With Christmas coming, I thought of the Lebanese savoury pastries as a versatile option. Although they are part of the mezza, they can also be served as canapés because you can make them any size you like and vary the filling. It might sound fiddly and long-winded, but in fact, the pastry is very simple to make, as for the filling, it cannot be easier. Another great advantage is that you can prepare them ahead of time and freeze them until needed.

Traditionally, the fillings are made with cheese, meat, spinach and Swiss chard or herbs. When the filling consists of meat or cheese, the pastry is made into a crescent shape and called Sambusik which could be Sambusik b’Jibneh/ Cheese Crescent or Sambusik b’Lahmeh/ Meat Crescent. As for the pastries with spinach filling or other greens they are called Fatayer like Fatayer b’Sbanegh/ Spinach Triangles which are the most popular or Fatayer b’Sili’ / Swiss chard Triangles.

Ajeenet al-Fatayer wa al-Sambousik

Traditional Savoury Pastry

Ingredients.

· 225g / 8 oz self raising flour

· ¼ tsp salt

· 2 tbsp vegetable or olive oil

· enough tepid water to make soft dough about 100-120ml / 3½ fl oz- 4 fl oz

Method.

  1. In a large bowl, sift the flour and salt, then make a well in the centre. Using the tip of your fingers, rub in the oil. Add the water gradually, while kneading with your hands to form a soft elastic dough. Alternatively, you can make it in the food processor using the dough hook.
  2. Cover with a cloth and let it rest for half an hour at room temperature, then the dough is ready for use.

Sambousik b’Lahmeh (Minced Meat Crescents)

Sambousik are usually deep fried, however, I have tried them baked which works well but, it did not give them that fluffiness that deep frying does. Another bonus with sambousik is that they freeze well but you have to cook them first, and when you need to serve, defrost thoroughly, then simply heat in the oven (fan 180°C / 200°F). The amount of filling required here is sufficient for 1 quantity of Traditional Savoury Pastry. However, if you want to split the dough to try different fillings, then reduce the amount accordingly.

Makes about 23 pieces (using a cutter 8½ cm/ 3½ inches diameter)

Ingredients.

· 1 quantity of Traditional Savoury dough (see recipe)

For the filling

· 10 ml vegetable oil

· 25 g/1 oz pine nuts

· 1 medium onion finely chopped

· 120 g/ 4½ oz minced lamb

· Seasoning: salt to taste, 1 tsp ground allspice, ½ tsp ground black pepper, ¼ tsp cinnamon

· 1 tbsp lemon juice or pomegranate syrup

Method.

  1. Heat up the oil in a medium-sized frying pan using medium heat. Add the onions and cook for 1 minute after which you add the meat. Fry breaking up any lumps with the spoon and cook until the meat is browned.
  2. Meanwhile, wipe with a little bit of oil another small frying pan. Using low to medium heat setting, sauté the pine nuts until golden brown, here, you have to be very watchful because pine nuts can burn easily.
  3. Once the meat is ready, season, stir in the pine nuts and then add the juice. Give the whole thing a good stir. Let it cool, so it is easy to handle.
  4. Sprinkle the working surface with a little flour and keep some flour handy for you will need it during the process. You will also need a table knife. I find the easiest way is to divide the dough into 3 balls and work with each one in turn. Keep the pastry you are not using covered with a cloth or cling film to prevent it from drying out. Take the first ball and with a rolling pin, roll it out into a circle of about 3 mm/ 1/8 inch thickness. Cut into circles of 8½ cm/ 3½ inches diameter which I think is suitable for canapés and for a beginner. If you are more adventurous you can cut them to 7cm/ 3inches. Gather together pastry cuttings, dust with some flour, knead them together, re-roll and cut into other circles until the first batch is finished.
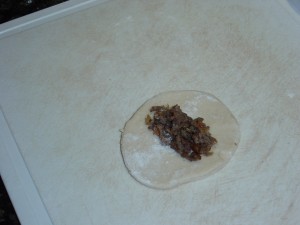
  5. Once you have cut the first batch, place 2 tsp of filling on each circle for medium sized or less depending on the size.
    The meat filling

    The meat filling

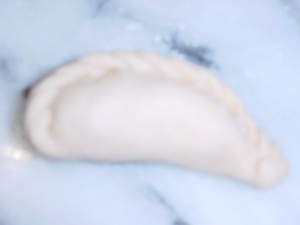
    Now fold over the circle into a crescent shape, pinch the edges together and fold twisting so you end up with a pleated firm edge.

    Put each sambousik on a plate sprinkled with a little flour.

    The finished pleated seam

    The finished pleated seam

    You can deep fry in hot oil but if you want to finish all batches, it is advised to cover the prepared sambousik with lightly oiled cling film.

  6. To deep fry them, heat up the oil in a deep pan, you need enough vegetable oil to generously cover the sambousik, give them enough room to float around and most probably you need to fry them in batches. When the temperature reaches 180°C/ 350°F (enough for a small cube of bread to crisp in 1 minute), place gently sambousik and fry turning once until they are golden. Remove with a slotted spoon and drain excess oil by placing them onto kitchen paper.
  7. If you want to try them baked. Pre-heat a fan oven to 200°C / 400°F place sambousik on a generously greased baking sheet, brush the top with vegetable oil and bake for 10-12minutes until golden then turn them over and bake for another 10 minutes.
  8. Serve hot or warm with wedges of lemon.

Sambousik b’ Jibneh (Cheese Crescents)

You can use any cheese you like, on its own or flavour it with other ingredients if you wish. My family’s favourite is Halloumi which melts beautifully inside the pastry without becoming runny or leaking. Sambousik are usually deep fried, however, you could try them baked. Once cooked, Sambousik freeze well, but you need to defrost them thoroughly then simply reheat in a pre-heated oven 180°C / 350°F for about 5 to 7 minutes.

Makes about 23 pieces (using a cutter 8½ cm/ 3½ inches diameter)

Ingredients.

· 1 quantity of Traditional Savoury Pastry

For the filling.

· About 200 g / 7 oz of Halloumi cheese finely chopped or grated

· enough vegetable oil to deep fry

Method

1. Sprinkle the working surface with a little flour and keep some flour handy for you will need it during the process. You will also need a table knife. I find the easiest way is to divide the dough into 3 balls and work with each one in turn. Keep the pastry you are not using covered with a cloth or cling film to prevent it from drying out. Take the first ball and with a rolling pin, roll it out into a circle of about 3mm / 1/8 inch thickness. Cut into circles of 8½ cm / 3½ inches diameter which I think is suitable for canapés and for a beginner. If you are more adventurous you can cut them to 7cm/ 3inches. Gather together pastry cuttings, dust with some flour, knead them together, re-roll and cut into other circles until the first batch is finished.

2. Once you have cut the first batch, place one circle on a flat surface and put enough filling roughly one full teaspoon and spread it along the middle, leaving the edges untouched. Now fold over the circle into a crescent shape, pinching tightly the edges to seal, once done, twist over the edges so you end up with a firm pleated edge. Put each sambousik on a plate sprinkled with a little flour. You can deep fry in hot oil but it is better to finish all batches. It is advisable to cover the prepared sambousik with lightly oiled cling film until you are ready to cook.

3. To deep fry them, heat up the oil in a deep pan, you need enough vegetable oil to generously cover the sambousik, give them enough room to float around and most probably you need to fry them in batches. When the temperature reaches 180°C/ 350°F (enough for a small cube of bread to crisp in 1 minute), place gently sambousik and fry turning once until they are golden. Remove with a slotted spoon and drain excess oil by placing them onto kitchen paper.

4. If you want to try them baked. Pre-heat fan oven to 200°C/ 400°F, place sambousik on a generously greased baking sheet, brush the top with oil and bake for 10-12minutes or until golden then turn them over and bake for another 10 minutes.

5. Serve hot or warm.

Another variation of filling is Feta cheese. Crumble 125 g/ 4½ oz of Feta cheese and mix with 75 g / 3 oz of Mozzarella finely chopped or grated, add 2 tbsp of dried mint and rub it into the mixture, then follow the same procedure as with the Halloumi cheese.

Fatayer b’ Sbanegh (Spinach Triangles)

These savoury pastries are suitable for vegan and vegetarians. People in Lebanon vary the filling, instead of spinach they use purslane leaves, Swiss chard leaves, dandelion, or any other edible herbs. So these are all alternatives, you can follow the same instructions described below. As mentioned earlier, Spinach Triangles or other herb pastries freeze well, however, you need to defrost thoroughly before reheating them. Another advantage is that you bake rather than deep fry them.

One last thing to mention, please do not use frozen spinach because you cannot get rid of the excess water content which will spoil both the pastry and the taste.

Makes about 15-16 pieces (using a cutter 10 cm / 4 inches diameter)

Ingredients

1 quantity of Traditional Savoury Pastry (see recipe)

For the filling.

· 200g / 7oz spinach, washed, dried and chopped

· 1 tsp salt

· 1 medium onion finely chopped

· ¼ tsp ground black pepper

· ¼ tsp allspice

· 1 tbsp sumac

· 1 tbsp pine nuts (optional)

· 2 tbsp lemon juice or to taste

· 2 tbsp extra virgin olive oil plus extra to brush the filled pastries before baking

Method.

1. Put the spinach in a large mixing bowl, sprinkle with salt and rub with your hands until it wilts then squeeze out the excess water. Do likewise with the onion before adding it to the spinach, season the mixture then add the remaining ingredients. Mix well and taste, adjust if necessary: usually the lemony taste should be obvious. The filling is now ready.

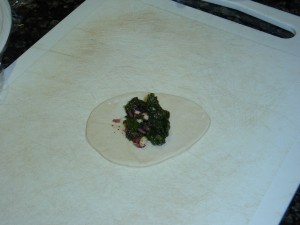
2. As for the pastry, proceed in the same way as with sambousik. However, I think that spinach pastries should be a little bigger than the sambousik ones because the filling is chunkier and actually, you need more of it because spinach does shrink. Roll out the dough to about 3 mm / 1/8 inch thickness and using the cutter, press out circles of 10cm / 4 inches diameter. Place 1 tbsp of the filling in the middle of each circle.

The spinach filling

The spinach filling

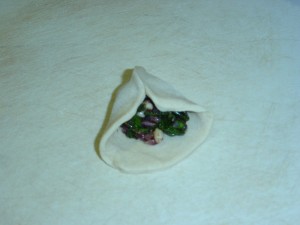
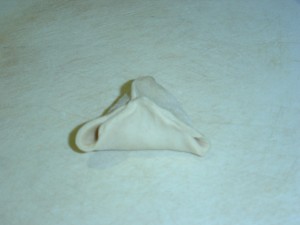
To create the triangular pyramid shape, lift 2 sides of the circle, each being one third of the circumference and pinch them together half way down to make a raised seam (keeping the filling intact).

Joining the first two sides

Joining the first two sides

Next, bring the other end to join the two sides creating a triangular pyramid.

The final fold before sealing

The final fold before sealing

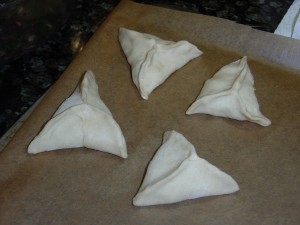
3. Put the filled pastry onto a baking sheet lined with baking parchment and continue until you finish them all. Brush them with oil.

Ready for the oven

Ready for the oven

4. Bake in a pre-heated fan oven at 200°C/ 400°F for 12-15minutes until golden.

5. Serve hot, warm or even cold with wedges of lemon. Whichever way, they are delicious!

Atayef or pancakes are usually associated in Lebanon and the Middle East with the Muslims’ celebrations for the holy month of Ramadan. I remember back home, the stalls that the sweet shop owners used to set up in front of their shops with the pancake makers competing with each other as to who would make the best and the freshest. It stuck in my mind watching the small bubbles drying out very quickly, leaving small holes and that is what I call today a perfect pancake.

Pancakes are also eaten all year round and by everybody. They are also versatile, you can fill them with Ashta (Lebanese clotted cream – see recipe), a walnut mixture or even cheese. One important thing to observe is that these pancakes should be cooked on one side only.

Atayef (Pancakes)

Makes about 10 (10cm/ 4 inches diameter)

Ingredients.

  • 200 g/ 7 oz plain flour
  • 1 tbsp fine semolina
  • Pinch of salt
  • 1 tsp fast acting yeast
  • ¼ tsp baking powder
  • 1tbsp sugar
  • 225 ml – 250 ml / 7 to 8fl oz warmish water
  • ¼ tsp of each orange blossom and rose water
  • A dab of flavourless oil

You also need a shallow non-stick, frying or pancake pan with a thick-base

Method

  1. Sift the flour into a medium-sized mixing bowl or food processor, then mix in the dry ingredients. Gradually, tip in the water along with the orange blossom and rose water, mixing continuously until well combined and the batter becomes smooth with no lumps. The consistency should be similar to that of single cream. Cover and let it rest for an hour in a warm place, by which time the batter should rise and its surface is bubbly. Meanwhile you can proceed with making your preferred filling and the Ater / sugar syrup (See recipes).
  2. When the batter is ready, grease your pan with a very little vegetable oil and pre-heat it for about 5 – 7 minutes on a stove switched on medium to high. It is important that the pan should be very hot before cooking the pancakes.
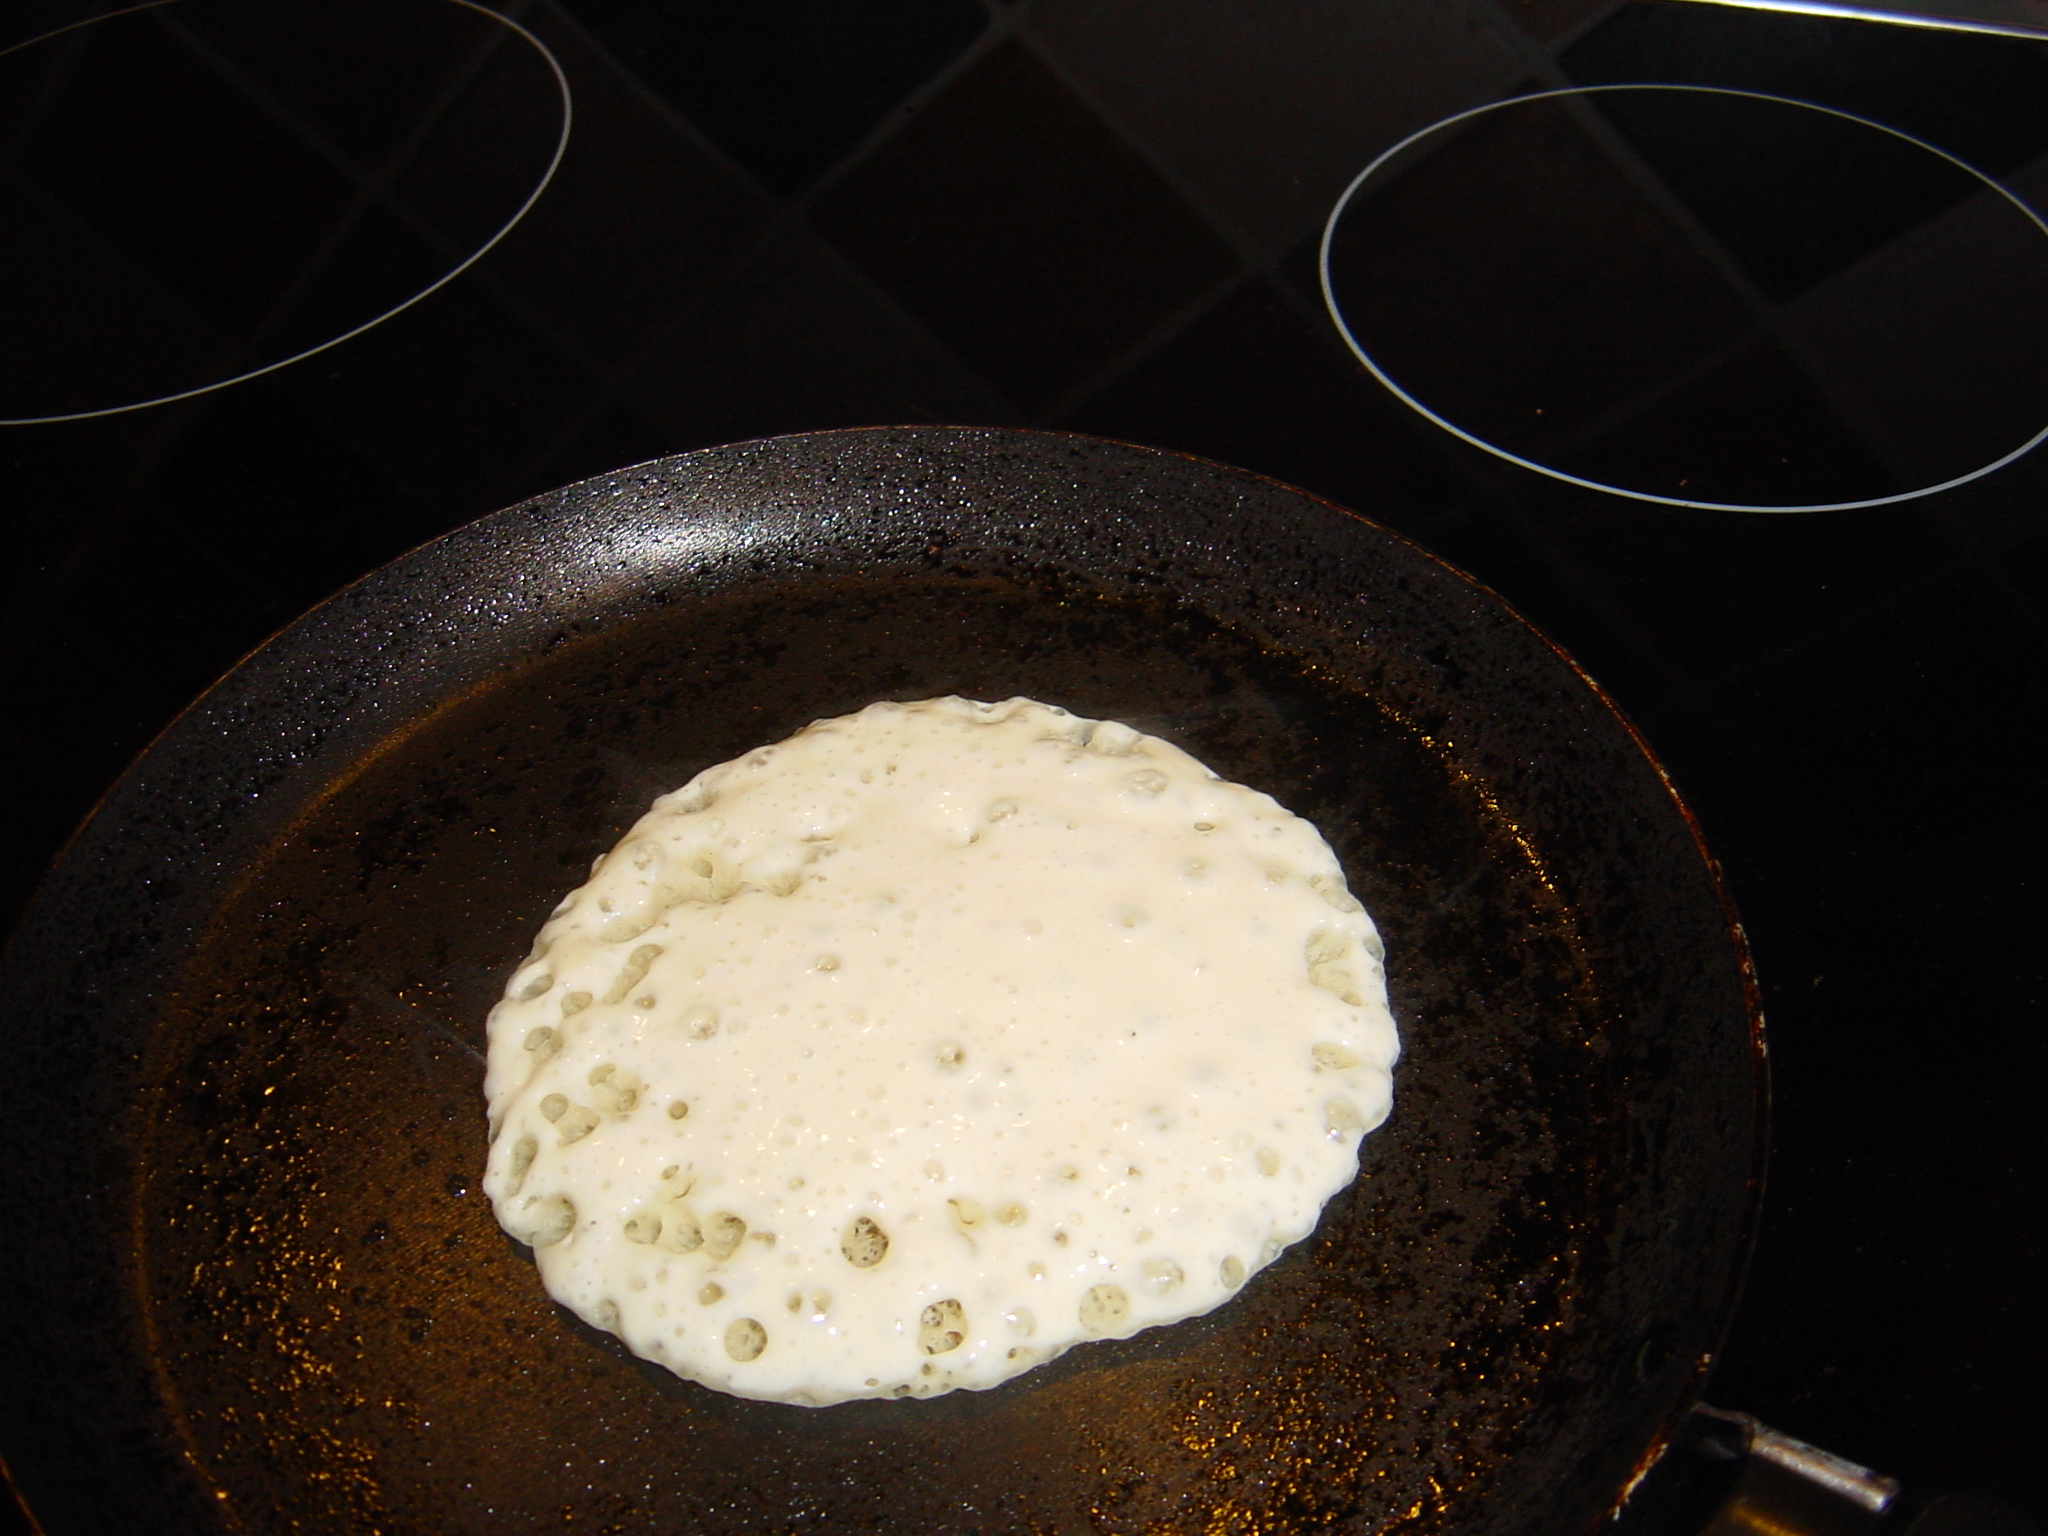
  3. Next, stir the batter with a spoon and mix well, then take 3 tbsp in a small ladle and pour it in circular movements into the hot pan. This will make a pancake of about 10cm/ 4 inches diameter. You can make them smaller or larger, the main thing is to measure the amount in advance and tip it in all at once. As soon as the batter touches the pan, you will see the bubbles drying out quickly, it takes about a minute or a little over until the top is dry and the bottom is slightly browned. As mentioned above Atayef/ pancakes are never cooked on both sides. Remove onto a tea towel folded in half and cover. Repeat the same process until the batter is finished.
Frying the Pancake (Atayef)

Frying the Pancake (Atayef)

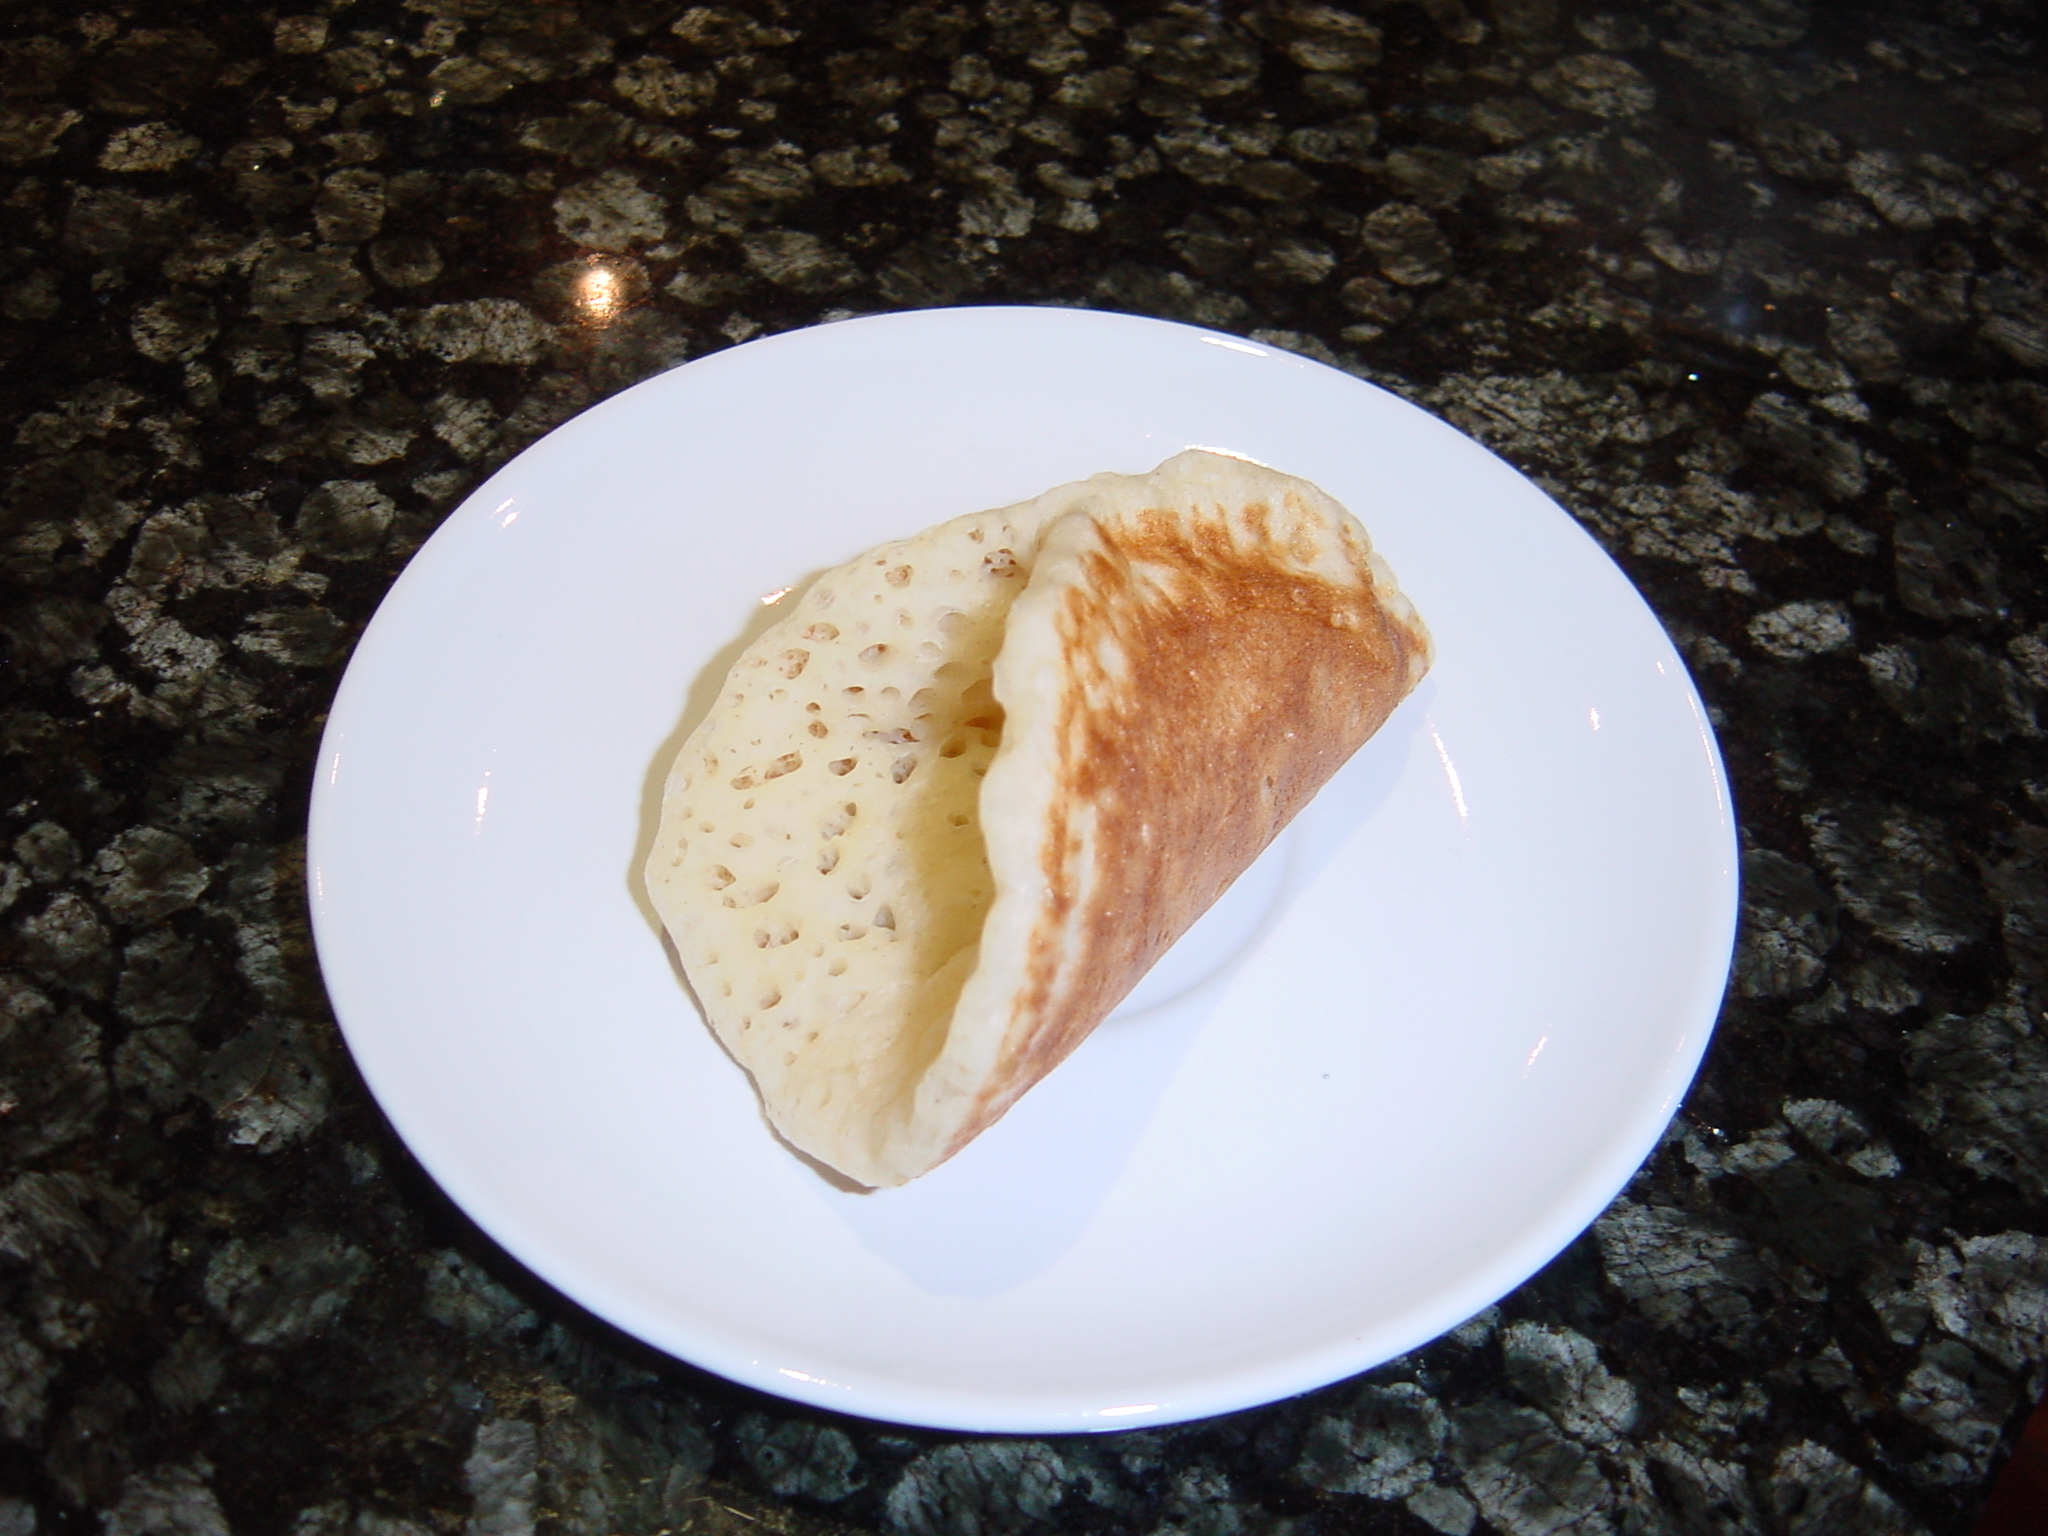
Pancakes cooling on a cloth.

Pancakes cooling on a cloth.

Atayef bil Ashtah (Pancakes filled with Clotted Cream)

I think they are the most elegant and attractive to present. The green pistachio nuts against the white cream decorated with the red candied rose petals, make the pancakes quite tempting.

Makes 10 (10 cm/ 4 inches diameter)

Ingredients

1 quantity of Atayef /Pancakes (see recipe above)

For the filling

  • ½ quantity Ashta / clotted cream filling (see recipe)

You also need

  • 1 quantity of Ater / sugar syrup (see recipe)

To decorate

  • 20g / ¾ oz coarsely ground pistachio nuts
  • Candied rose petals (optional)

Method

  1. Prepare Atayef/ pancakes as described above. Do likewise with the Ater/ sugar syrup and the Ashtah (see recipes).
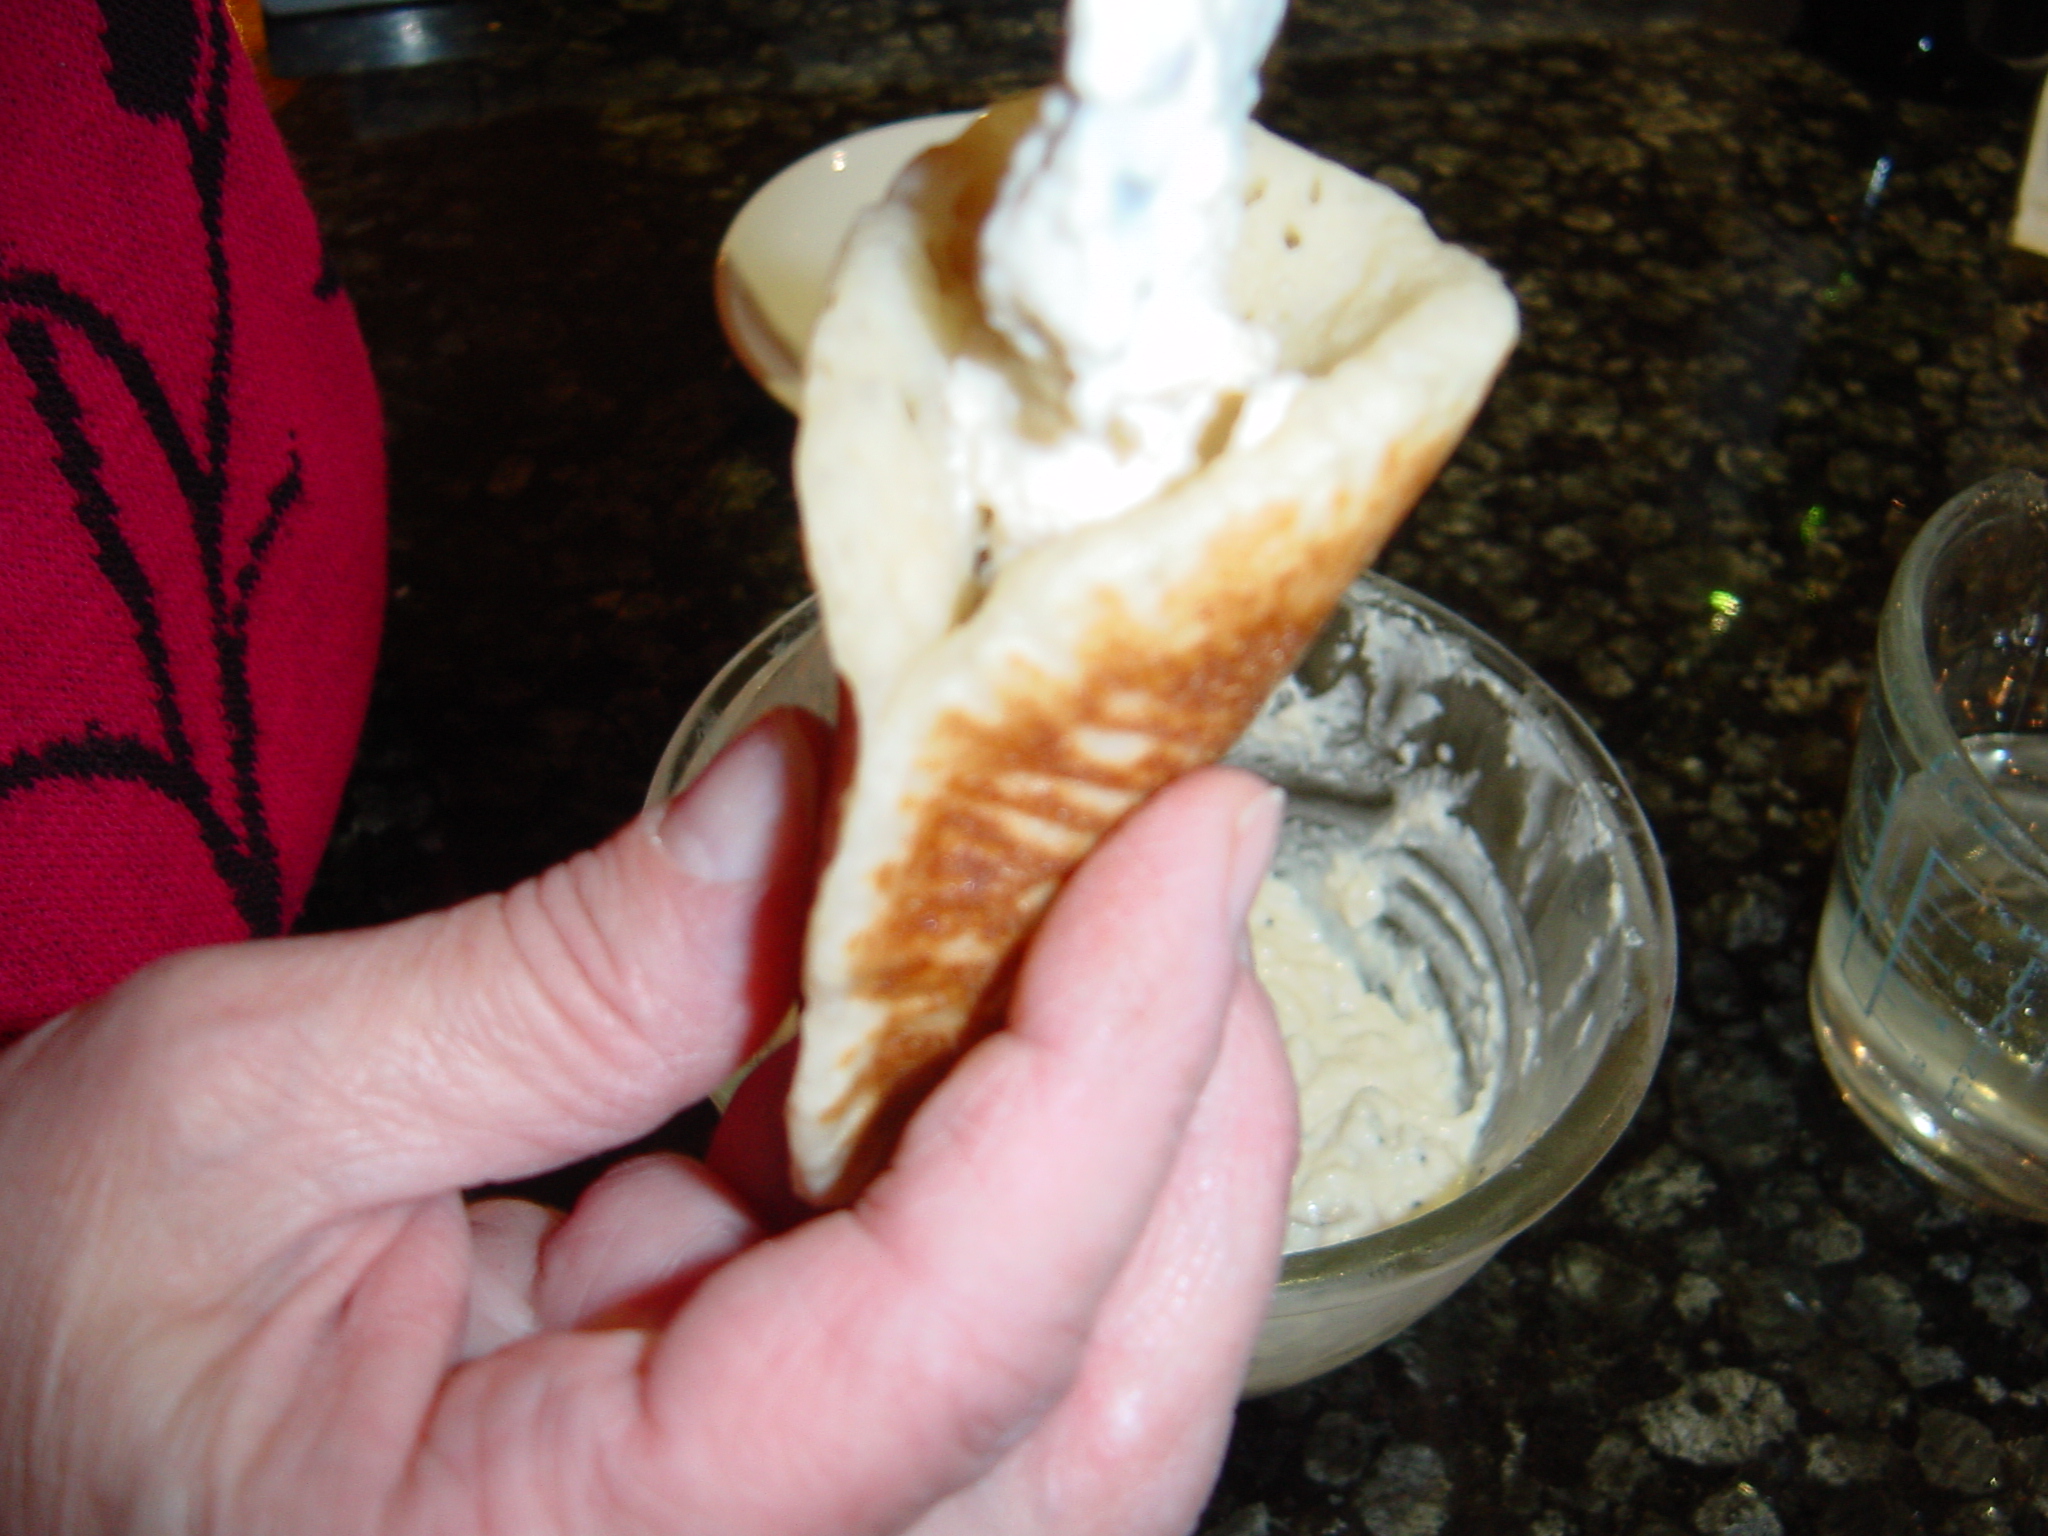
  2. When the pancakes have cooled, take one and put it in your hand, brown side down then pinch the edges pressing tightly until half way. Now, with the other half open, spoon the Ashtah/ clotted cream, about 1tbsp, then dip it into the crushed pistachio nuts and, if you like, decorate with candied rose petals. Arrange on a serving plate, do likewise with the rest. If you are not eating it immediately, you could at that stage cover with a cling film and keep it in the fridge for an hour or so, but no later. These pancakes won’t keep for long.
  3. Serve chilled handing round the Ater/ sugar syrup, so people can pour the amount they like.
Atayef ready for the Ashtah filling.

Atayef ready for the Ashtah filling.

Filling the Atayef with Ashtah.

Filling the Atayef with Ashtah.

Atayef bil Joz (Pancakes Stuffed with Walnuts)

These are usually either deep fried or baked in the oven until golden brown then dipped in cold Ater/ sugar syrup. Once ready, these pancakes are better served immediately.

Makes 10 (10 cm/ 4 inches diameter)

Ingredients

  • One quantity of Atayef/ pancakes (see recipe above)
  • 1 quantity Ater/ sugar syrup

For the walnut filling

  • 120g/ 4 ½ oz medium ground walnuts
  • 1 tbsp sugar
  • ½ tsp ground cinnamon
  • ¼ tsp of each orange blossom and rose water

To decorate:

  • 20 g/ ¾ oz coarsely ground pistachio nuts

Method

  1. Prepare Atayef/ pancakes as described above. Do likewise with the Ater/ sugar syrup (see recipe). As for the walnut filling, simply mix all the ingredients.
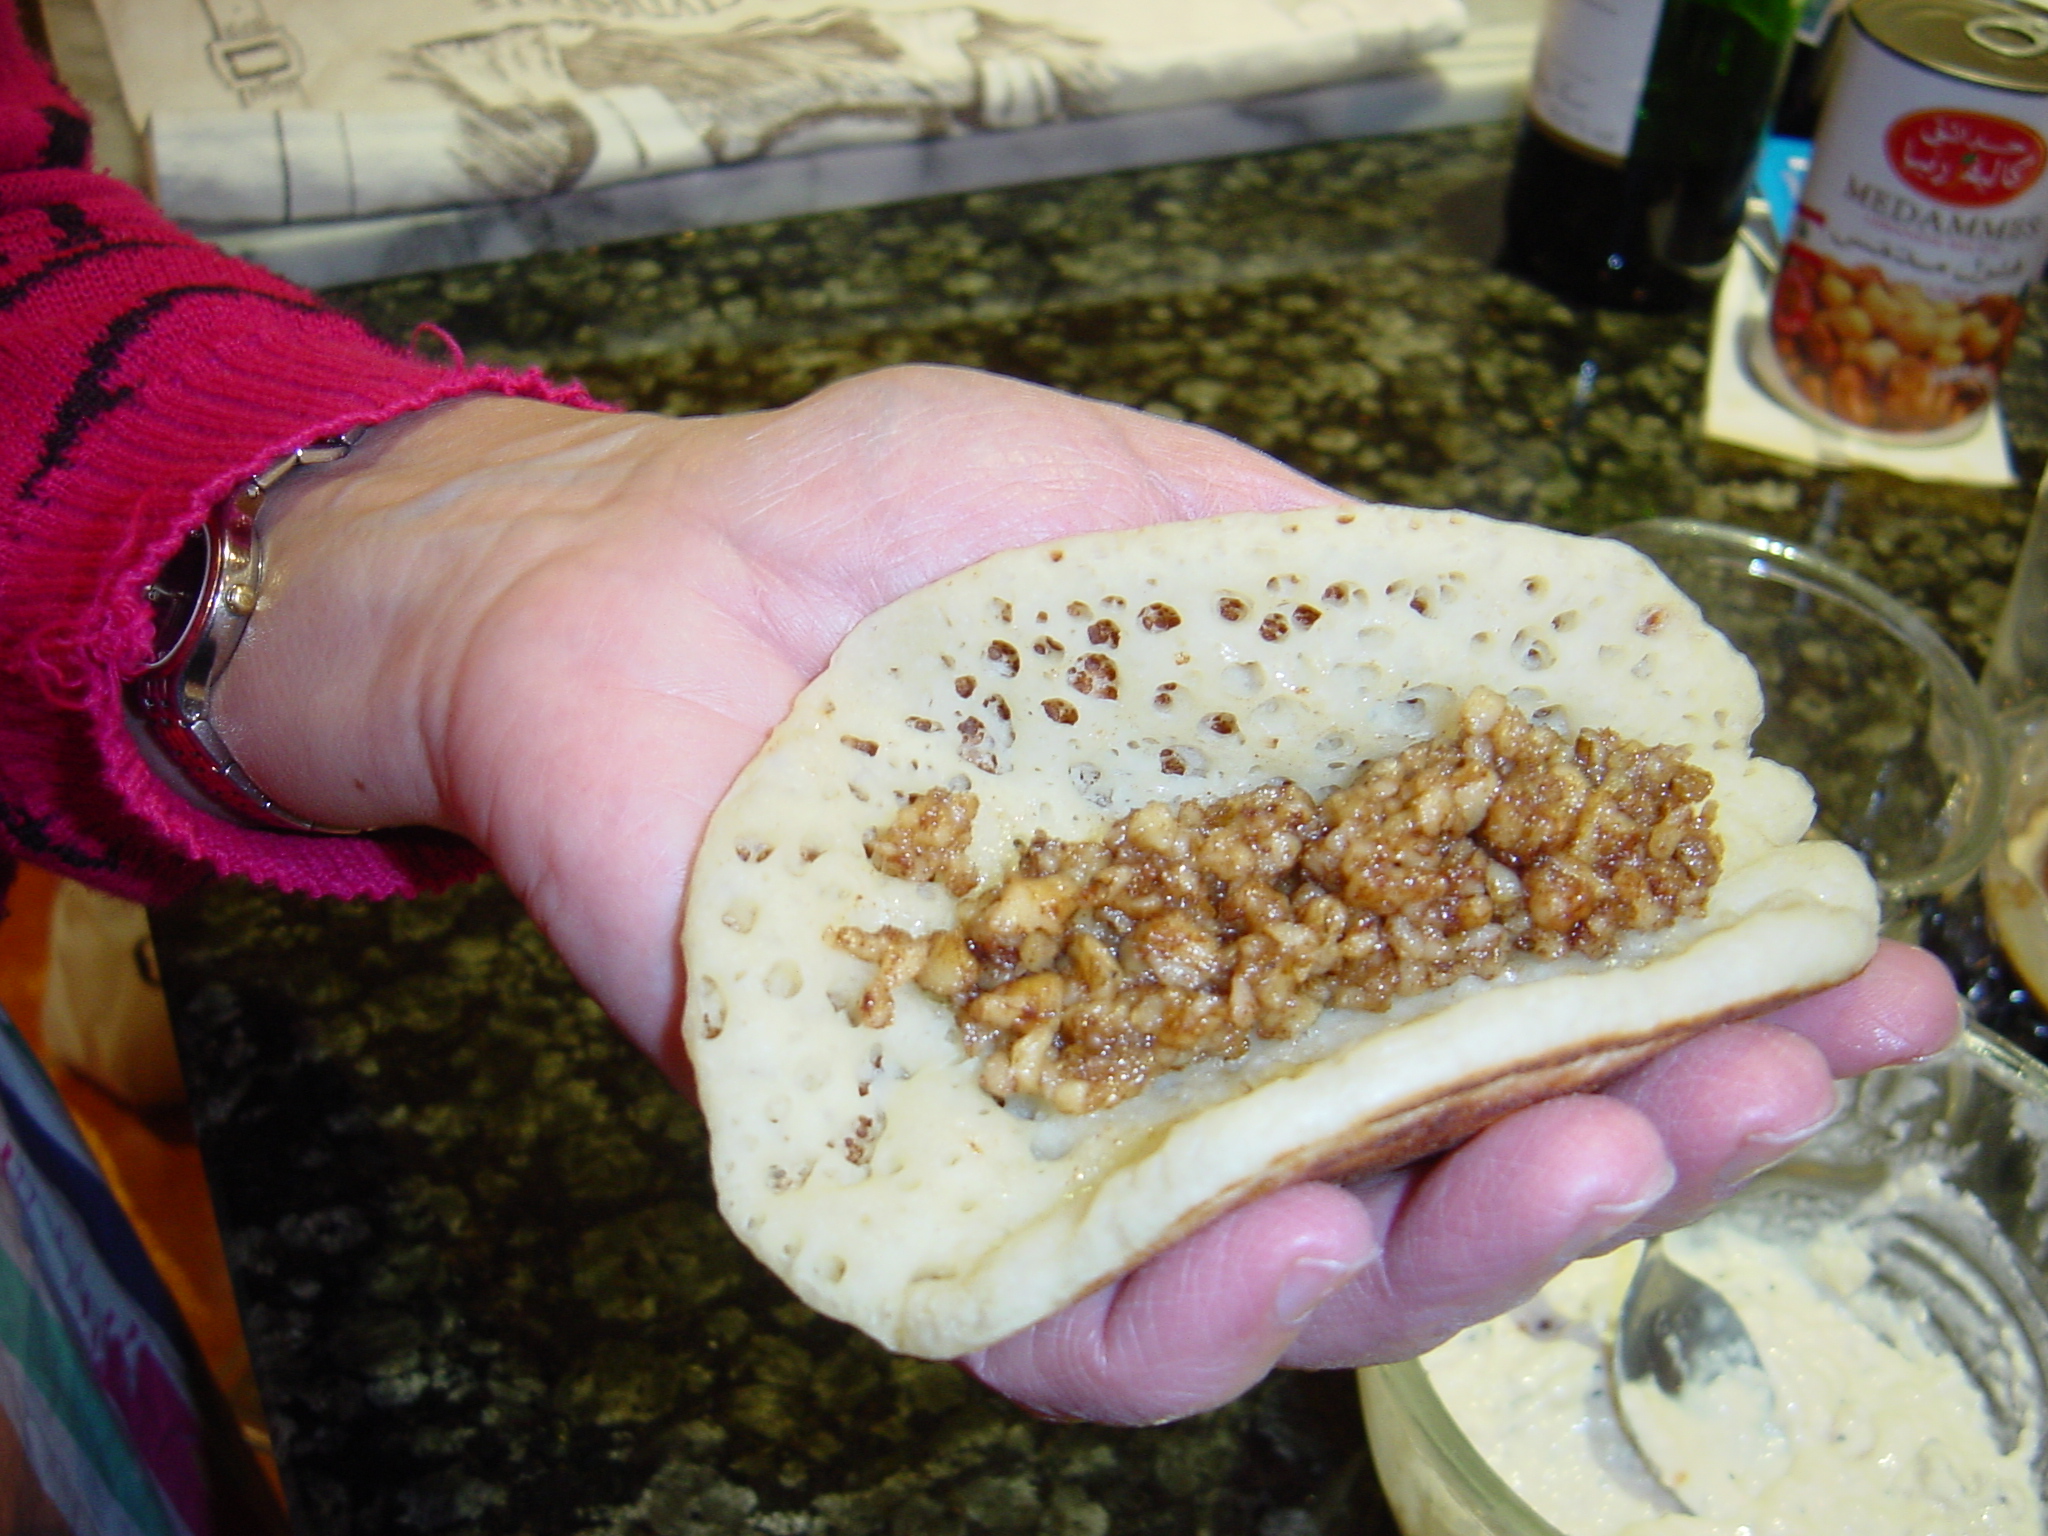
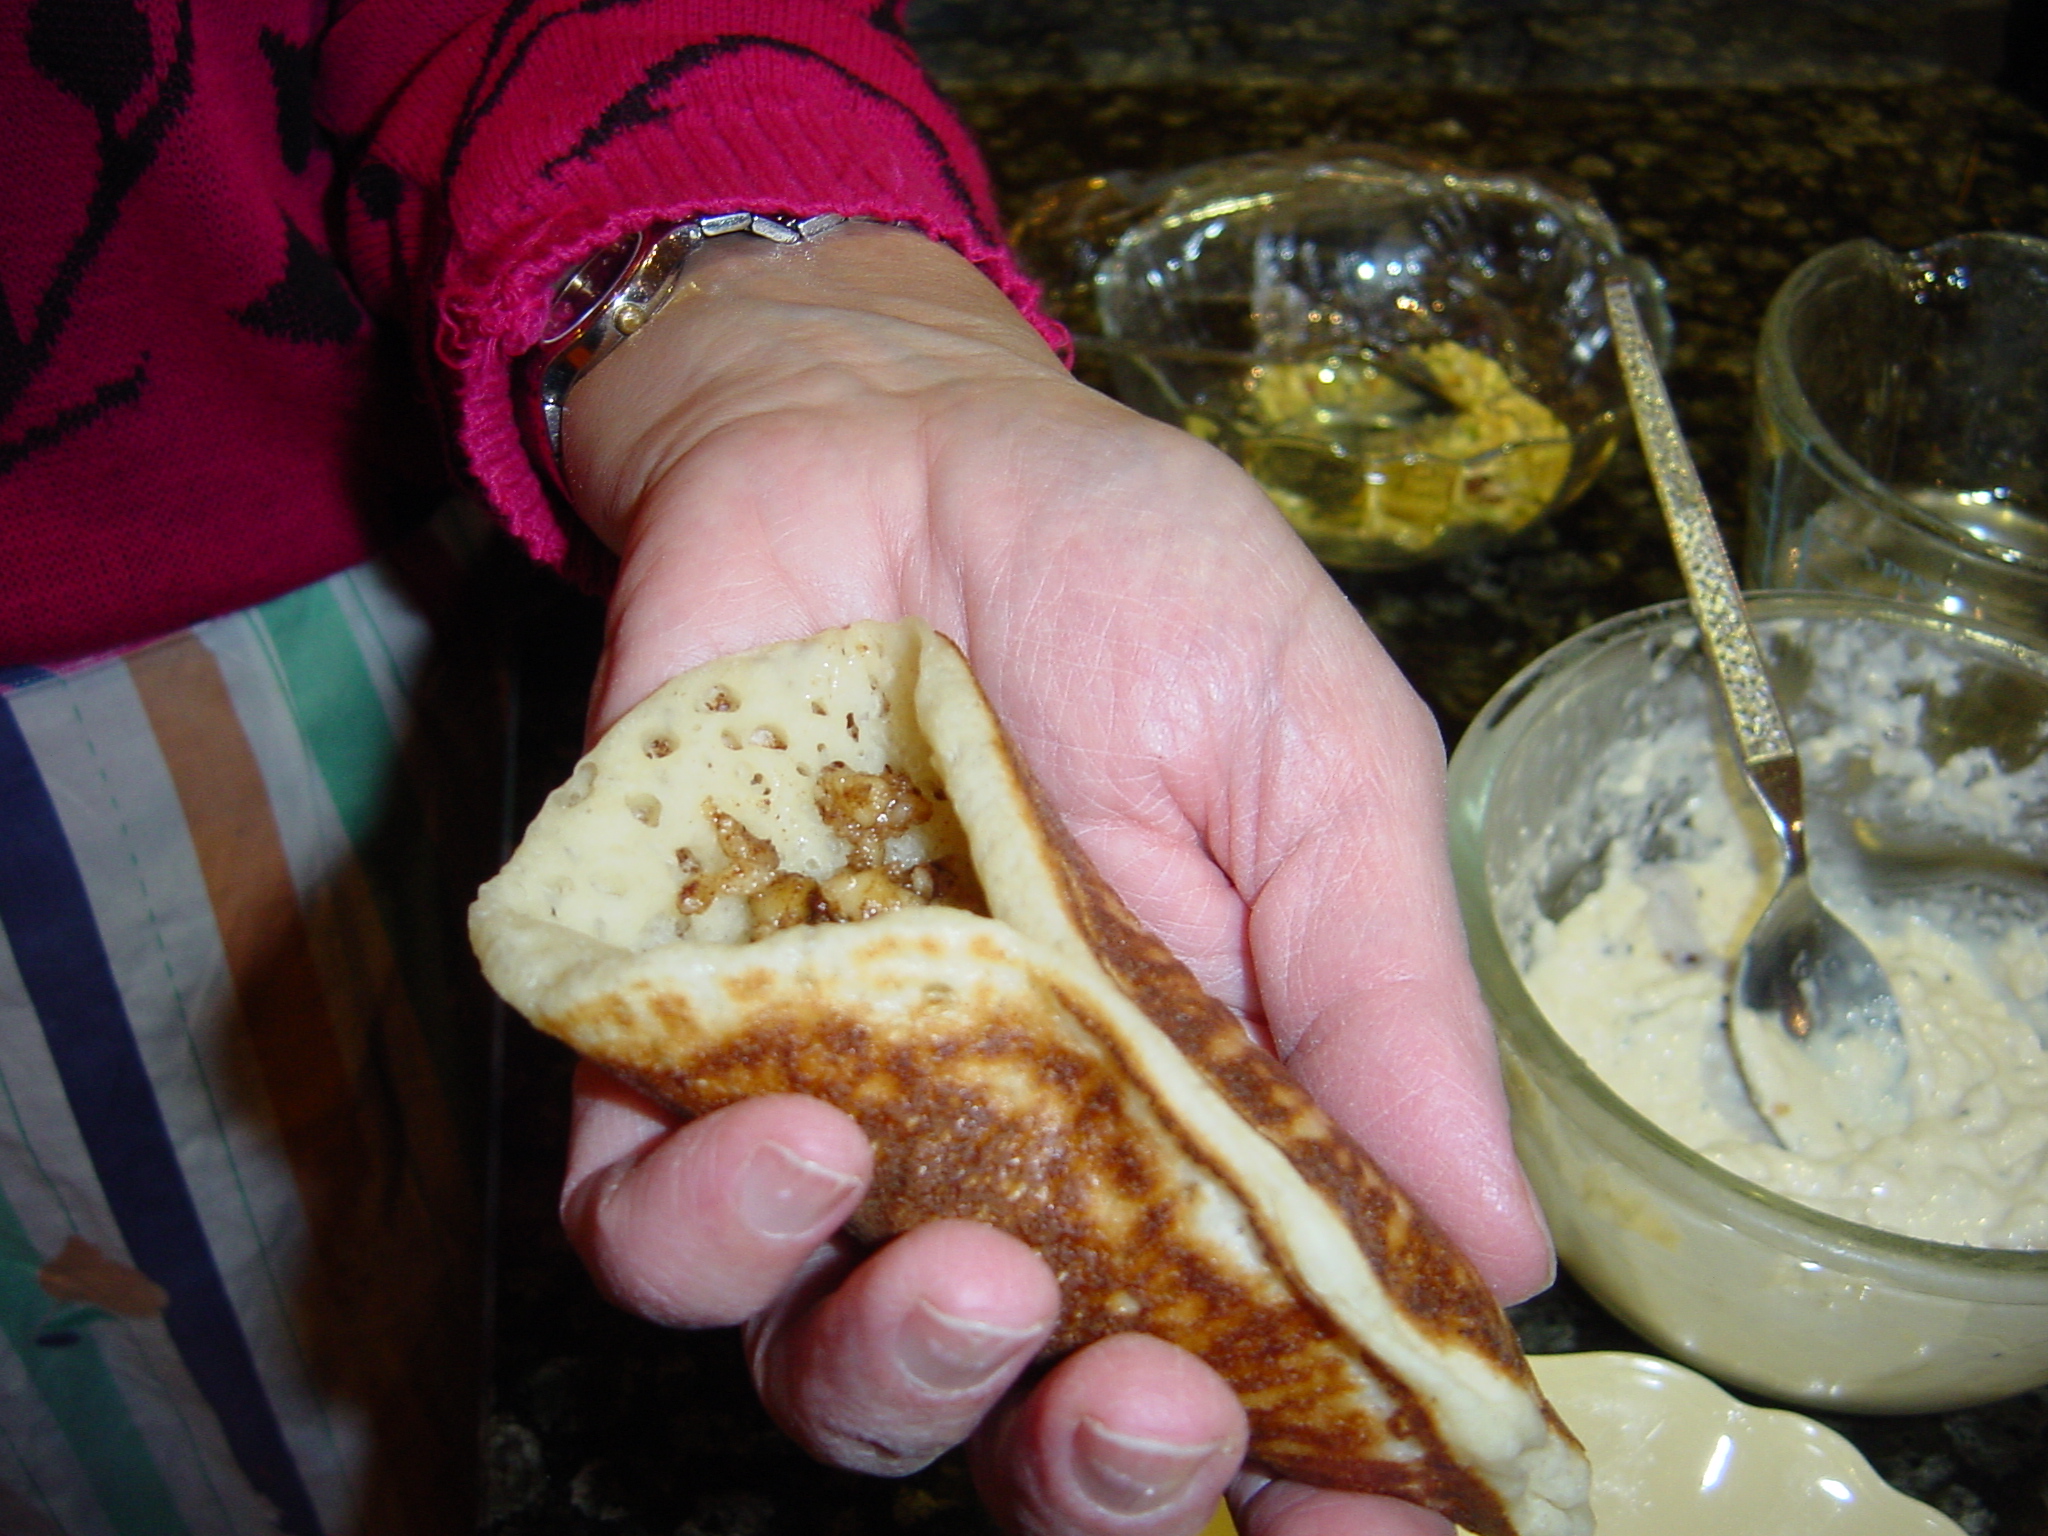
  2. Now, take one pancake in your hand, brown side down, put about 1tbsp of the filling and spread it along the middle, leaving the edges untouched. Next, fold the pancake into a crescent shape pinching tightly the edges to seal. Place the pancake onto a plate, then continue likewise with the rest.
  3. In a medium sized frying pan and using medium setting, heat up enough oil to deep fry the pancakes. You may need to do this in batches. When the oil is hot enough, gently drop in the pancakes and fry until golden on both sides, it takes about 2-3 minutes. Remove with a slotted spoon onto kitchen paper to the drain excess oil then dip while still hot into the cooled Ater/ sugar syrup, swirl the pancakes in the syrup to give them a good coating, leave them for one minute then take them out and put on a serving plate.
  4. Sprinkle the crushed pistachio nuts on top and serve immediately

Filling the Atayef with the Walnut mixture.

Filling the Atayef with the Walnut mixture.

Pinching the Atayef around the edges to seal it.

Pinching the Atayef around the edges to seal it.

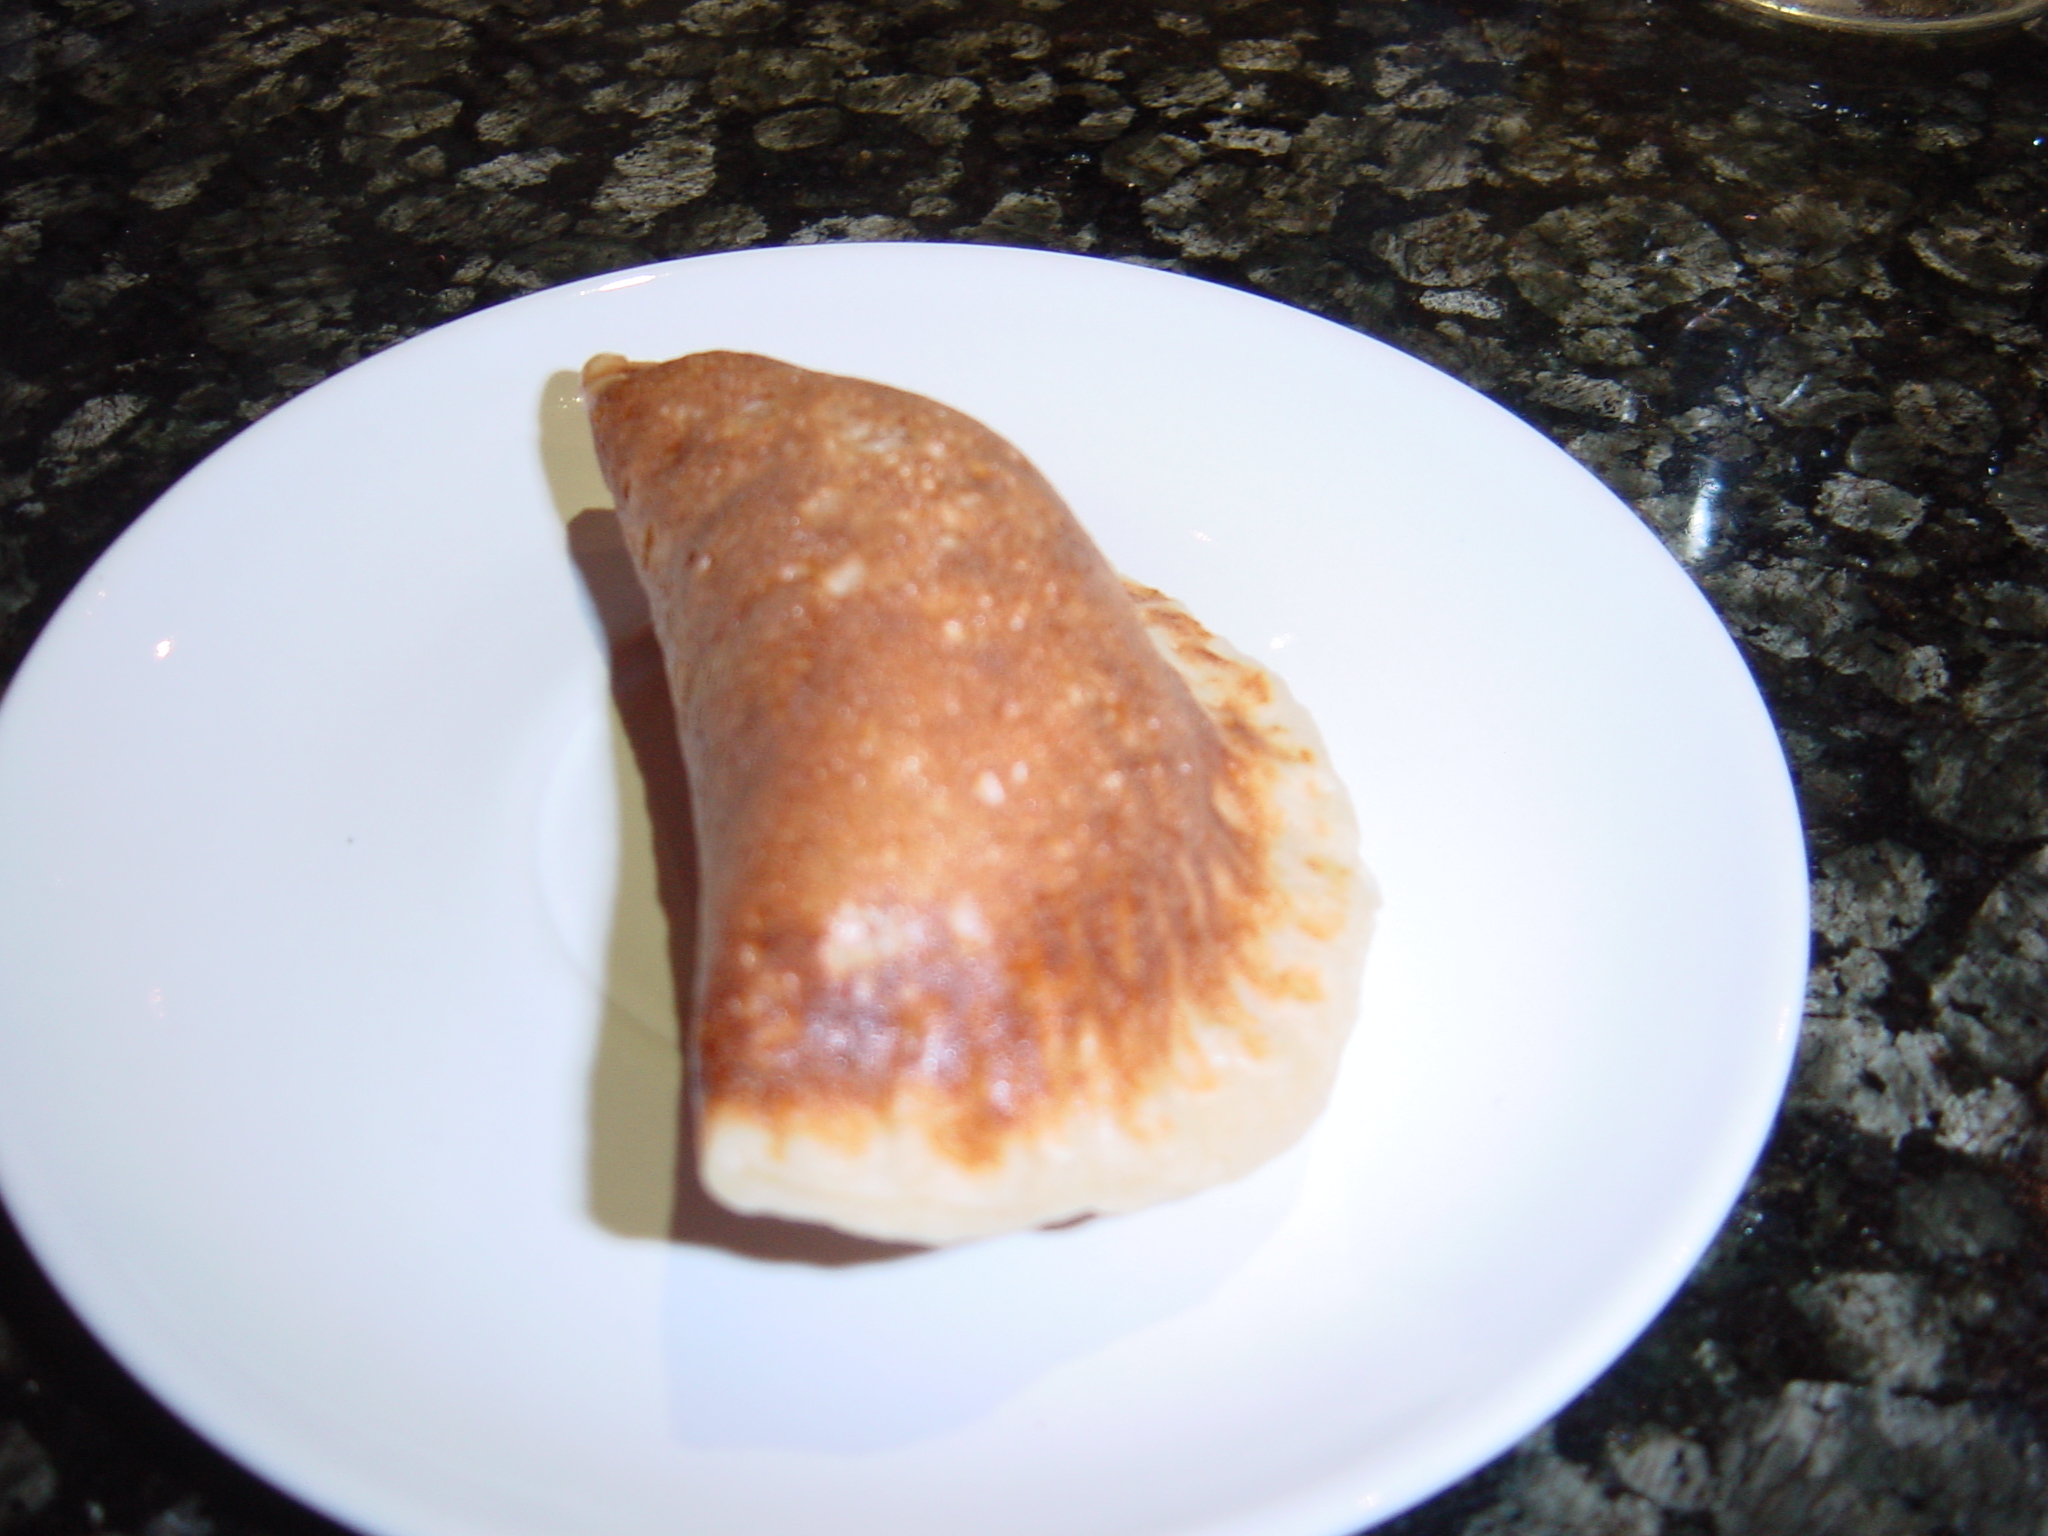
The Atayef filled and sealed ready for frying or baking.

The Atayef filled and sealed ready for frying or baking.

If you prefer to bake them, this is how to proceed:

  1. Pre-heat the oven to 200°C/ 400°F.
  2. Melt about 50 g/ 2oz of butter and let it cool slightly, then stir in 1 tbsp of vegetable oil. Meanwhile, line a shallow baking sheet with baking parchment paper. Lay the filled pancakes on the baking tray and brush each one on both sides with the butter mixture, pop it in the oven. Bake for about 7 minutes then turn over and continue baking for another 7 minutes time by which they should be a golden-brown colour on both sides. Dip, as explained above, into the cooled Ater/ sugar syrup then transfer onto a serving plate, sprinkle with the crushed pistachios and serve at once.

Atayef bil Jibneh (Pancake filled with cheese)

Traditionally, Akkawi cheese is used for the filling. Since this cheese is very salty, you need to soak it in cold water for several hours, changing the water from time to time until you get rid of the salt, then dry thoroughly and mash. Alternatively, use the same amount of Mozzarella cheese, dry and mash.

Makes 10 (10 cm/ 4 inches diameter)

Ingredients

  • One quantity of Atayef/ pancakes (see recipe above)
  • 1 quantity Ater/ sugar syrup (see recipe)

For the cheese filling.

  • 170 g/ 5½ oz Akkawi (you need to soak it in cold water for several hours, changing the water from time to time until you get rid of the salt, then dry thoroughly and mash)

OR

  • 170 g/ 5½ oz Mozzarella cheese dried and mashed.

Method

  1. Proceed as explained in Atayef bil Joz / Pancakes Stuffed with Walnuts).
  2. Dip them in the cooled Ater/ sugar syrup and serve warm.

NB. You can also follow the same method for the pancakes stuffed with Ashtah/ clotted cream.

The Lebanese way of cooking cauliflower is varied and my two recipes reflect that. The first one Arnabeet Me’ li (Fried Cauliflower) is the most popular, very simple, it consists of frying the cauliflower florets and serve it with taratoor/ tahini sauce (see Sauces section).


The second one Arnabeet Matboukh ma’ Kuzbara (Cauliflower with Coriander) is also easy, the florets are cooked in a very light sauce, finishing off with chopped coriander that complements the flavour of the cauliflower.

If you like to read more on cauliflower, here is a suggested website:

http://www.whfoods.com/genpage.php?tname=foodspice&dbid=13

Some cooks blanch the florets for a couple of minutes before frying them, I don’t, because I think that blanching gives the cauliflower a mushy texture. The heat should be on a medium setting to allow the florets to cook thoroughly. You can serve it as a starter or as a light lunch, preferably hot or warm, at room temperature, whichever you choose, eat it within the day when it is at its best.


Serves 4.


Ingredients


  • 1 kg/ 2 lb cauliflower, discard the tough stalks then cut into smallish florets
  •  Enough vegetable oil to generously cover the bottom of the frying pan
  • Taratoor/ tahini sauce (See recipe in Sauces)


Method


  1. Using a medium setting, heat up the oil in a frying pan.
  2. Fry the cauliflower florets, turning them from time to time until they turn deep golden brownish colour, you know they are cooked when you can easily prick them with a fork. Drain on a kitchen paper to get rid of the excess oil.

Serve with hot bread and tahini sauce. If you don’t like using sauce, sprinkle freshly milled salt and black pepper on the cooked cauliflower and eat it with bread and spring onions.  

It is a quick dish to prepare. This can be eaten as a light supper and is ideal for vegans. Simple ingredients such as onions, garlic, tomatoes and coriander mingling with the cauliflower make this dish a delicious light meal. I use a few  tomatoes in my recipe, but some cooks stick simply to lemon juice, either way is nice. If you prefer to use lemon juice only, you will need about one lemon for the recipe below. Cook the mixture with half of the juice and add the remainder towards the end.

One thing to observe, because cauliflower naturally contains water, the sauce might become watery. If it happens, simply take off the lid half way through and let the excess evaporate. What we are looking for is a mixture that is moist, not too saucy nor dry.  


Serves 2-3


Ingredients


  • 1 small onion finely chopped
  • About 7-8 cloves of garlic peeled and roughly smashed
  • 2 tbsp vegetable or olive oil
  • About 300 g / 11 oz tomatoes skinned and chopped
  • 750 g / 1½ lb   (net weight) cauliflower rinsed and cut into florets
  • About  2 tbsp lemon juice or to taste
  • 25 g/ 1oz  freshly chopped coriander.


Method


  1. Heat up the oil in the saucepan and sauté the onion for a couple of minutes, add the garlic and cook for one minute. Drop in the tomatoes followed by the cauliflower and stir fry the mixture for a couple of minutes. Season with salt and pepper, then cover and let the mixture simmer over medium heat for about twenty minutes or until the cauliflower is cooked. If, during cooking, you notice that there is too much sauce, take the lid off half way through to let the excess liquid evaporate.
  2. A few minutes before the finishing time, add the lemon juice, followed by the chopped coriander, check seasoning and serve at once with freshly cooked rice.

I used ready to eat figs for this recipe, it is quick and the figs are moist, they do not require pre-soaking or re-boiling. It is a very sustaining and versatile jam. It could be eaten on its own as a dessert, with bread, or even with cheese. The addition of anis seeds, miskeh (see glossary) and toasted sesame seeds adds to the jammy texture, a delightful nutty taste. Make sure the sugar is well dissolved before adding the figs, as this will help the jam to set smoothly. Because figs come whole, I usually make a cross- incision to open them up, it helps them to absorb the flavours of other ingredients and cooks better. Alternatively, just chop the figs into quarters.


Facts about jam making.


  • The presence of pectin in fruit, along with the sugar, help to set the jam. However, some fruits like figs have a lower pectin content, therefore, adding lemon juice is necessary as it helps the jam to set and enhances the taste of the fruit.  


  • Testing the setting point for jam. Put a saucer in the fridge before you start cooking. Spoon a small amount of the hot jam onto the saucer, let it cool for a few seconds then push it with your finger. If the surface wrinkles, it means the jam has set. If using jam thermometer, the setting point is 105°C/ 221°F.


  • Do not attempt to remove any scum during the cooking process. Wait until the end, when you switch off the heat, stir in a knob of butter which will get rid of it.


  • If well stored, jams keep for roughly a year.


If you like to read about pectin in fruits and jams, here are suggested websites:


http://en.wikipedia.org/wiki/Pectin


http://www.allotment.org.uk/allotment_foods/jams-preserve/make-jam-jelly-ingredients.php


Ingredients.


  • 500 g/  1lb 2oz   ready to eat dried figs
  • 150 g/   5 oz   sugar
  • 300 ml/ 10 fl oz  water
  • 1 tbsp anis seeds
  • ¼ tsp ground miskeh (see glossary)
  • 3 tbsp lemon juice
  • 30 g/  1 1/8  oz  sesame seeds
  • 25 g/ 1 oz  almond flakes (optional)


You also need, two jam jars (about 227g/ 8oz capacity), two wax discs, cellophane and string.


Method.


  1. Prepare the figs. Make a cross incision with the knife and open them up with your fingers or chop into quarters. Keep on one side.
  2. Using a low heat setting, warm up the water in the preserving pan, mix in sugar, anis seeds, miskeh and stir until the sugar is completely dissolved. Once this is achieved, add the figs, two tbsp lemon juice and stir the mixture. Increase the heat to the boiling point, then reduce and let it simmer very gently, stirring occasionally, for about twenty-five to thirty minutes. At that stage, it should thicken reaching a jammy consistency.
  3. While the jam is cooking, toast the sesame seeds using a low heat until they become a golden colour. Do likewise with the flaked almonds, if using.
  4. A couple of minutes before taking the jam off the heat, stir in the remaining lemon juice, then add the sesame seeds, flaked almonds and mix.    
  5. Leave to stand for 15 minutes. Meanwhile, put the jars in a low heat oven then, when ready, spoon the jam into the warmed jars, fill them right to the top. Cover with wax discs. Next, dampen lightly one side of the cellophane and put it on top of the jar, (dampened side up) securing it with a string.
  6. When completely cold, label the jars and keep in a cool, dry, and dark place.


The way to proceed with very dried figs.


For the same amount used above, soak the chopped figs in 1.75 litres/ 3 pints of water, the night before. The next day, put the figs with their soaking water into a preserving pan, bring to the boil then simmer until they feel soft, stirring occasionally, it takes about 30 minutes. Meanwhile, dissolve the sugar in 100ml of hot water, add it to the softened figs, along with 2 tbsp of lemon juice, anis seeds and miskeh, then continue following stage two onwards. If any scum forms during cooking, wait till you take the pan off the heat and stir in a knob of butter.

You can adjust the spiciness to your liking. It is colourful, easy to make and you can prepare it ahead of time. Above all, it makes a delicious accompaniment to any meal, vegetarian, vegan or meat and can simply be eaten on its own or as a starter. I normally go for small salad potatoes because there are faster to prepare, no need to peel them and when it comes to dicing: just cut them in half.


Serves 4


Ingredients


  • 550g / 1¼ lb potatoes scrubbed but skins left on.
  • 1 chilli or 2 if you like it hotter, finely chopped
  • 25g/ 1oz of fresh coriander, tough stalks discarded, the rest washed, pat dried and chopped.


For the dressing

  • 4 fat cloves of garlic peeled
  • 5 tbsp extra virgin olive oil
  • 2 tbsp lemon  juice


  • Seasoning: salt & freshly milled black pepper


Method


  1. If using small salad potatoes, get the best flavour by steaming them. To do that, pour boiling water into a saucepan fitted with a steamer, tip the potatoes into the steamer with one or two sprigs of mint. Cover, and using a medium setting let them steam for 25 minutes or until cooked. You can test them by inserting a skewer in the centre which should feel soft. Discard the mint, then transfer potatoes into a suitable sized-bowl and cover with a clean cloth so it absorbs excess steam, and helps the potatoes to keep a nice texture without getting mushy. This should take roughly 4 minutes, then cut them into halves.
  2. If using big potatoes, rinse them under the tap, then put in a saucepan and cover with water, add 1tsp of salt and bring to boil. Reduce the heat to a medium setting, cover and let them simmer, for nearly 25 minutes or until when inserting a skewer, they feel tender. Drain the potatoes and let them cool down before peeling off the skin. Cut them into bite sized chunky pieces.
  3. You can prepare the dressing while the potatoes are cooking. Sprinkle some salt onto the peeled garlic and smash into a smooth paste. Add 3 tbsp olive oil, season with freshly milled black pepper and mix thoroughly.
  4. When you are ready to serve, heat up the remaining olive oil in a suitable sized saucepan and throw in the chopped chillies, stir fry for 30 seconds then add the prepared potatoes, followed by the garlic-olive oil mixture. Toss the potatoes around so they absorb the flavour of the ingredients and are re-heated. Stir in the chopped coriander, give the whole thing a good stir, add lemon juice and toss briefly. Take it off the heat, taste and adjust if necessary.

Transfer to a salad bowl and serve at once. However, it is also delicious served at room temperature or even cold.

Mhammarah, literally means reddened, in this context, it refers to mixing hot red chillies with walnuts. Pomegranate syrup is added to sooth down the fiery effect of the chillies. Suitable for vegans and everybody else, this recipe is very basic and works well as an appetiser (mezza) before barbecues, while hanging around and sipping chilled drinks like beer or white wine. The other good thing about this dip is that you can prepare it well ahead of time, which in fact helps the flavours to develop.

Traditionally walnuts are the main ingredients, but you can vary by substituting a quarter of the quantity with pine nuts.

Serves 4

Ingredients.

  • 100 g / 4oz walnuts.
  • 1 or 2 red hot chillies (depending how hot you prefer it) finely chopped
  • 4 tbsp extra virgin olive oil
  • 1 tbsp pomegranate molasses
  • Lemon juice to taste
  • Salt to taste

Method

  1. Grind the walnuts to a paste or until relatively fine (if you like a bit of crunchiness), then tip into the serving bowl.
  2. Add the remaining ingredients and mix well with the spoon. Taste and adjust seasoning if necessary. Keep it in the fridge if you are not eating immediately.
  3. Serve with Lebanese bread, fresh crusty bread also goes well too.

It looks like cream cheese but in fact is strained yoghurt, the better quality the yoghurt, the better taste you get. Although Labneh is one of the traditional Lebanese breakfast dishes, it is becoming more and more popular as part of the mezza. When I took my visiting Irish friends to a Lebanese restaurant they liked it so much that they asked for the recipe which gave me the idea to include it in this section. It is very easy to make and not time consuming at all, though you need to prepare it the night before.

Serves 4-6

Ingredients.

  • 500g/ 1lb 2oz tub of good quality yoghurt (usually called Greek Yoghurt)
  • About 1tsp salt
  • 2 large fat cloves of garlic.
  • Leaves of 1 small sprig of mint. Alternatively ½ tsp of dried mint
  • 1 fat black olive for garnish
  • Extra virgin olive oil to drizzle.

You also need a cotton bag (such as a white pillowcase) in order to drain the mixture overnight

Method.

  1. Mix yoghurt with salt then tip it into the bag. Tie the bag and hang over a bowl or on the tap over the sink, so all the excess liquid is drained which usually takes about 12 hours. You should end up with the consistency of cream cheese.
  2. Transfer the strained yoghurt into a bowl scrapping off all the sticky bits. It should be smooth and spreadable, like a clotted cream. If you think it is too stiff add a little water, taste and adjust if necessary. Keep in the fridge
  3. When you are ready to serve, peel and smash the garlic to a paste then mix with the labneh adding the dried mint if you prefer. Transfer to a serving dish. Decorate with the black olive in the middle, if using the fresh mint chop it up and sprinkle over, finish off with a drizzle of extra virgin olive oil.
  4. Serve with Lebanese bread, try it also toasted.

The squid is cooked in its ink together with bay leaves, orange peel, lemon and lime which gives it a subtle flavour of the sea. It is then served in its inky juice mixture as a cold salad, garnished with parsley, suitable for a spring evening with a glass of chilled arak or white wine. You need a big squid about 550g / 1¼ lb or over, when you buy it, ask the fishmonger to reserve the sac of ink. You can also buy the ink separately in sachets, some fishmongers stock it.


Loligo vulgaris is the most commonly known edible squid, it is native to the Mediterranean and the Eastern Atlantic including the British Isles. However, I noticed that some squids have less ink than others. Therefore, if you want the deep black colour, make sure you have extra ink.


If you want to know more about squids, here are two suggested websites:


http://science-herbal.blogspot.com/2009/03/benefits-for-squid.html


http://animals.howstuffworks.com/marine-life/squid3.htm


Serves 4


Ingredients


·         1 kg / 2¼ lb squid cleaned keeping the sac of ink intact.

·         Enough water to cover the squid

·         3 bay leaves

·         1 orange peel, 1 large lemon quartered, 1 whole lime quartered

·         Salt and freshly milled black pepper

·         Extra virgin olive oil

·         3 cloves of garlic peeled (optional)

·         2 tbsps lemon juice or to taste

·         A generous handful of fresh parsley chopped       


Method


1.      Start cleaning the squid if it hasn’t been done already. Put the squid on a solid area like large cutting board. While holding the body firmly with one hand, carefully remove the head (you will see the eyes) and tentacles with the other hand pulling along with it the guts containing the mucus. The ink sac is attached to the guts. It is very small and you will see the dark ink through the whitish membrane. It is very fragile, cut it off very carefully, but make sure there is something like a saucer underneath (to the catch the juice in case it breaks).  Next, cut off the tentacles from the head, just below the eyes. Throw away the head and other innards. There is inside the ring of tentacles what looks like a hard cartilage umbilicus, if you squeeze the tentacles, this umbilicus-like ring will pop out, pull it off and discard. Now, back to the main body, pull out what feels like a plastic quill in the inside, discard. Next, tear off the fins from both sides of the body and the outer brownish skin should all peel off, discard. Clean and wash the body and tentacles thoroughly with water, to remove any other membrane or guts, and to get rid of any sand or grit.   

2.      Transfer the cleaned squid and tentacles to the pan, pour enough tap water to cover. Prick the ink bag over the pan and stir in 1 tbsp of extra virgin olive oil. Give it a good stir, then throw in the bay leaves, orange peel, lemon and lime slices.

3.      Using a high to medium setting, bring the mixture to the boil. Season then cover and let it simmer for about 20-30 minutes, until just tender. Overcooking makes them chewy.

4.      Meanwhile prepare the dressing. Crush (if using) the garlic to a paste, transfer to a deep serving salad bowl and whisk in lemon juice. Remove the squid and tentacles from the inky juice and cut into thick slices, toss into the dressing.

5.      Discard the orange peel, bay leaves, lemon and lime slices. Strain the remaining juice and add it to the squid mixture. Taste, and if necessary, top up with more lemon juice. If you are not eating immediately, cover and keep it in the fridge.

6.      Just before serving, drizzle about 1 tbsp of extra virgin oil and add in the parsley. Serve with Lebanese bread on the side. Crusty bread also goes well.

« Older entries § Newer entries »