Festive Dishes

You are currently browsing the archive for the Festive Dishes category.

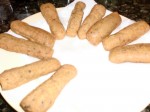
Finger Fritters or Zlebiyeh is another traditional pastry prepared to celebrate Epiphany. Apart from that particular occasion, I have rarely seen Finger Fritters or Zlebiyeh sold in shops. These are frequently confused with Lebanese doughnuts or oowamat / owwamat.

The recipe is easy to make, however, to give it a crunchy taste and prevent the inside from becoming doughy, Finger Fritters need to be deep-fried twice. Finger Fritters or Zlebiyeh are suitable for most people particularly vegans, they can be served sprinkled with sugar or dipped in sugar syrup which should be warm: not too hot or cold.

Makes about 20

Ingredients

For the Finger Fritters

  • 125g / a little over 4½ oz all purpose flour
  • 125g / a little over 4½ oz fine semolina
  • 1 tsp ground aniseeds
  • ½ tsp ground mahlab (see glossary)
  • ½ tsp poppy seeds
  • 1½  tsp ground nutmeg
  • 1½ tsp yeast
  • ½ tsp salt diluted in warm water about 150ml / 5fl oz (enough to bind the dough)
  • Vegetable oil to deep fry

Sugar Syrup/Ater

  • 1 full cup granulated sugar
  • ½ cup water
  • 1 tsp lemon juice
  • 2 tsp orange blossom water
  • 1 tsp rose water

Equipment: you need a deep fryer and preferably an electric mixer.

Method

  1. To make the Finger Fritters. Mix all the dry ingredients in a bowl wide enough to let the dough rise later. Gradually, add in the salted warm water, mixing with your hands until you form a dough.
  2. Transfer the dough into a lightly floured surface and knead for about 6 minutes. Alternatively, you could do the whole process in an electric mixer using the dough hook, thus reducing the kneading time by half (to about 3 minutes). In the end, the dough should feel soft and elastic, shape into a ball.  Grease the bowl with a dab of oil and transfer the dough into it then cover with a polythene bag or cling film, but make sure that they are brushed with a little oil to prevent the dough from sticking. Leave it in a warm place for 1½ hours to rise.
  3. When the rising time is up, pick up the dough and put it on a lightly floured surface. Punch it to get rid of the excess air, knead briefly then shape into a long fat roll. Divide this into equal portions.
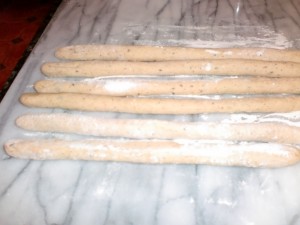
  4. Take one dough-portion and cover the rest. Using your hands, stretch and shape the portion of dough into a long thin sausage (see picture). Put it on a lightly floured hard surface such as cutting board (you need to cut it later) and cover. Repeat the same process placing the long thin sausage-like dough shapes neatly parallel to each other until you finish all the dough portions. If you can, try to keep them all the same length, it helps to cut them at equal lengths.
  5. Next, using a long sharp knife, cut the sausage shaped lengths of dough into 10 cm/ 4 inches, long pieces or fingers.
  6. Transfer onto a tray lined with baking parchment, cover and let the fingers rest for 20-30 minutes. Meanwhile prepare the sugar syrup/ Ater.
  7. Tip sugar and water into a saucepan, using a medium heat setting, bring them to the boil stirring occasionally. Stir in the lemon juice and let the mixture simmer for about 4-5 minutes, until it reaches a stage where the syrup coats the back of a spoon. Finally, switch off the heat and stir in the rose and orange blossom water
  8. When the second rising time is up, heat the oil to 190ºC / 375ºF. If you haven’t got a thermometer, drop a small dough fritter into the deep fryer and if the oil bubbles around it, it is ready to use.
  9. Deep fry the fingers for three minutes turning them so they are cooked on all sides, you may need to do them in batches. Drain on kitchen papers. Keeping the oil hot, (starting with the first previous batch) repeat the deep frying for another three minutes, by which time the fresh Finger Fritters or Zlebiyeh should turn deep golden and crunchy.
  10. Now, you can drain off any excess oil on the kitchen papers, sprinkle sugar on top and serve. If you prefer the Finger Fritters or Zlebiyeh sweeter, dip them straight into the warm sugar syrup (you can always reheat it if it becomes cold), leave them to soak for 1 minute then take them out and they are ready. These Finger Fritters or Zlebiyeh can be eaten warm or cold. Finger Fritters or Zlebiyeh keep for approximately for two days.
Finger Fritters or Zlebiyeh Place the long thin sausage-like dough shapes neatly parallel to each other.

Place the long thin sausage-like dough shapes neatly parallel to each other.


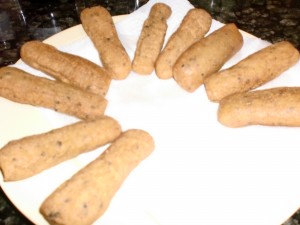
Finger Fritters or Zlebiyeh freshly deep fried

Finger Fritters or Zlebiyeh freshly deep fried.


Tags: , , , , ,

Kaa’k el Eid or Easter biscuits are usually made along with the maa’moul the traditional Easter pastry (see recipe in desserts) to give something special to children as well as to involve them in the Easter preparations. It’s a basic recipe, once the dough is done, it would be great fun for children to shape it into rings as I will explain later.

As children, we loved them, now I realise that it is their light texture blended with simple spices that made us and other children favour them.

In this recipe, I used the traditional spices, however, you can make your own variation, for instance, you could substitute mahlab for aniseeds or nutmeg instead of cinnamon.

Makes about 18 (depending on the length and thickness of the rings)

Ingredients.

  • 250 g/ 9 oz flour
  • ¼ tsp ground miskeh (see glossary)
  • ½ tsp ground cinnamon
  • 1 tsp aniseed (alternatively ½ tsp ground mahlab)
  • 100 ml / 3½ fl oz milk
  • 100 g/ 4 oz caster sugar
  • 110 g/ 4¼ oz softened butter
  • ½ tsp easy blend yeast
  • 1 egg yolk added to 2 tbsp milk for glazing
  • 2 tbsp sesame seeds (optional)

Method

  1. Put the milk into a small saucepan, tip in the sugar and warm through to dissolve the sugar. Keep on one side.
  2. Mix the flour, spices and yeast in a bowl or food processor, add the softened butter and rub with either your fingers or the beater until well combined.
  3. Add the sweetened milk to the flour mixture and knead with your hands or the dough hook for a couple of minutes, until you have a smooth paste. Cover with a cling film and let it rest for 2 hours.
  4. Next, pre-heat the oven to 200ºC/ 400ºF. Line one or two baking sheets with baking parchment paper.
  5. Divide the dough into equal walnut size pieces. Now, take one piece, roll it into a strip about 1.25 cm/ ½ inch thick and 10cm/ 4 inches long, bring both ends together to achieve a circle shape, pressing one end on top of the other. Transfer gently onto the baking sheet, do likewise with the rest. Once, you have finished, brush the biscuits with the egg wash, sprinkle, if using, with the sesame seeds and pop them into the preheated oven. Bake until they are a light golden colour, roughly 10 to 12 minutes. Let them cool slightly before transferring them onto a wire rack.
  6. If you are not serving the biscuits immediately, you can store them in an airtight container for up to a week.

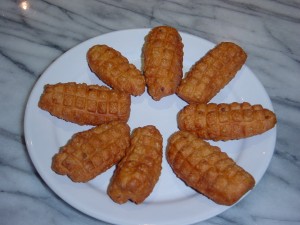
Traditionally, when the Christians in Lebanon celebrate Epiphany, they eat and serve different varieties of fritters. Last year, I talked about O’wwamat /Lebanese Doughnuts (see recipe). This time, my recipe is about Ma’croon /Lebanese Fritters with Aniseed.

Ma’croon can be made with flour or semolina or both combined. The main flavouring ingredient is aniseed that gives it a festive aroma. It is very simple to make and is suitable for all eating habits. These are usually deep-fried then dipped straight into the sugar syrup, however, if you don’t like them too sweet, dip and then remove quickly. Ma’croon need the sugar syrup but you can alter the amount by reducing or prolonging the soaking time. I make my Ma’croon with both: flour and semolina because I like that bit of crunchiness created by the semolina. Ma’croon are best eaten when freshly made, like other fritters, they don’t keep for long.

Makes about 25 (roughly 6-7cm / 2½ inches long)

Ingredients

  • 1 quantity of sugar syrup/ Ater (see recipe)
  • 150 g / 5oz fine semolina
  • 75 g/ 3oz flour
  • ¼ tsp easy blend yeast
  • 1 tbsp ground aniseed
  • ¼ tsp Mahlab (optional, see glossary)
  • About 120 ml/ 4fl oz warmish water
  • 3 tbsp vegetable oil to make the dough and enough vegetable oil to deep fry

Method

  1. Sift the flour into a large bowl then add the remaining dry ingredients and mix well. Rub the oil into the mixture, then, gradually add the water mixing and kneading with your hands or dough mixer until you have a firm dough that you can roll. Cover with an oiled clingfilm and leave it at room temperature for an hour. Meanwhile, you could prepare the sugar syrup/ Ater.
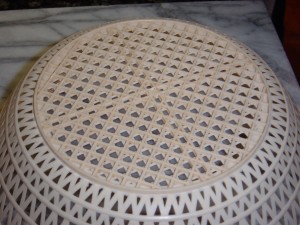
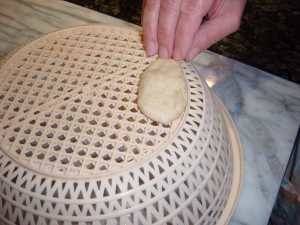
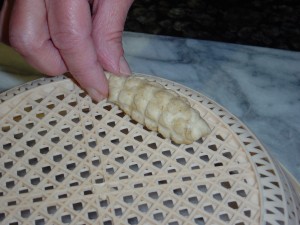
  2. Shape the dough into a long roll (roughly ½ cm diameter) then cut it into pieces, (depending how small or big you want the fritters), the ones in this recipe are about 6 cm / 2½ inches long, therefore, I divided the roll into 25 pieces. Now, take one piece at a time and roll it on a marble or between your hands and give it the shape of a sausage or a plump date. Next, press this down onto a perforated surface like the cheese grater, or a colander with a large mesh (see picture) or any equivalent, to give a dimpled effect. Roll the piece with your fingers towards you so could achieve a dimpled pattern (see picture), place it on the plate and cover with a tea towel to prevent the Ma’croon from drying out, continue likewise with the rest until you finish all the pieces.
    Colander with a suitable mesh

    Colander with a suitable mesh

    Pressing the piece to get the dimpled effect.

    Pressing the piece to get the dimpled effect.

    The dimpled effect.

    The dimpled effect.

  3. Heat up the oil in a deep frying pan and when it is hot enough (enough for a small cube of bread to crisp in 1 minute), drop in as many pieces as the frying pan can safely take, allowing them to float around without being squashed, you may need to do that in batches. Fry, turning the fritters until they are golden, this should take about three or four minutes. Remove with a slotted spoon and drain excess oil by placing them briefly onto kitchen paper, then transfer them while still hot into the pan containing the warm sugar syrup/ Ater. The Ma’croon need the sugar syrup but you can alter the sweetness by reducing or prolonging the soaking time.
  4. Remove from the sugar syrup with a slotted spoon onto a serving plate and eat at once.

    Ma'croon ready to eat.

    Ma'croon

Atayef or pancakes are usually associated in Lebanon and the Middle East with the Muslims’ celebrations for the holy month of Ramadan. I remember back home, the stalls that the sweet shop owners used to set up in front of their shops with the pancake makers competing with each other as to who would make the best and the freshest. It stuck in my mind watching the small bubbles drying out very quickly, leaving small holes and that is what I call today a perfect pancake.

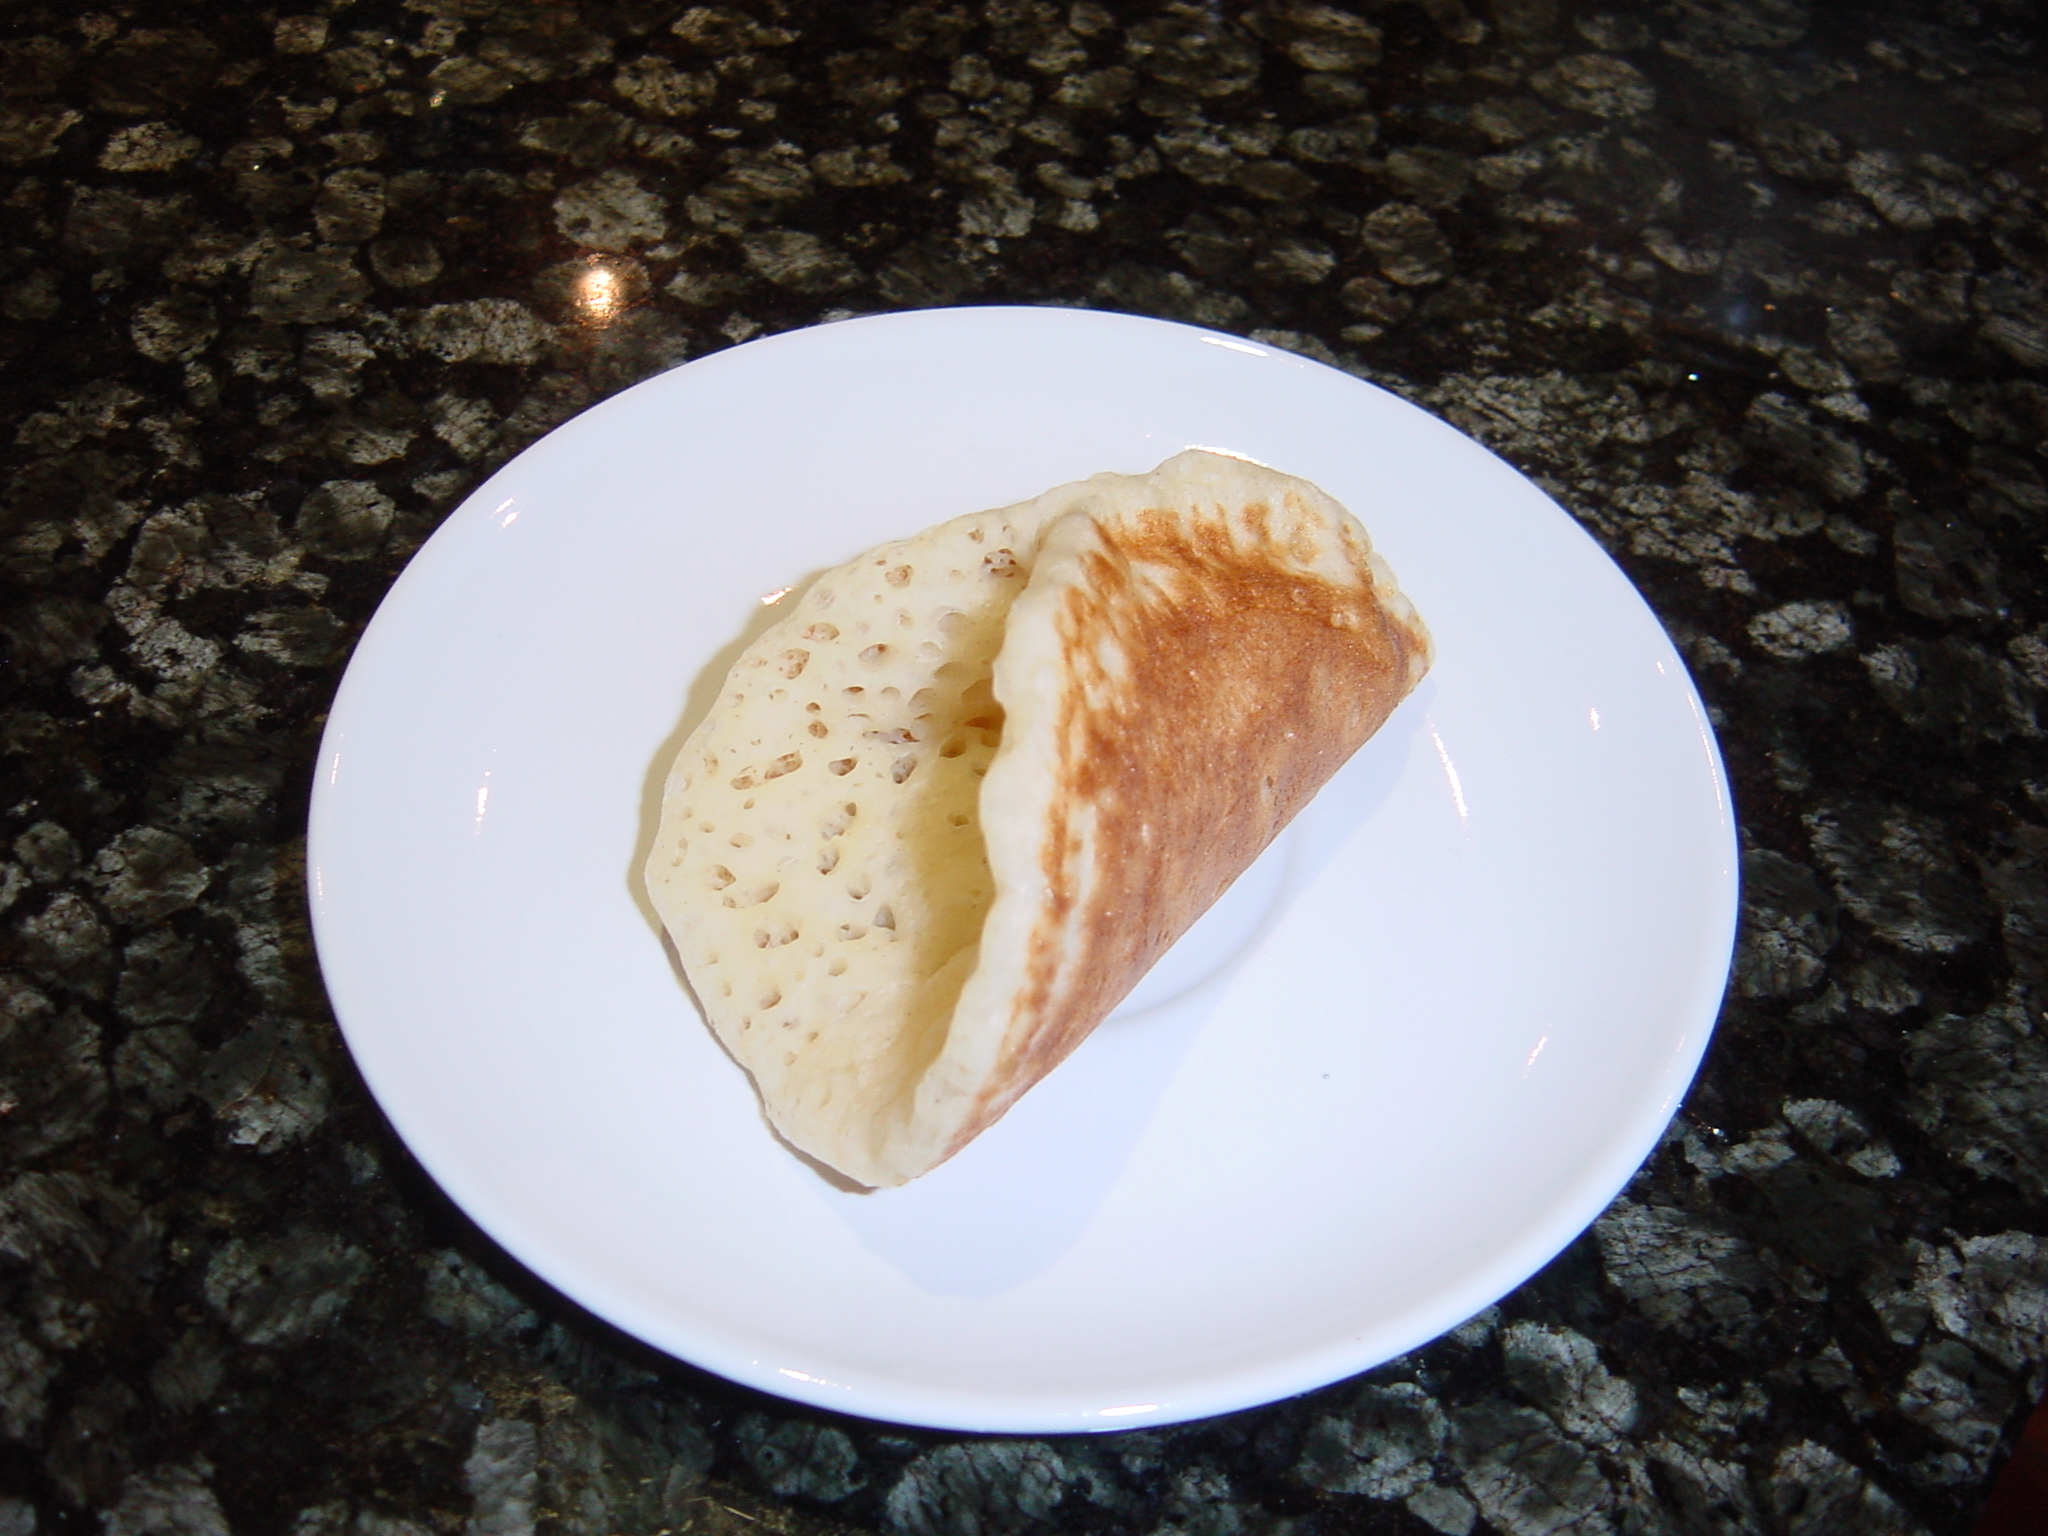
Pancakes are also eaten all year round and by everybody. They are also versatile, you can fill them with Ashta (Lebanese clotted cream – see recipe), a walnut mixture or even cheese. One important thing to observe is that these pancakes should be cooked on one side only.

Atayef (Pancakes)

Makes about 10 (10cm/ 4 inches diameter)

Ingredients.

  • 200 g/ 7 oz plain flour
  • 1 tbsp fine semolina
  • Pinch of salt
  • 1 tsp fast acting yeast
  • ¼ tsp baking powder
  • 1tbsp sugar
  • 225 ml – 250 ml / 7 to 8fl oz warmish water
  • ¼ tsp of each orange blossom and rose water
  • A dab of flavourless oil

You also need a shallow non-stick, frying or pancake pan with a thick-base

Method

  1. Sift the flour into a medium-sized mixing bowl or food processor, then mix in the dry ingredients. Gradually, tip in the water along with the orange blossom and rose water, mixing continuously until well combined and the batter becomes smooth with no lumps. The consistency should be similar to that of single cream. Cover and let it rest for an hour in a warm place, by which time the batter should rise and its surface is bubbly. Meanwhile you can proceed with making your preferred filling and the Ater / sugar syrup (See recipes).
  2. When the batter is ready, grease your pan with a very little vegetable oil and pre-heat it for about 5 – 7 minutes on a stove switched on medium to high. It is important that the pan should be very hot before cooking the pancakes.
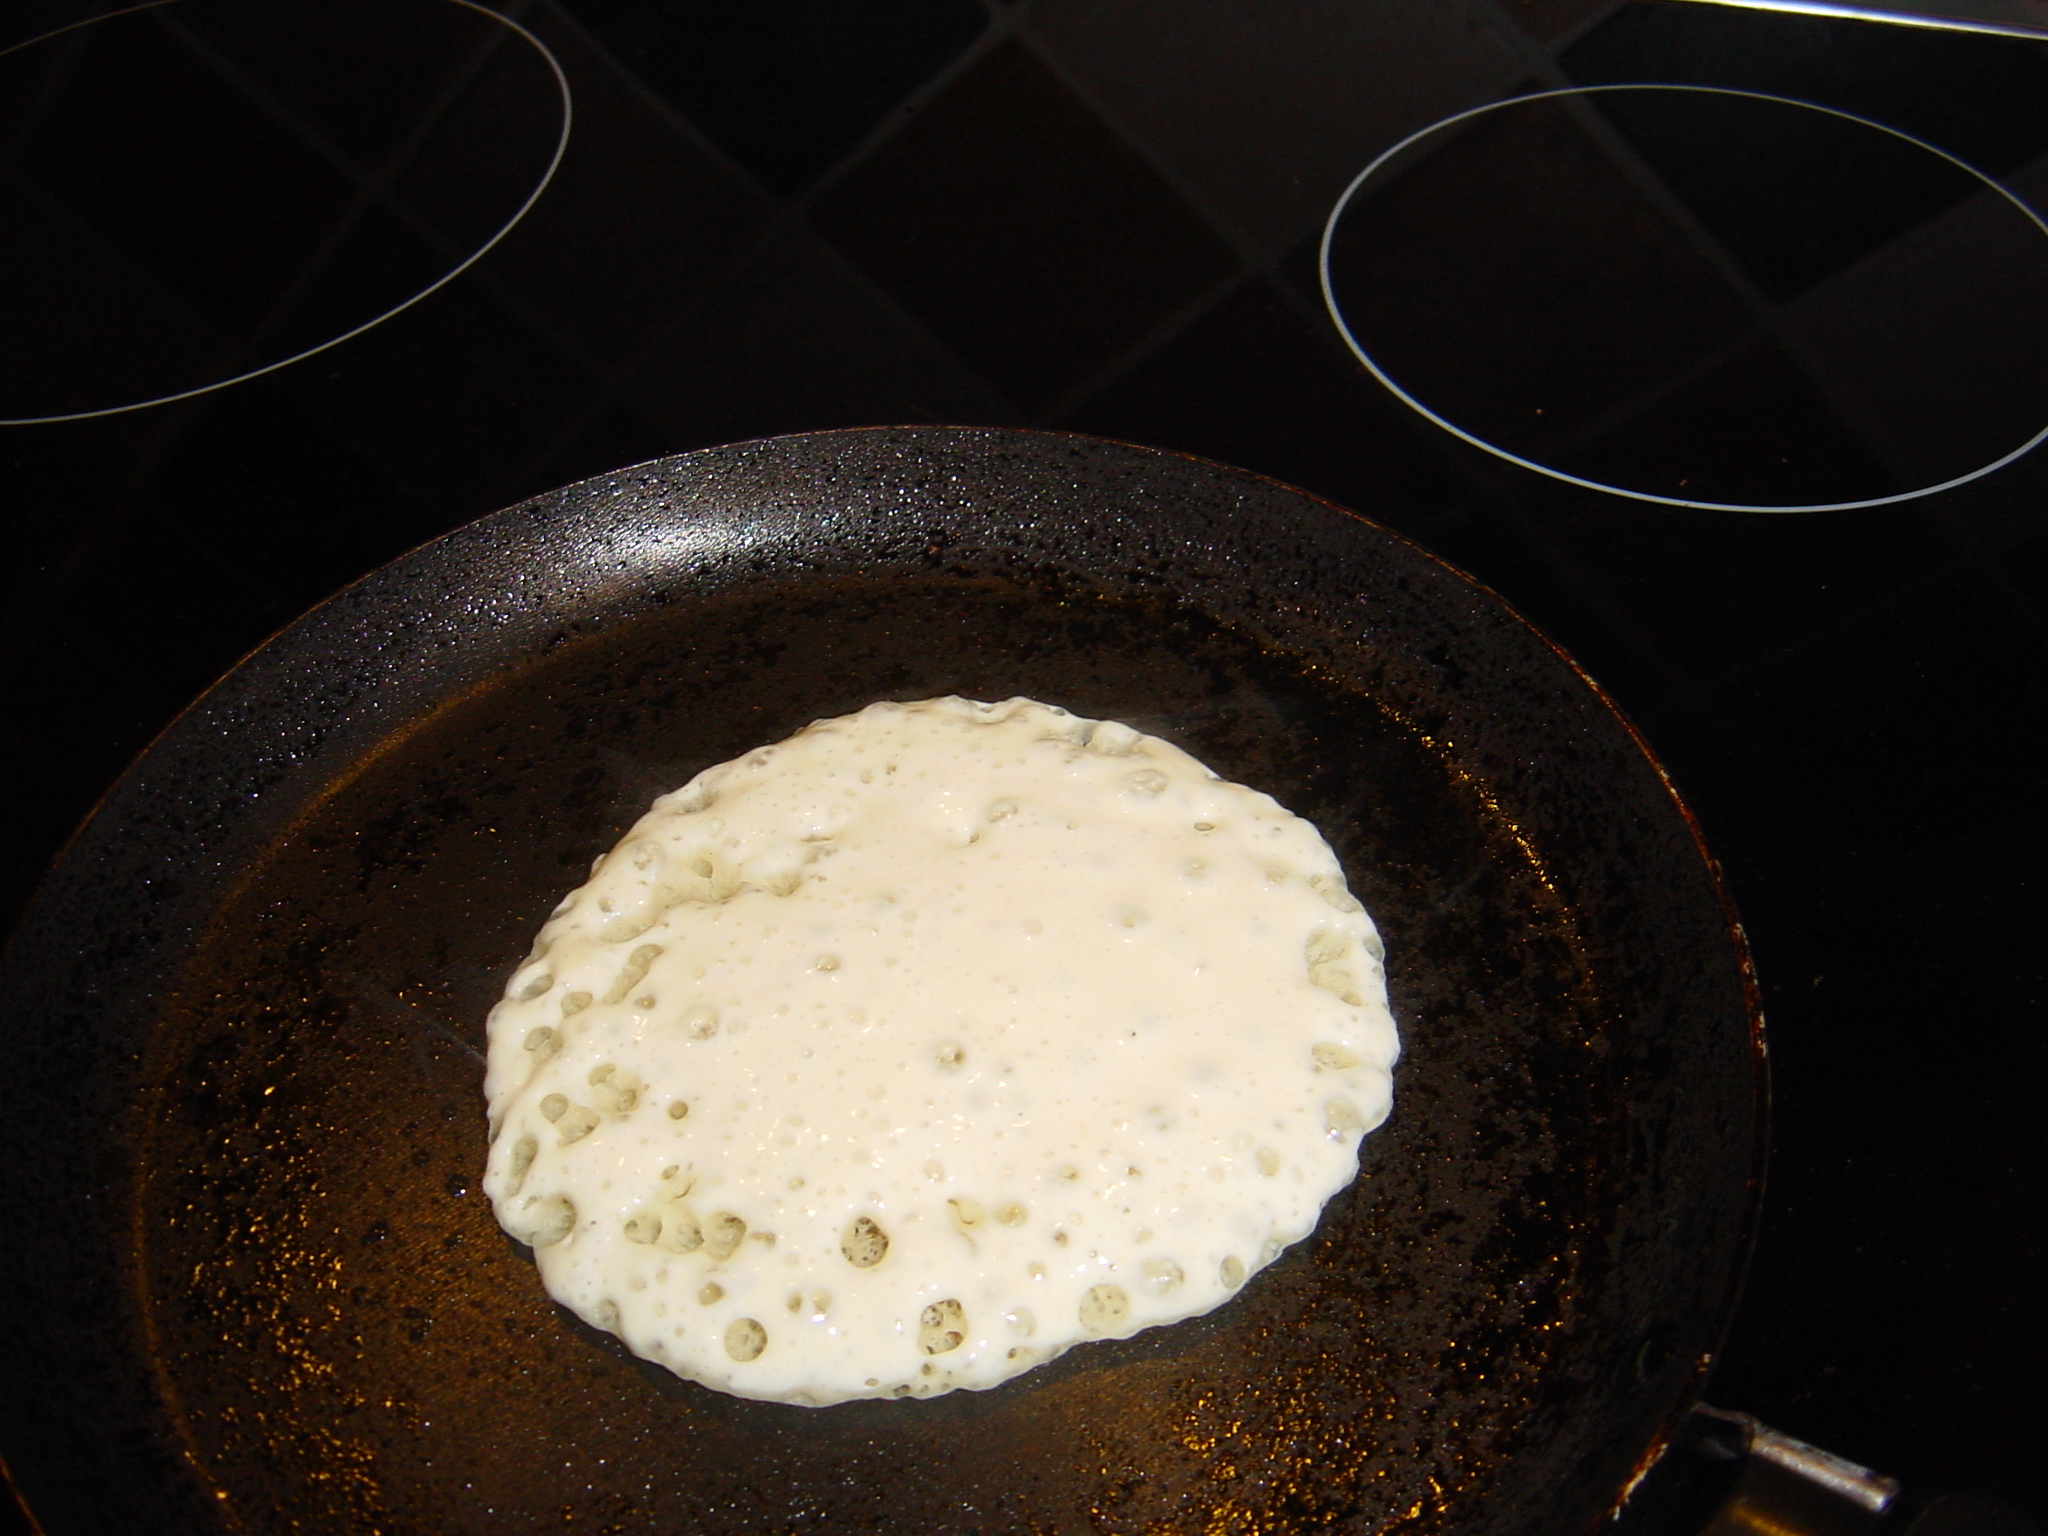
  3. Next, stir the batter with a spoon and mix well, then take 3 tbsp in a small ladle and pour it in circular movements into the hot pan. This will make a pancake of about 10cm/ 4 inches diameter. You can make them smaller or larger, the main thing is to measure the amount in advance and tip it in all at once. As soon as the batter touches the pan, you will see the bubbles drying out quickly, it takes about a minute or a little over until the top is dry and the bottom is slightly browned. As mentioned above Atayef/ pancakes are never cooked on both sides. Remove onto a tea towel folded in half and cover. Repeat the same process until the batter is finished.
Frying the Pancake (Atayef)

Frying the Pancake (Atayef)

Pancakes cooling on a cloth.

Pancakes cooling on a cloth.

Atayef bil Ashtah (Pancakes filled with Clotted Cream)

I think they are the most elegant and attractive to present. The green pistachio nuts against the white cream decorated with the red candied rose petals, make the pancakes quite tempting.

Makes 10 (10 cm/ 4 inches diameter)

Ingredients

1 quantity of Atayef /Pancakes (see recipe above)

For the filling

  • ½ quantity Ashta / clotted cream filling (see recipe)

You also need

  • 1 quantity of Ater / sugar syrup (see recipe)

To decorate

  • 20g / ¾ oz coarsely ground pistachio nuts
  • Candied rose petals (optional)

Method

  1. Prepare Atayef/ pancakes as described above. Do likewise with the Ater/ sugar syrup and the Ashtah (see recipes).
  2. When the pancakes have cooled, take one and put it in your hand, brown side down then pinch the edges pressing tightly until half way. Now, with the other half open, spoon the Ashtah/ clotted cream, about 1tbsp, then dip it into the crushed pistachio nuts and, if you like, decorate with candied rose petals. Arrange on a serving plate, do likewise with the rest. If you are not eating it immediately, you could at that stage cover with a cling film and keep it in the fridge for an hour or so, but no later. These pancakes won’t keep for long.
  3. Serve chilled handing round the Ater/ sugar syrup, so people can pour the amount they like.
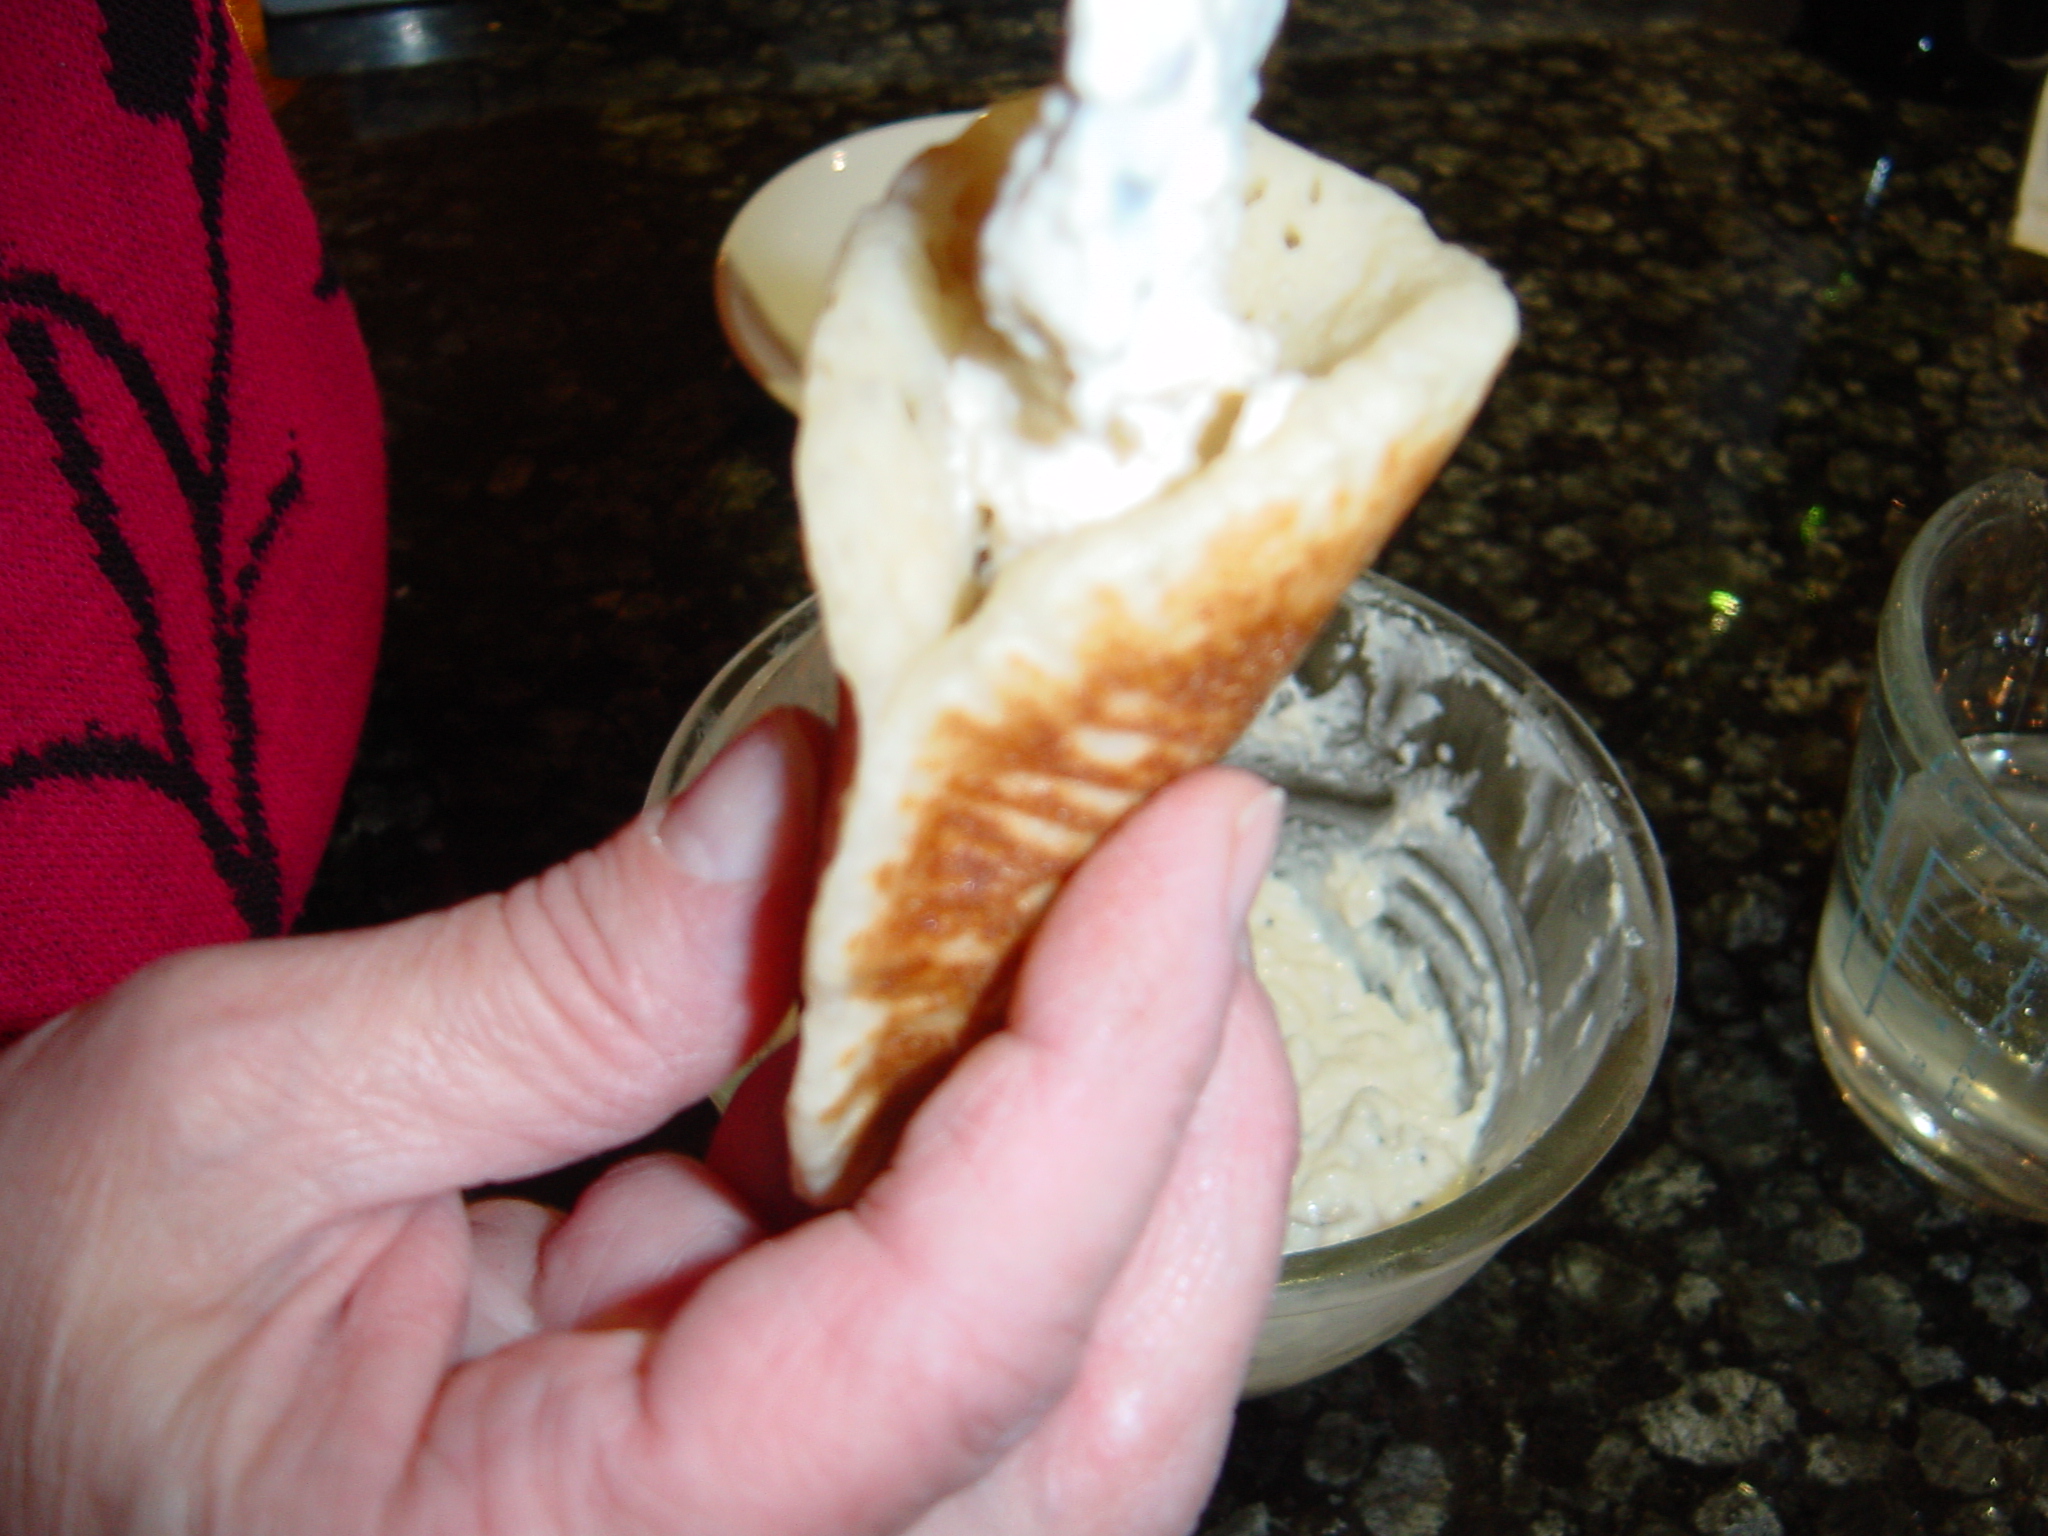
Atayef ready for the Ashtah filling.

Atayef ready for the Ashtah filling.

Filling the Atayef with Ashtah.

Filling the Atayef with Ashtah.

Atayef bil Joz (Pancakes Stuffed with Walnuts)

These are usually either deep fried or baked in the oven until golden brown then dipped in cold Ater/ sugar syrup. Once ready, these pancakes are better served immediately.

Makes 10 (10 cm/ 4 inches diameter)

Ingredients

  • One quantity of Atayef/ pancakes (see recipe above)
  • 1 quantity Ater/ sugar syrup

For the walnut filling

  • 120g/ 4 ½ oz medium ground walnuts
  • 1 tbsp sugar
  • ½ tsp ground cinnamon
  • ¼ tsp of each orange blossom and rose water

To decorate:

  • 20 g/ ¾ oz coarsely ground pistachio nuts

Method

  1. Prepare Atayef/ pancakes as described above. Do likewise with the Ater/ sugar syrup (see recipe). As for the walnut filling, simply mix all the ingredients.
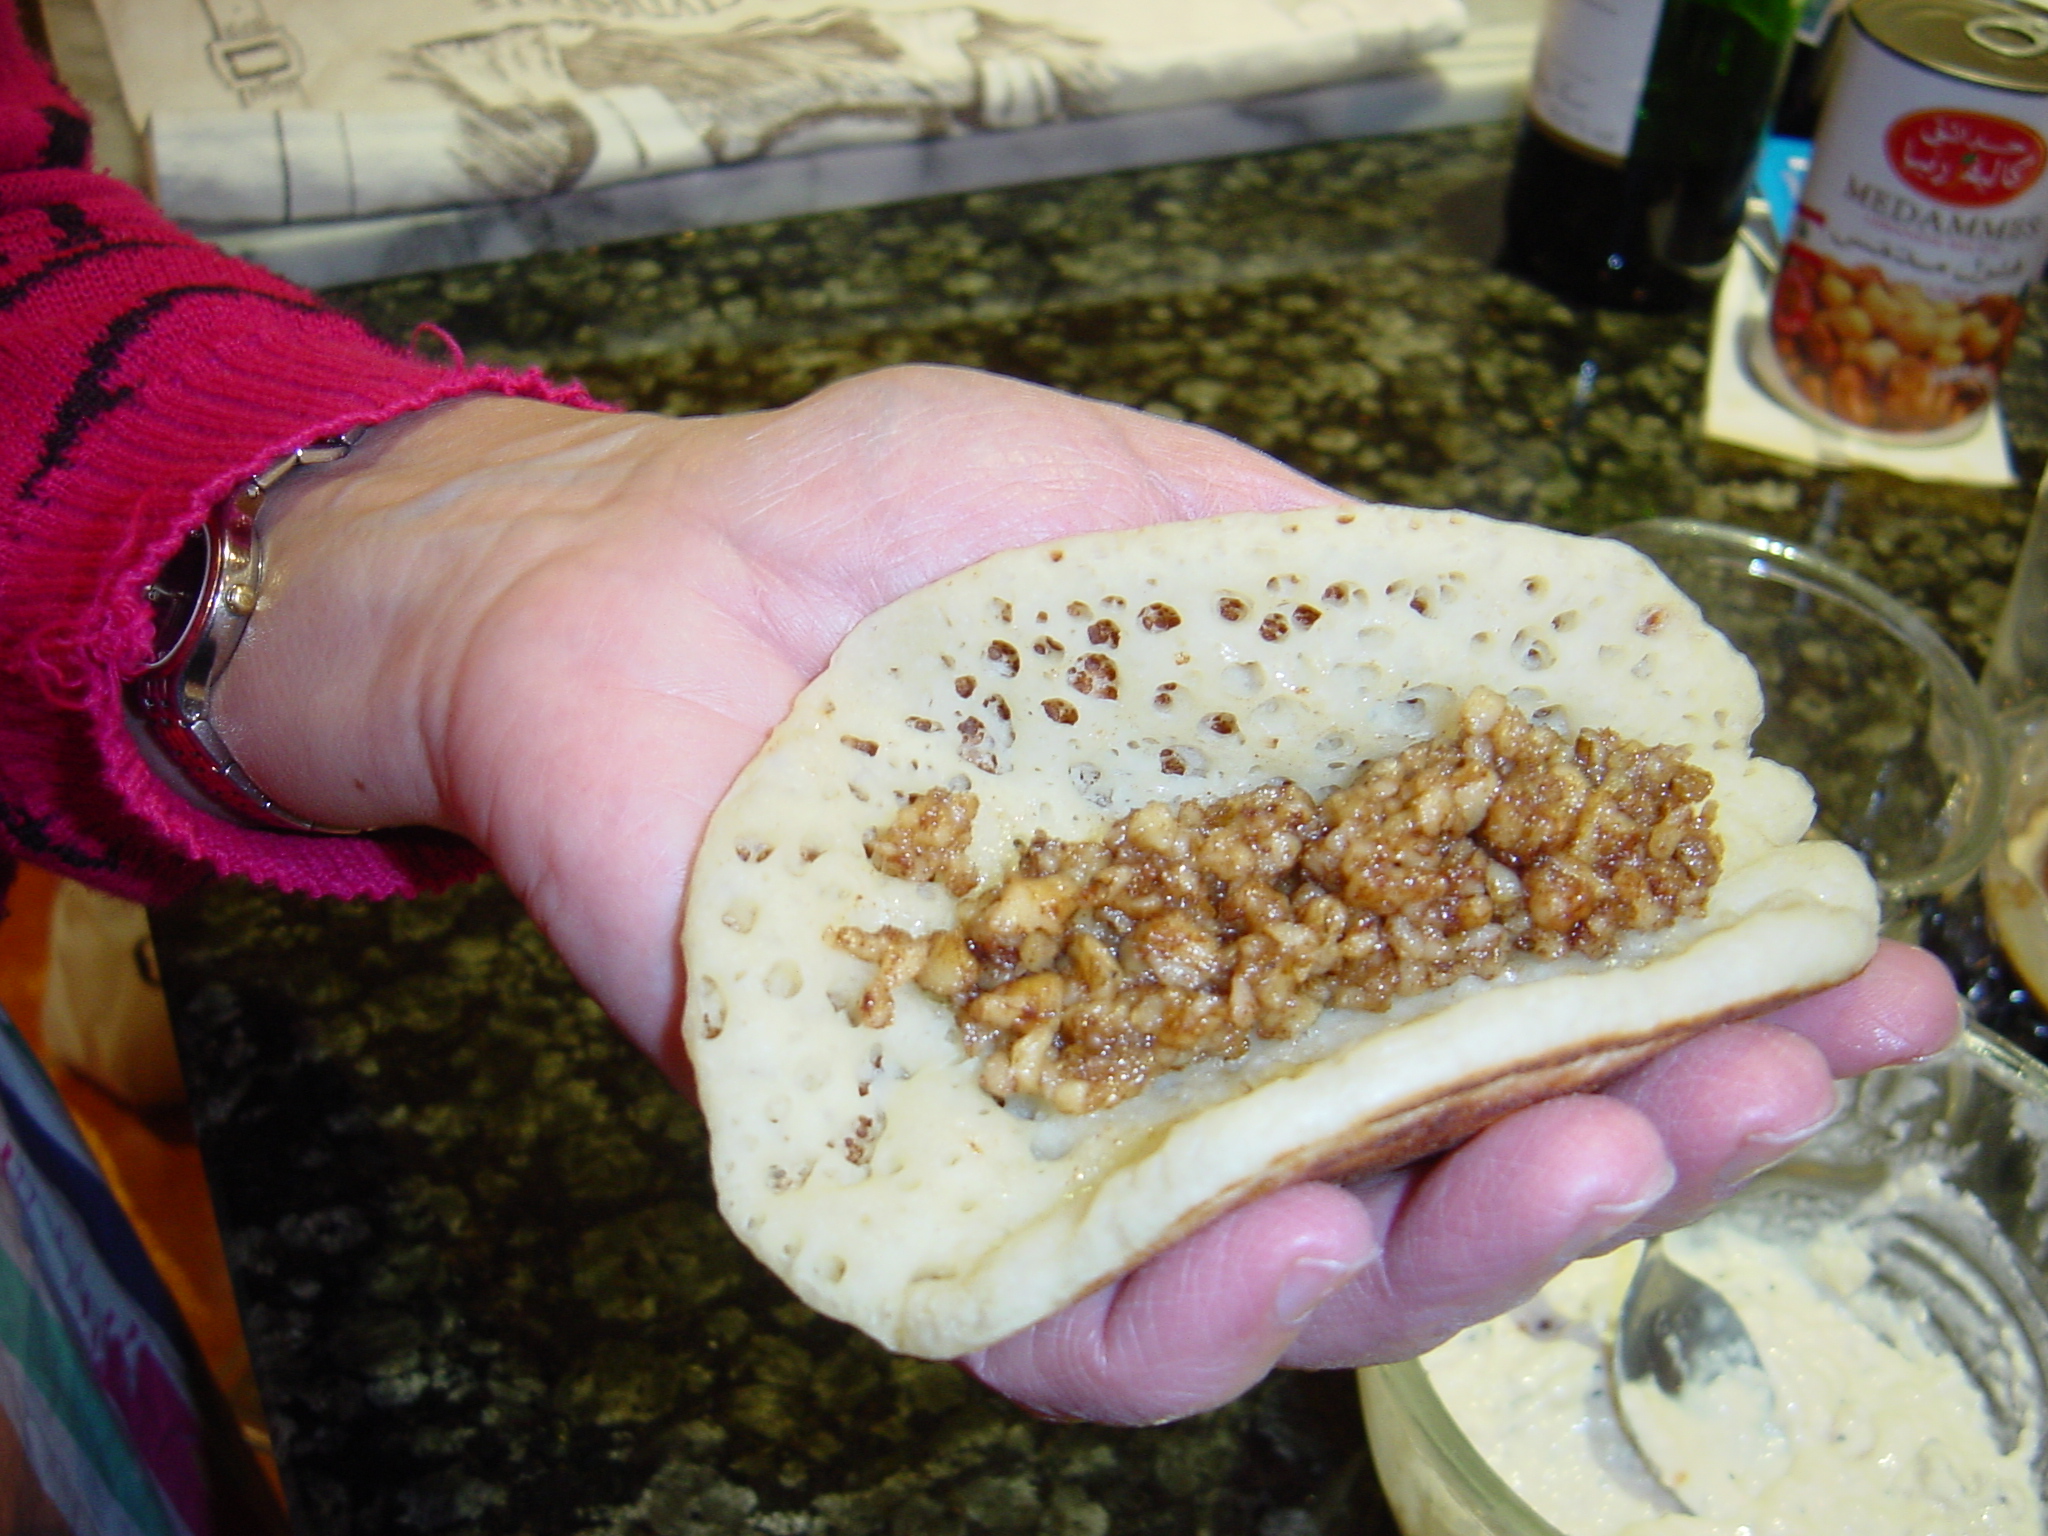
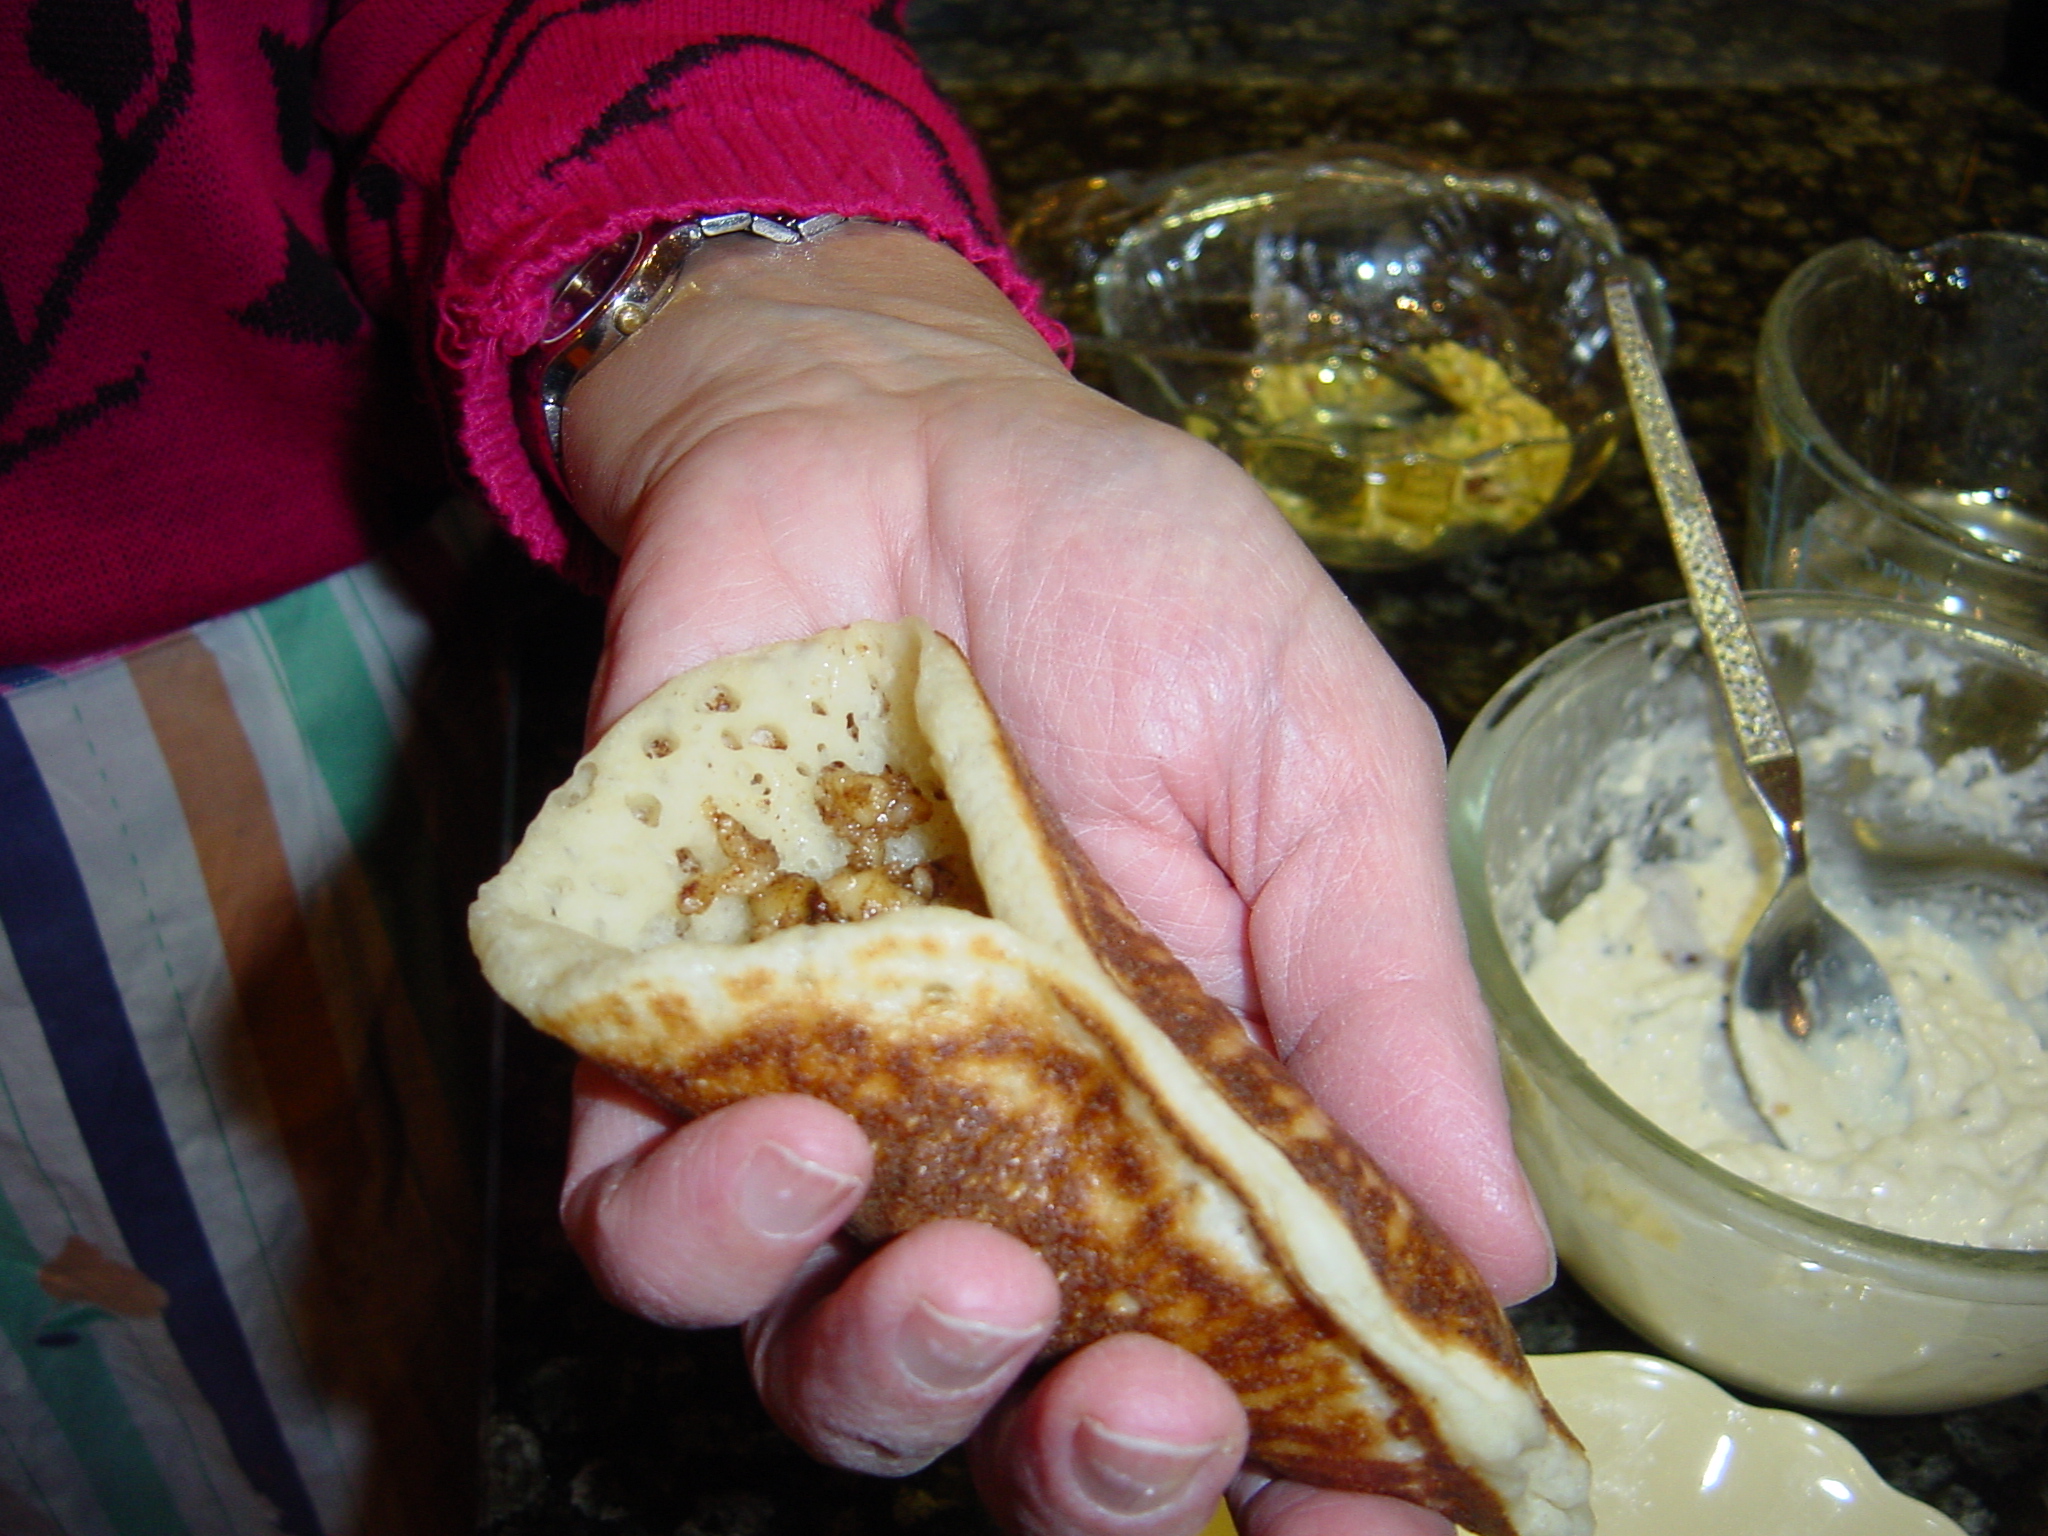
  2. Now, take one pancake in your hand, brown side down, put about 1tbsp of the filling and spread it along the middle, leaving the edges untouched. Next, fold the pancake into a crescent shape pinching tightly the edges to seal. Place the pancake onto a plate, then continue likewise with the rest.
  3. In a medium sized frying pan and using medium setting, heat up enough oil to deep fry the pancakes. You may need to do this in batches. When the oil is hot enough, gently drop in the pancakes and fry until golden on both sides, it takes about 2-3 minutes. Remove with a slotted spoon onto kitchen paper to the drain excess oil then dip while still hot into the cooled Ater/ sugar syrup, swirl the pancakes in the syrup to give them a good coating, leave them for one minute then take them out and put on a serving plate.
  4. Sprinkle the crushed pistachio nuts on top and serve immediately

Filling the Atayef with the Walnut mixture.

Filling the Atayef with the Walnut mixture.

Pinching the Atayef around the edges to seal it.

Pinching the Atayef around the edges to seal it.

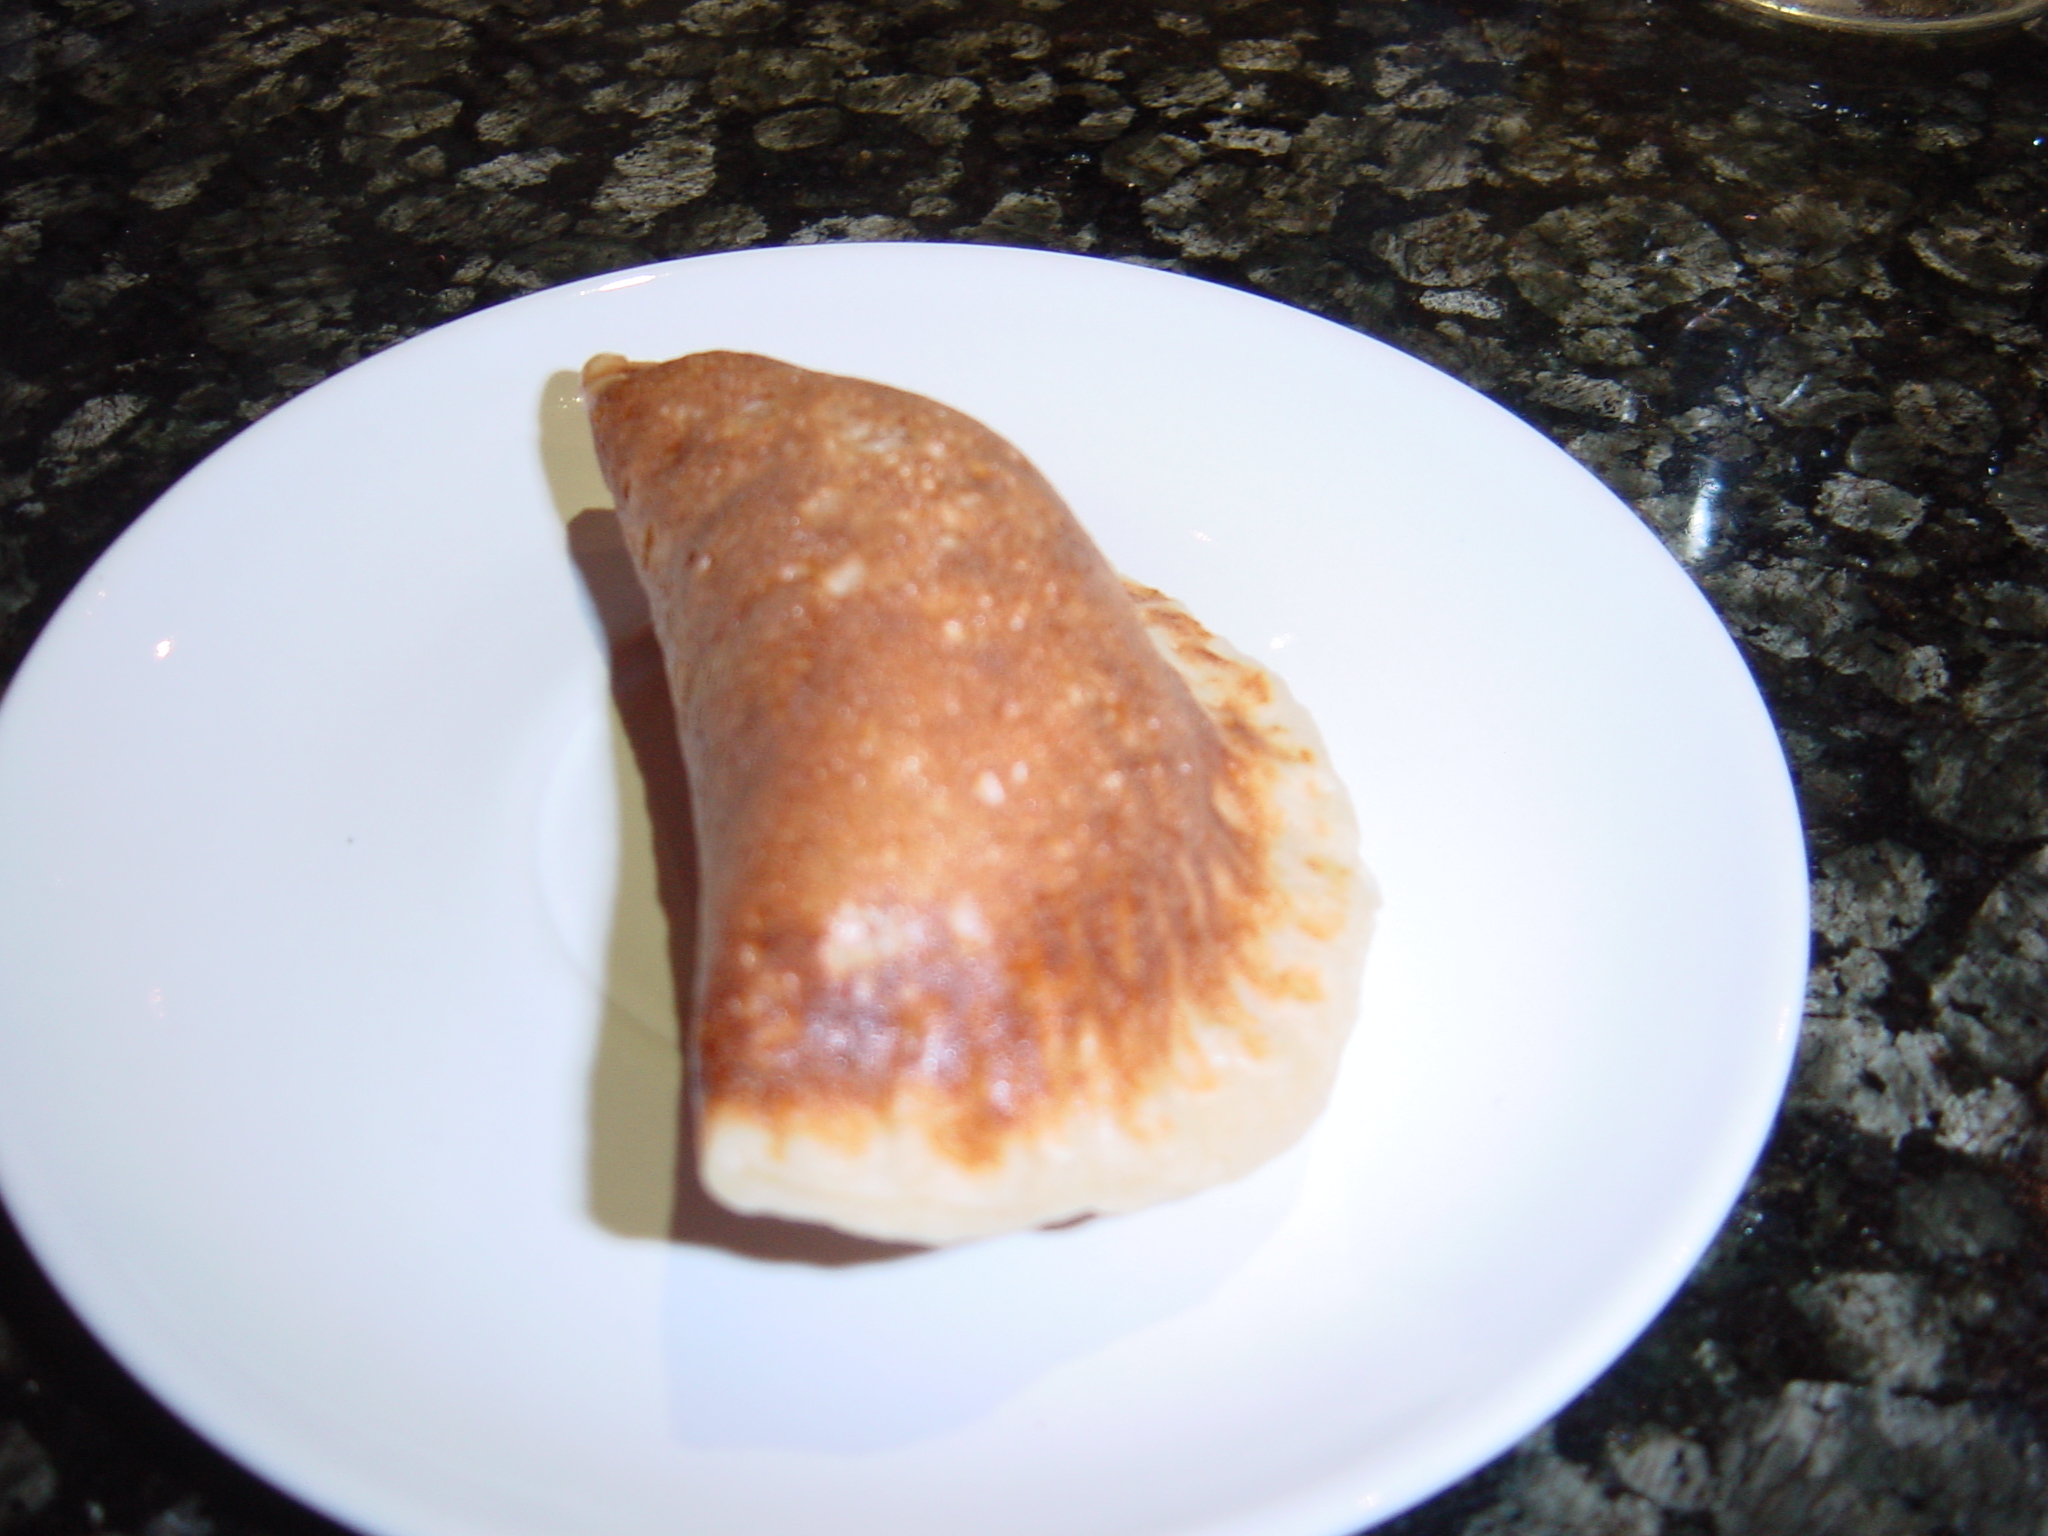
The Atayef filled and sealed ready for frying or baking.

The Atayef filled and sealed ready for frying or baking.

If you prefer to bake them, this is how to proceed:

  1. Pre-heat the oven to 200°C/ 400°F.
  2. Melt about 50 g/ 2oz of butter and let it cool slightly, then stir in 1 tbsp of vegetable oil. Meanwhile, line a shallow baking sheet with baking parchment paper. Lay the filled pancakes on the baking tray and brush each one on both sides with the butter mixture, pop it in the oven. Bake for about 7 minutes then turn over and continue baking for another 7 minutes time by which they should be a golden-brown colour on both sides. Dip, as explained above, into the cooled Ater/ sugar syrup then transfer onto a serving plate, sprinkle with the crushed pistachios and serve at once.

Atayef bil Jibneh (Pancake filled with cheese)

Traditionally, Akkawi cheese is used for the filling. Since this cheese is very salty, you need to soak it in cold water for several hours, changing the water from time to time until you get rid of the salt, then dry thoroughly and mash. Alternatively, use the same amount of Mozzarella cheese, dry and mash.

Makes 10 (10 cm/ 4 inches diameter)

Ingredients

  • One quantity of Atayef/ pancakes (see recipe above)
  • 1 quantity Ater/ sugar syrup (see recipe)

For the cheese filling.

  • 170 g/ 5½ oz Akkawi (you need to soak it in cold water for several hours, changing the water from time to time until you get rid of the salt, then dry thoroughly and mash)

OR

  • 170 g/ 5½ oz Mozzarella cheese dried and mashed.

Method

  1. Proceed as explained in Atayef bil Joz / Pancakes Stuffed with Walnuts).
  2. Dip them in the cooled Ater/ sugar syrup and serve warm.

NB. You can also follow the same method for the pancakes stuffed with Ashtah/ clotted cream.

Although Owwamat or Lebanese Doughnuts are available all year round, it is traditional for the Christians in Lebanon to eat them on 6 January to commemorate Jesus’ baptism, the Feast of Epiphany. As a child, I used to compare Owwamat to ping-pong balls because their rounded shape looked so perfect, it is not easy to achieve that at home, however the home-made ones are much tastier than the ones sold in shops.


There are also other fritters served on this occasion such as M’shabbak where confectioners pride themselves in displaying these colourful laced discs, Ma’croon and Zellabiya, the latter is rarely found in patisseries, it is usually homemade more specifically by countrywomen. These fritters are best served hot and fresh, they won’t keep well for long.


Makes about 16 doughnuts


Ingredients

  • 150 g / 5 oz plain flour
  • ¼ tsp yeast
  • A generous pinch of salt
  • 65 ml / 2 ½ fl oz plain yoghurt
  • About 150 ml / 5 fl oz tepid water
  • 1 quantity of Sugar Syrup/ Ater (See recipe)
  • Enough vegetable oil to deep fry


Method

  1. Sift the flour into a Pyrex or non-metallic bowl, stir in yeast and salt, then mix in the yoghurt. Mix well all the ingredients adding gradually the tepid water, to achieve a smooth batter that has a dropping consistency. Cover and set aside in a warmish place for roughly one hour after which the batter should rise a little with some bubbling on the surface. Meanwhile, prepare the sugar syrup. 
  2. When the batter is ready, heat up the oil until it is hot, (you can test it by dropping a tiny amount of batter, if it floats and the oil is bubbling, it means it is the right temperature). Lightly grease a dessert spoon with oil and take a spoonful of batter then drop it into the hot oil, do as many as you can fit easily in the deep fryer. Fry the doughnuts, turning them until they look fluffy and reach a golden colour on all sides, this should take about 2 minutes. Remove with a slotted spoon and drain on absorbent kitchen papers, before dipping them into the syrup, swirl the doughnuts around for a minute or so then transfer into a serving dish, do likewise with the remaining batches. This is how it is usually done, however, I prefer not to dip the doughnuts into the syrup, I like them fluffy with a bit of crispiness, I simply let people add the amount of syrup they like.
  3. Serve while they are warm.


NB: Home-made doughnuts do not keep well for the next day.

Although the title indicates Festive Chicken, you can also use turkey. Like in the West, the Lebanese eat both, depending on their preferences. Once cooked, the bird is usually presented on a serving platter surrounded by the glistening cooked rice, a layer of golden toasted nuts is scattered on top and that I believe is what gives it the special festive look.


When cooking a chicken, make sure that the bird is basted at regular intervals (depending on its size), so in the end you have a juicy succulent bird with a lovely bronzed skin. Also to achieve a thorough cooking of the chicken, allow 20 minutes per 450 gm / 1lb plus 20 minutes extra.


Serves 4


Ingredients


·         1 medium chicken (about 1.5kg / 3¼ lb weight), preferably free-range

·         35 g/ 1 ¼ oz butter softened at room temperature

·         About 150 ml /  5 fl. oz water

·         1 tbsp vegetable oil, plus 2 tsp extra

·         1 medium onion finely chopped

·         225 g /  8 oz long grain white rice (eg Basmati rice)

·         425 ml / 14¾ fl oz chicken stock

·         50 g / 2 oz of each pine nuts, blanched almonds and pistachio nuts

·         450 g / 1 lb plain yoghurt (optional)


Seasoning:


·         Salt and freshly milled black pepper

·         1 tsp ground allspice

·         1 tsp ground cinnamon


                     Utensils     


·         You also need a deep roasting tin wide enough to fit the chicken.

·         A non-stick medium sized saucepan

·         A medium frying pan


Method


1.      Pre-heat the oven to 180°C / 350°F. Rinse the chicken under tap water and pat dry with a kitchen paper. Rub the butter all over the chicken then season generously with salt and pepper. Now, pour about 150 ml / 5 fl. oz water into the roasting tin and place the chicken, cover tightly with foil and transfer to the oven on the centre shelf.


2.      Bake for about 1¾ hours basting the chicken three times with its juices. To test the chicken, prick the thickest part of the thigh with a skewer, if the juices run clear then it is cooked. If they are pink, put it back into the oven for a further 15 minutes before testing again and continue to do this until the juices run clear. Just half an hour before the finishing time, tip most of the juices from the chicken into a heat-proof jug, leaving sufficient amount to keep the chicken moist, pop the chicken back into the oven, uncovered this time, to give it a crispy golden colour. Put the jug in the fridge, while you make a start with the rice.


3.      Heat up the oil in a medium saucepan using a medium heat, sauté the chopped onion for about two minutes. Add the minced meat to the mixture, stirring from time to time and breaking any lumps. Half way through add the pine nuts, cook well until the meat is lightly browned. Now, stir in the rice, season with salt, pepper, ground allspice and cinnamon, cook for another two minutes. By this stage the fat in the jug should have separated leaving you with the jelly at the bottom of the jug. I prefer to remove the fat and to perhaps use it for something else later. Then top up the remaining jelly with hot water if necessary to make up the amount required for the chicken stock. Add this to the rice mixture and give it a good stir, bring it up to a gentle boil then lower the heat to a simmering point, cover the pan and let it cook for about 10 minutes. Once the time is up, take the lid off and cover the pan with a kitchen towel, let it stand for about 10 minutes.


4.      Heat up 2 tsp of vegetable oil in a medium sized frying pan, sauté the almonds and pistachio nuts until the almonds reach a toasted golden colour.


5.      There are 2 ways of serving. Transfer the rice into a serving dish creating a depression in the middle where you place the bird. Scatter the warm nuts on top of the rice and take the dish to the table where you carve and serve. Place the yoghurt on the table, so people can help themselves. The other way is instead of carving at the table, you simply divide the chicken into the required portions and place them on top of the rice.

This is a basic stuffing that requires three ingredients: rice, minced meat and pine nuts. The mingling of flavours inside the roasting chicken gives this stuffing a moist succulent taste. However, in order to achieve a better texture, it is advisable to soak the rice before stuffing the cavity.


The quantity below is suitable for a medium chicken (about 1.5 kg / 3¼ lb), serving four people.


Ingredients


·         100 g / 4 oz long grain white rice

·         75 g / 3 oz lamb minced meat

·         30 g / 1 ¼ oz pine nuts


Seasoning:

·         salt & freshly milled black pepper

·         1 tsp ground allspice

·         ½ tsp ground cinnamon


Method


·         Soak the rice in water for about 15 minutes, drain and keep in the colander.

·         Tip the minced meat into a suitable sized bowl, season then add pine nuts, the drained rice and mix well. The stuffing is now ready.

Probably each country has its own folk stories that symbolise a tradition they have carried over centuries and sometimes across continents, like Halloween. While the West celebrates Halloween on 31st October, we, Lebanese and the Levant have our own that we call Eid el Barbara, the feast of Saint Barbara on the 4th December. Venerated by the Church, Barbara is traditionally the patron saint of artillerymen, armourers and those who fear lightning. She lived in Asia Minor in the 3rd century AD and was beheaded by her wealthy father Dioscorus for rejecting paganism and converting to Christianity. If you want to read more about Saint Barbara, here are 2 useful websites.


http://en.wikipedia.org/wiki/Saint_Barbara

www.saintbarbara.org/about/frp_stbarb.cfm


Despite its religious root, the celebration of Saint Barbara has become more of a Halloween-like occasion. Children are allowed to disguise themselves and have fun playing tricks or scaring others. A bowl of boiled wheat is served to mark the occasion.


There are different versions explaining what has become a legend to tell the children on that day. One of them is that when the young Barbara confessed her new faith to her father, he decided to bring her before the Roman prefect of the town. In an attempt to avoid capture, she disguised herself as a poor woman and fled through the fields. She reached a hut where shepherds gathered eating boiled wheat, tired and hungry, Barbara accepted their invitation. However, one of them recognised her, he informed the Romans and eventually she met her fate.


Eating wheat on its own may sound plain, especially when we consider that perhaps, the root of the recipe goes back to the 3rd Century AD. Although, this dish has retained its essence, other simple ingredients are added to simply create a warm tasty dish that anyone can enjoy, especially on a cold spooky night.


Serves 6-8


Ingredients


  • 300 g / 11 oz wheat (some cooks use pearl barley, though it does not taste the same)
  • 1½ litre / 2½  pints water
  • 1 tbsp anise seeds wrapped in a muslin linen
  • Bowl of sugar to sweeten (optional)
  • 75 g / 3 oz  raisins
  • Orange blossom and Rose water
  • 60 g / 2 ½ oz of each pine nuts, walnuts, and blanched almonds.


Method


  1. Put the wheat, aniseeds in a medium saucepan, cover with the water and bring to boil using medium to high setting. Boil for about 10 minutes, remove scum then reduce the heat and let it simmer for 40 minutes or until the wheat grain is soft to eat but not dry. It should be left enough of its own juice to serve it with. 
  2. Discard the anise seeds and serve the wheat hot with a little juice in small bowls, sprinkle few drops of each orange blossom and rose water. If you like to sweeten it, sugar should be mixed at this stage so it dilutes better. Divide the raisins and nuts equally and serve at once.