Vegan

You are currently browsing the archive for the Vegan category.

Lebanese Potato Salad, Batata Mtabbaleh maa Hamoud wa Toom is a classic summery dish and can complement any type of barbecued meat or seafood, it is also delicious on its own as a starter.

Lebanese Potato Salad, Batata Mtabbaleh maa Hamoud wa Toom

Lebanese Potato Salad, Batata Mtabbaleh maa Hamoud wa Toom

Serves 4

Ingredients

For the salad

  • 450g/ 1lb potatoes
  • 200g/ 7oz tomatoes washed
  • 3 small spring onions or 1 small red onion
  • 25g/1oz fresh mint, leaves only washed and patted dry

For the dressing

  • 3-4 fat cloves of garlic peeled
  • 4 tbsp lemon juice
  • 6 tbsp extra virgin olive oil
  • Salt to taste & freshly milled black pepper

Method

  1. If using small salad potatoes, you get the best flavour by steaming them. To do that, pour boiling water into a saucepan fitted with a steamer, tip the potatoes into the steamer with one or two sprigs of mint. Cover, and using a medium setting let them steam for 25 minutes or until cooked. You can test them by inserting a skewer in the centre which should feel soft. Discard the mint, then transfer potatoes into a suitable sized-bowl and cover with a clean cloth so it absorbs excess steam, and helps the potatoes to keep a nice texture without getting mushy. This should take roughly 4 minutes, then cut them into halves.
  2. Alternatively if using big potatoes, leave the skin on, rinse them under the tap, then put in a saucepan and cover with water, bring to the boil. Reduce the heat to a medium setting, cover and let them simmer, for nearly 25 minutes or until when inserting a skewer, they feel tender. Drain the potatoes and let them cool down before peeling off the skin. Cut them into bite sized chunky pieces.
  3. To prepare the dressing. Sprinkle a little salt over the garlic and crush to a paste then whisk in the lemon juice and olive oil. Season, taste and adjust if necessary then transfer into the serving bowl.
  4. When you are ready to serve, tip the prepared potatoes into the dressing. Finely, slice the onions then add to the potatoes, chop the tomatoes and tip them including their juice into the mixture. Now, gently mix all the ingredients, taste and adjust if necessary. Roughly, chop the mint and scatter all over the Batata Mtabbaleh maa Hamoud wa Toom salad, serve at once.

I like to serve this Lebanese Potato Salad, Batata Mtabbaleh maa Hamoud wa Toom while still warm, however, it is also delicious served at room temperature or chilled.

Tags: ,

Finger Fritters or Zlebiyeh is another traditional pastry prepared to celebrate Epiphany. Apart from that particular occasion, I have rarely seen Finger Fritters or Zlebiyeh sold in shops. These are frequently confused with Lebanese doughnuts or oowamat / owwamat.

The recipe is easy to make, however, to give it a crunchy taste and prevent the inside from becoming doughy, Finger Fritters need to be deep-fried twice. Finger Fritters or Zlebiyeh are suitable for most people particularly vegans, they can be served sprinkled with sugar or dipped in sugar syrup which should be warm: not too hot or cold.

Makes about 20

Ingredients

For the Finger Fritters

  • 125g / a little over 4½ oz all purpose flour
  • 125g / a little over 4½ oz fine semolina
  • 1 tsp ground aniseeds
  • ½ tsp ground mahlab (see glossary)
  • ½ tsp poppy seeds
  • 1½  tsp ground nutmeg
  • 1½ tsp yeast
  • ½ tsp salt diluted in warm water about 150ml / 5fl oz (enough to bind the dough)
  • Vegetable oil to deep fry

Sugar Syrup/Ater

  • 1 full cup granulated sugar
  • ½ cup water
  • 1 tsp lemon juice
  • 2 tsp orange blossom water
  • 1 tsp rose water

Equipment: you need a deep fryer and preferably an electric mixer.

Method

  1. To make the Finger Fritters. Mix all the dry ingredients in a bowl wide enough to let the dough rise later. Gradually, add in the salted warm water, mixing with your hands until you form a dough.
  2. Transfer the dough into a lightly floured surface and knead for about 6 minutes. Alternatively, you could do the whole process in an electric mixer using the dough hook, thus reducing the kneading time by half (to about 3 minutes). In the end, the dough should feel soft and elastic, shape into a ball.  Grease the bowl with a dab of oil and transfer the dough into it then cover with a polythene bag or cling film, but make sure that they are brushed with a little oil to prevent the dough from sticking. Leave it in a warm place for 1½ hours to rise.
  3. When the rising time is up, pick up the dough and put it on a lightly floured surface. Punch it to get rid of the excess air, knead briefly then shape into a long fat roll. Divide this into equal portions.
  4. Take one dough-portion and cover the rest. Using your hands, stretch and shape the portion of dough into a long thin sausage (see picture). Put it on a lightly floured hard surface such as cutting board (you need to cut it later) and cover. Repeat the same process placing the long thin sausage-like dough shapes neatly parallel to each other until you finish all the dough portions. If you can, try to keep them all the same length, it helps to cut them at equal lengths.
  5. Next, using a long sharp knife, cut the sausage shaped lengths of dough into 10 cm/ 4 inches, long pieces or fingers.
  6. Transfer onto a tray lined with baking parchment, cover and let the fingers rest for 20-30 minutes. Meanwhile prepare the sugar syrup/ Ater.
  7. Tip sugar and water into a saucepan, using a medium heat setting, bring them to the boil stirring occasionally. Stir in the lemon juice and let the mixture simmer for about 4-5 minutes, until it reaches a stage where the syrup coats the back of a spoon. Finally, switch off the heat and stir in the rose and orange blossom water
  8. When the second rising time is up, heat the oil to 190ºC / 375ºF. If you haven’t got a thermometer, drop a small dough fritter into the deep fryer and if the oil bubbles around it, it is ready to use.
  9. Deep fry the fingers for three minutes turning them so they are cooked on all sides, you may need to do them in batches. Drain on kitchen papers. Keeping the oil hot, (starting with the first previous batch) repeat the deep frying for another three minutes, by which time the fresh Finger Fritters or Zlebiyeh should turn deep golden and crunchy.
  10. Now, you can drain off any excess oil on the kitchen papers, sprinkle sugar on top and serve. If you prefer the Finger Fritters or Zlebiyeh sweeter, dip them straight into the warm sugar syrup (you can always reheat it if it becomes cold), leave them to soak for 1 minute then take them out and they are ready. These Finger Fritters or Zlebiyeh can be eaten warm or cold. Finger Fritters or Zlebiyeh keep for approximately for two days.
Finger Fritters or Zlebiyeh Place the long thin sausage-like dough shapes neatly parallel to each other.

Place the long thin sausage-like dough shapes neatly parallel to each other.


Finger Fritters or Zlebiyeh freshly deep fried

Finger Fritters or Zlebiyeh freshly deep fried.


Tags: , , , , ,

Tomato Soup with Freekeh Shorbet Banadoura maa Freekeh

This tasty Freekeh Tomato Soup, Shorbet Banadoura maa Freekeh is made simpler and quicker by using ingredients usually found in the store cupboard:  tinned chopped tomatoes, stock cubes, freekeh and dried herbs. It is also versatile because both vegetarians and non-vegetarians can cook it as you could use either vegetable stock or beef stock. More effectively, the addition of freekeh gives it that nice nutty flavour which turns it into a warm comfort soup suitable for a wintery evening. 

Tomato Soup with Freekeh Shorbet Banadoura maa Freekeh

Freekeh Tomato Soup, Shorbet Banadoura maa Freekeh

The Freekeh Tomato Soup recipe described below makes two substantial portions. You can always double the quantity of the ingredients if you want more.

Serves 2

Ingredients for Freekeh Tomato Soup, Shorbet Banadoura maa Freekeh

  • 1 tin of chopped tomatoes weighing about 400g / 14 oz
  • 1 tbsp olive oil
  • 1 small to medium onion (about 100g/ 4oz) thinly sliced
  • 3 cloves of garlic sliced
  • 1 tsp dried mint
  • Vegetable or beef stock cubes that will make 450-500ml/ 15 -17 fl oz of stock.
  • 30g / 1¼ oz freekeh whole or cracked: either would do
  • Salt to taste and freshly ground black pepper
  • To garnish (optional), 1or 2 tbsp of freshly chopped herbs such as mint, parsley, coriander, fresh thyme.

Method

  1. I tend to process the chopped tomatoes in the food processor to give the soup a smoother texture, and I do that before cooking. You don’t have to if you don’t want.
  2. Using a medium setting, heat the oil in a medium sized pan then tip in the sliced onions and fry until just softened, a couple of minutes. Stir in the garlic and cook for another minute then pour in the processed or chopped tomatoes, mix in the dried mint followed by the stock. Give the mixture a good stir, increase the heat to bring to the boil, then reduce, cover the pan leaving a little gap and let the mixture simmer for 20 minutes. Meanwhile, soak the freekeh, especially if it is a loose one, to get rid of any dirt.
  3. When the simmering time is over, taste the mixture and season to taste then drain the freekeh and stir it in. Increase the heat briefly to bring the soup to the boil then simmer covered for another 15 minutes or more until the freekeh is cooked to your taste, some people like it with a bit of crunch, others don’t.
  4. Check again the seasoning and adjust if necessary, then serve as it is or sprinkle on top your favourite herb.

Enjoy your Freekeh Tomato Soup, Shorbet Banadoura maa Freekeh.

Tags: , , , , , ,

Roasted Vegetables and Green Wheat Freekeh Salad

Roasted green wheat freekeh (also known as freeka, frikeh or farik) is rarely used in western cooking although it is one of the oldest food ingredients in the world. The story goes that roughly 2000 years ago when towns and cities used to fight each other frequently, an eastern Mediterranean city was threatened with being besieged. Fearing to die of starvation, the people of that city picked all the wheat while it was still green and stored it. Unfortunately, it caught fire and was burnt. However, out of desperation, they tried to salvage what they could. To their surprise, they discovered as they rubbed off the burnt external skin, that the wheat itself remained intact and edible, they called it farik (later freekeh or freeka) which meant in their spoken Aramaic language the rubbed one. Ever since, roasted green wheat freekeh has become a valuable grain for cooking in the Eastern Mediterranean and North African countries.

The old method of preparation of roasted green wheat freekeh is that once the young wheat stalks are harvested, they are stacked in bunches and dried in the sun, then roasted in the field over an open fire. The aim is to burn off the bristles and the kernel’s outer skin or husk, the moisture within the young grain will protect it from burning while the process endows it with a distinctive smoky flavour. When the roasted wheat has cooled, the grains are shelled by hand, dried again but this time away from the sun, then they are either kept whole or cracked. In fact, some farmers in rural parts of the Levant still use this method. Of course, modern technology had inspired farmers and enthusiasts to develop new techniques to prepare freekeh faster, efficiently and in bigger quantities, like the Greenwheat Freekeh Company.

Freekeh or freeka is very nutritious. Scientific research has proven that green wheat retains more vitamins, fibres and proteins than any other grains. In fact, this link  describes the benefits of freekeh, providing detailed tables of the green wheat contents.

The next link to a youtube video gives you an idea how roasted green wheat freekeh is processed by modern farming

Most importantly, freekeh has a distinctive smoky and nutty taste and it is versatile, it can be cooked as a side dish or as a main course. We Lebanese use it mostly in salads and with meat, while neighbouring countries as well as North African ones have their own signature dish, most of their recipes including the Lebanese ones are on the internet.

Here are my own versions for a salad suitable for all seasons and a heart warming soup.

Roasted Vegetables & Green Wheat Freekeh Salad,

Freeka maa al Khoudra

This roasted green wheat freekeh salad is quite sustaining especially if you are a vegan, as well as that, it goes well with barbecued or grilled meat it can be eaten warm or cold, either way it is quite tasty. It is also ideal for picnics or packed lunches.

Roasted Vegetables and Green Wheat Freekeh Salad

Roasted Vegetables and Green Wheat Freekeh Salad

For this recipe I used coarse cracked freekeh (freeka), but you can substitute it with a whole grain one which might take a little longer to cook.

Serves 4-6

Ingredients

For the freekeh (freeka)

  • roasted green wheat freekeh (freeka) 1¼ cups
  • 2½ cups water
  • 2 tbsp Olive oil
  • 1 large onion finely chopped
  • Pinch of salt
  • 1 tsp cayenne pepper
  • 2 tsp dried mint

Dressing    

  • 3 or 4 tbsp lemon juice
  • 3 tbsp extra virgin olive oil
  • Salt to taste & freshly milled black pepper
  • About 30 g/1 ¼ oz fresh coriander, rough stalks discarded the rest is washed, dried then chopped

For the roasted vegetables

  • 1 aubergine about 400g / 14oz washed.
  • 450g / 1 lb juicy tomatoes washed then quartered
  • 2 medium courgettes washed then cut into 3 cm / 1¼ inch chunks
  • 2 medium onions peeled then quartered
  • 1 each red and yellow peppers quartered seeds removed
  • 1 tsp dried mint

For the garlic sauce

  • 3 cloves of garlic peeled
  • 4 tbsp olive oil
  • Salt & freshly milled black pepper

Equipment: 1 non-stick baking tray measuring about 30 cm x 22 cm (12 inches x 9 inches) and one non-stick medium sized saucepan.

Method

Preparing the vegetables

Preparing to roast the vegatables for the freekeh salad

Preparing to roast the vegatables for the freekeh salad

  1. I like to drain the excess bitter juice from the aubergine, it helps to roast better and to absorb other flavours, but it can work without it. With the skin on, cut the aubergine into 3 cm / 1¼ inch chunks then sprinkle over about 1 tsp salt and mix. Transfer into a colander, fit on top a suitable plate on which you place a heavy weight such as tins of tomatoes and leave for an hour to drain away some of the bitter juice. Next, rinse under a tap of cold water then dry thoroughly with a kitchen paper.
  2. When you are ready to cook, pre-heat the oven (fan oven) to 210°C / 450°F.
  3. To make the garlic sauce. Crush the garlic to a paste then add the olive oil, season, and mix well.
  4. Now, arrange the chopped vegetables in the baking tin, sprinkle over the dried mint and mix. Next, drizzle over with the garlic sauce and toss in the vegetables so they are well coated, season again with salt and pepper and give it a good stir. Pop it in the oven for about 30-40 minutes or until the vegetables start to brown round the edges.

To prepare the roasted green wheat freekeh

  1. Pre-packed freekeh is usually clean. If you have purchased it loose, it may contain some dirt, tip into a fine sieve and rinse a couple of times under a tap of cold water and drain well.
  2. Using a medium heat setting, heat the oil in the saucepan then tip in the chopped onion and cook for about 3 minutes. Next, add the freekeh (freeka) and sauté the mixture until all the grains are coated with oil, then pour in the water, add a pinch of salt, cayenne pepper and bring to the boil. Reduce the heat slightly, stir in the dried mint and simmer for about 20-25 minutes by which time the water should have been absorbed while the mixture remains moist and the grains have softened. It is worth checking the mixture when simmering, so if it is cooking dry, top it up with a little more boiling water. If using whole grain freekeh (freeka), increase the amount of water by roughly 85 ml/ 3 fl oz and simmer for a longer time. Once the freekeh (freeka) mixture is cooked, let it stand covered for 5 minutes before assembling the salad.

Assembling the salad.

  1. Tip the cooked freekeh (freeka) over the roasted vegetables, so the roasted green wheat freekeh would absorb all the juices and gently fork it in, adding the chopped coriander and drizzling along the dressing, so all the flavours mingle together. Transfer into a large salad bowl and serve.

Tags: , , , , ,

Ardi Choki literally translates the thorn (choki / chawki) from the ground (ard), indicating that this plant belongs to the thistle family. Its initial growth is marked by a pretty purple flower head, while the thorny tips of the leaves is another noticeable thistle characteristic. You will find a good illustration of the Globe Artichoke .

It is worth mentioning that there are three types of artichoke plants which are unrelated: Globe Artichoke, Jerusalem Artichoke and Chinese Artichoke, however, my main focus here is the culinary usage of the Globe Artichoke in our cuisine. The two recipes below demonstrate our simplistic way of cooking artichoke as an appetiser or as a starter.

Artichoke benefits

According to the articles I read, globe artichoke leaves are valued together with the rest of the plant for their health benefits. Apart from their high fibre content and antioxidants, globe artichokes are praised for their properties in:

Cancer prevention

Increasing bile flow

Liver health

Treatment of hangover

Helping digestion

Reducing cholesterol

See also this article on the health benefits of Globe Artichokes.

When buying globe artichoke:

Make sure it is firm with tight fresh green leaves and feels heavy when you hold it.

A raw Globe Artichoke

A raw Globe Artichoke

How to prepare and cook a whole globe artichoke

  1. Place the artichoke on a strong cutting board, remove the toughest outer leaves at the base. Grip the stem and cut off most of it leaving only about 3cm on the artichoke.
  2. Trim the stem with a paring knife, removing any tough fibres surrounding the base. Some cooks prefer to trim off the thorny bit of the top of each leaf, I don’t.
  3. Now rinse the artichoke under a cold water tap.
  4. Next, fill a pan large enough to fit all the artichokes comfortably so they are covered with water, to which you add salt and lemon juice, some cooks prefer to cut a lemon into wedges and throw it in.
  5. Bring to the boil then drop in the prepared artichoke, making sure it is well submerged and let it boil gently uncovered for about half an hour to 40 minutes (depending on the size), or until you can easily pull away an outer leaf.
  6. Once it is cooked, place the artichoke upside down in a colander and drain well.

Globe Artichoke Leaves with Lemon Dressing

Ardi Shawki maa Salsit Hamoud.

This is a very simple and basic recipe that you could use as a tasty appetiser, which is very low in calories. Artichoke can be served warm, at room temperature or even cold as some people prefer. When you eat a whole globe artichoke, watch out for the inedible part called the hairy choke: simply scoop it out and discard.

Serves 4

Ingredients.

  • 4 globe artichokes: allow 1 artichoke per person
  • 1tbsp lemon juice
  • About 1 tsp salt

For the lemon sauce

  • 1 fat clove of garlic peeled
  • 4 tbsp lemon juice
  • 7 tbsp extra virgin olive oil
  • Salt to taste & freshly milled black pepper

Method

  1. Prepare and cook the artichokes as described above.
  2. Smash the garlic to a paste then simply whisk in the remaining ingredients. Taste and adjust if necessary then pour the sauce into two small bowls.
  3. Place the artichokes on individual serving plates along with the sauce bowls and serve.
  4. Take one leaf, dip it into the sauce and eat the tip of it then discard. When you reach the hairy choke that covers the heart or fond, simply remove it with a spoon and discard, then dip the whole heart into the remainder of the sauce and enjoy: it is delicious!
The Globe Artichoke cooked and ready to serve.

The Globe Artichoke cooked and ready to serve.

Dip the Artichoke leaf in the sauce then eat the tender part, discarding the tough outer part.

Dip the Artichoke leaf in the sauce then eat the tender part, discarding the tough outer part.

The Hairy Choke still covering the Heart

The Hairy Choke still covering the Heart

The Globe Artichoke heart after removing the Hairy Choke

The Globe Artichoke heart after removing the Hairy Choke

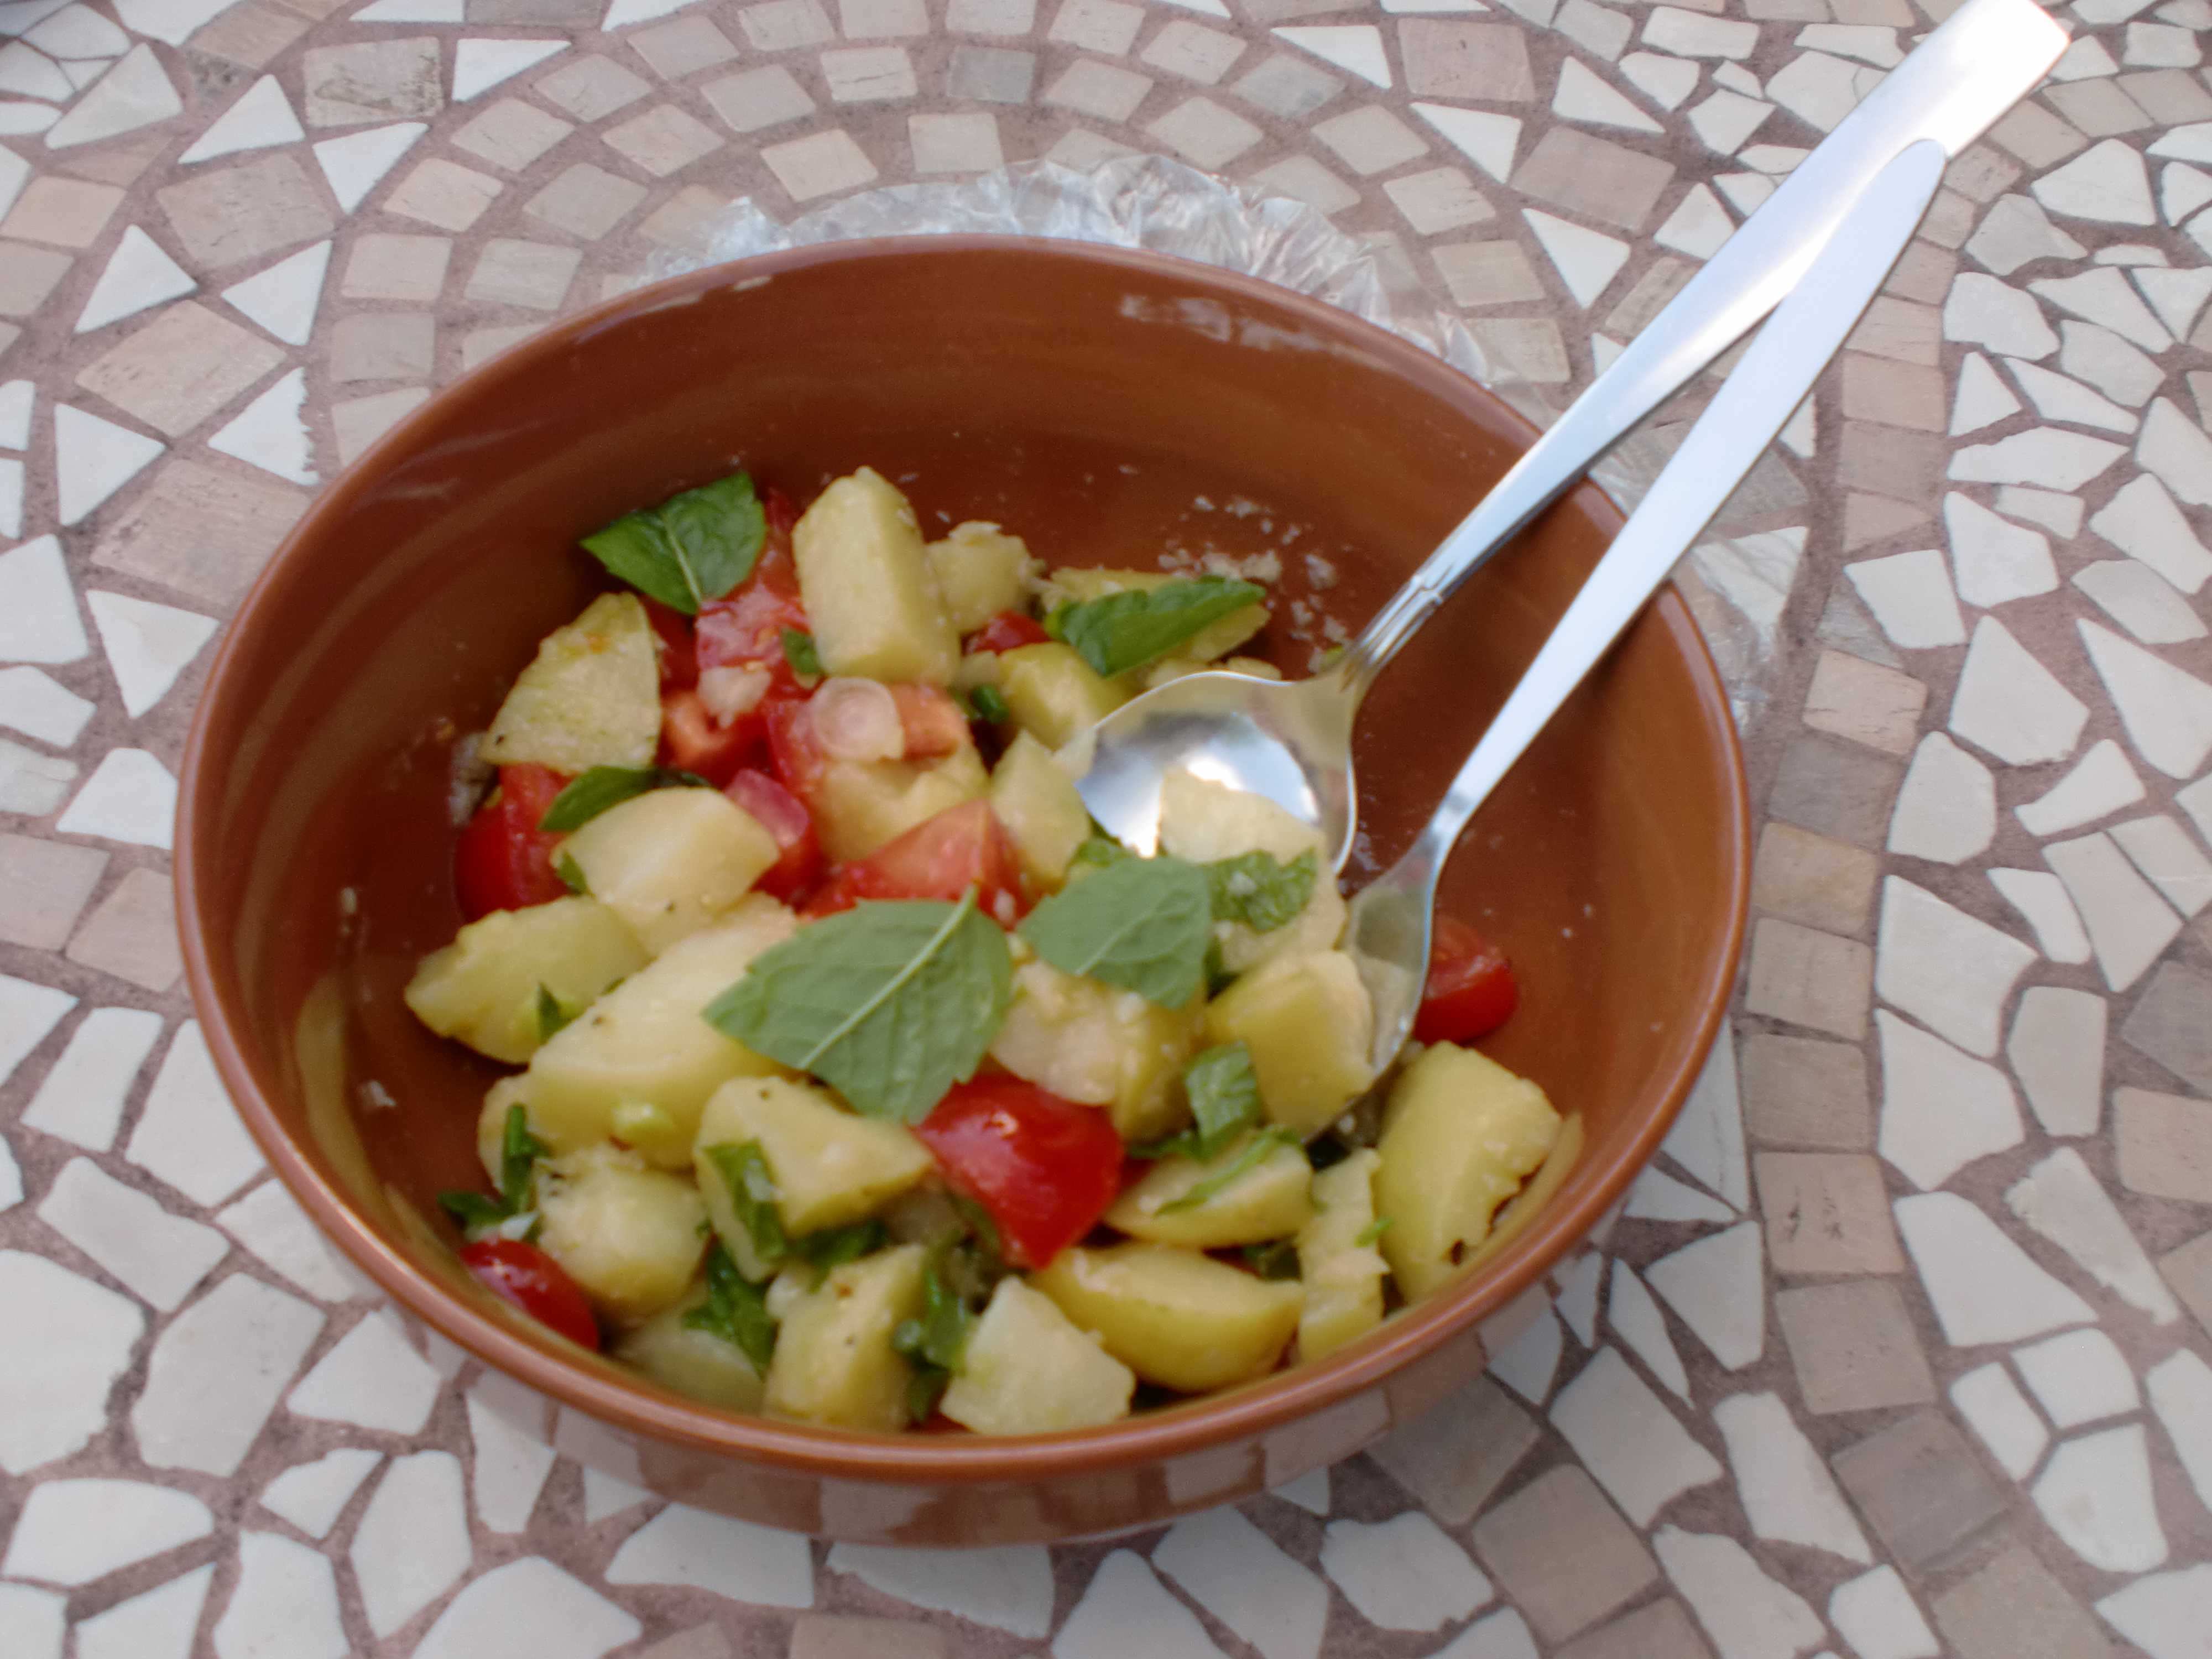
Globe Artichoke & Mushroom Salad/ Salatit Ardi Chawki maa al Fitr

For this recipe, you need artichoke hearts which you can buy tinned, or prepare yourself, nevertheless, you can never beat the flavour of freshly prepared artichoke hearts.

I am not intending to explain how to prepare these artichoke hearts from scratch because there are good video clip demonstrations on the internet like on the following ones:

http://www.bbc.co.uk/food/techniques/preparing_artichokes


As for the mushrooms, I usually go for the chestnut ones because I like their nutty flavour.

Serves 4

Ingredients

4 artichoke hearts

120 g/ 4½ oz chestnut mushrooms, cleaned

1 small onion preferably red

3 tbsp of fresh chopped parsley

As a garnish base: A handful of mixed baby salad leaves such as spinach, beetroot leaves… washed and dried

25g pine nuts toasted (optional)

Dressing

2 fat cloves of garlic peeled

4 tbsp lemon juice

6 tbsp extra virgin olive oil

2 tsp sumac (optional)

Salt to taste & freshly milled black pepper

Method

  1. First cook the mushrooms. Drop the prepared mushrooms into a small pan of simmering water, add a pinch of salt and simmer for 5 minutes. Next, drain the mushrooms and leave in the colander until they are easy to handle then quarter each one and transfer into the salad bowl.
  2. To cook the raw artichoke hearts. Drop the prepared artichoke hearts into a pan of simmering water to which you add salt and 1 tbsp lemon juice, making sure that they are well submerged, top up with more boiling water if necessary. Simmer the for about seven minutes by which time the artichoke hearts should be tender, then tip into a colander to drain. Slice them into chunks then add to the mushrooms
  3. If using tinned artichoke hearts, simply drain them from the brine, cut into chunks and proceed as above.
  4. Thinly slice the onion then tip into the salad bowl along with the chopped parsley.
  5. Whisk all the dressing ingredients, season to taste then tip it over the salad and mix thoroughly. Taste and adjust if needed.
  6. Divide the baby leaves salad between the individual salad plates, top with the dressed salad and scatter the toasted pine nuts over (if you choose to do so). Serve at once.
  7. Toasting pine nuts: wipe a small frying pan with a little oil or butter, tip in the pine nuts and put on a low heat and let the nuts toast keeping a close eye and shaking the pan from time to time until they turn golden. Remove from the heat, transfer onto a small plate, they are ready for use.
Artichoke and Mushtoom Salad

Artichoke and Mushtoom Salad


Tags: ,

Manaeesh bi Zaatar is our national breakfast. Suitable for everybody, more specifically for vegans and vegetarians as well as that, it freezes well.

The topping that we call Zaatar is basically a mixture of dried thyme, sumac and sesame seeds. You can buy it ready prepared from Middle Eastern or Lebanese grocers, it comes usually packaged.

Some cooks use the same bread dough for making the Flat Bread with the various toppings, others prefer the following one where the only difference is the addition of more oil. Both work well.

Makes about 8 medium ones

Ingredients.

For the dough:

  • 400g /14oz strong white flour, slightly warmed plus a little extra for dusting
  • 1tsp salt
  • 1 tsp easy blend yeast or its equivalent of fresh or dried yeast
  • About 200ml / 7fl oz lukewarm water
  • 2 tbsp vegetable or olive oil plus a little extra for greasing

You also need baking parchment paper cut to fit the baking sheets.

For the topping

  • 4 tbsp Zaatar
  • 100ml / 3½ fl oz extra virgin olive oil
  • 1 small onion finely chopped (optional)

Method

  1. Sift flour and salt into a large mixing bowl then mix in the yeast. Add the oil into the water. Make a well in the centre of the bowl and gradually tip in the water-oil mixture. Using your fingertips, combine all the ingredients, depending on the flour, you may need to add some more water, the dough should feel elastic and come away from the sides of the bowl. Transfer the dough to a lightly floured surface and knead for about 8-10 minutes. Alternatively, you could do the whole process in an electric mixer using the dough hook, thus reducing the kneading time by half (for about 5 minutes). In the end, the dough should feel spongy and elastic.
  2. Shape the dough into a ball then transfer to a lightly greased bowl and cover with a polythene bag or cling film, but make sure that they are lightly oiled to prevent the dough from sticking. Leave it in a warm place until it has doubled in size. The rising time usually takes one and a half to two hours.
  3. Meanwhile, mix the topping ingredients and set aside.
  4. When the rising time is up, take the dough and put it on a lightly floured surface. Punch it to get rid of the excess air, then knead again for about 3-4 minutes, alternatively, let the mixer do the kneading for 2 minutes.
  5. Divide the dough into 8-9 equal balls. On a lightly floured surface, roll out each ball with a lightly dusted rolling pin to 16cm/ 6½ inches circle, 3-4mm / 1/8 inch thick. Alternatively, you can make nicely shaped circles by using large cutters. Place the dough circles on the prepared baking parchment papers, cover and let them rest for another 20 minutes. Meanwhile, pre-heat the oven to 230ºC / 450ºF, heating up at the same time the baking sheets.
  6. When the resting time is up and ready to bake, uncover the dough circles and dimple the surface of each one with your fingertips to prevent it from puffing up during baking. Put 1 heaped tbsp of the prepared Zaatar mixture in the middle and spread it all over, leaving about 1cm / ½inch gap around the edges. Slide the dough circles with their baking parchment onto the hot baking sheets, you may need to do them in batches. You have to be quick when you open the oven, as it is very important to maintain the same temperature all the time.
  7. Bake for 4-8 minutes, the edges should be slightly golden and the top bubbling hot. Transfer to a wire rack and serve while still hot or warm.

Another variation which is vey nice. Omit the onion if using. Finely chop one juicy medium tomato and add it with 2 tsp of tomato puree to the ingredients for the toping, mix thoroughly, if it becomes too thick loosen it with some olive oil. Put one tbsp in the middle of the rolled out dough and spread it all over. Continue as above.

Nothing is more satisfying than a homely made Hommous bi Tahineh. Although tins of chickpeas are cheap and widely available, the Lebanese in general prefer to prepare it from scratch, the reason is that we think that the freshly cooked chickpeas are much softer and their juices are much tastier, that in turn affects the whole texture of the dip.      

I find that the quality of tahini has an impact on the overall taste. Selecting a good one, though you pay a little more it is worth it. Please shake well or stir with a spoon before use because the paste tends to solidify at the bottom and you might end up with a very thin layer on top and lumps at the bottom.

In addition to its classification as a dip, Hommous bi Tahineh makes a good accompaniment to all grilled or barbecued meat including fish. Some cooks like to add a little yoghurt to the mixture which in turn enhances the lemony flavour and makes it smoother.


Ingredients


  • 200g / 7oz dried chickpeas soaked overnight in water 3 times their volume adding 1tsp bicarbonate of soda.
  • 175 ml/ 6 fl oz of tahini
  • About 100 ml / 3½ fl oz lemon juice or to taste
  • 5 – 6 fat cloves of garlic peeled and crushed to a paste
  • Salt
  • 2 tbsp yoghurt (optional)
  • To garnish 1 tbsp of freshly chopped parsley
  • Paprika
  • Extra virgin olive oil
  • Lebanese bread or segments of red pepper to serve


Method


  1. Begin by discarding the soaking water, rinse chickpeas thoroughly and tip in a medium-sized pan with a generous quantity of fresh water and boil vigorously for 10 minutes. Remove the white scum that forms on the surface, then reduce to medium heat, cover and keep checking every 20 minutes. Top up with boiling water if necessary. It should take about 45 minutes, depending on the quality of the chickpeas. Basically, they are cooked when tender. If you don’t want to proceed to the next stage, you can keep the cooked chickpeas in their liquid in the fridge for a few days, then all you need to do is reheat before making the dip.
  2. To make the dip: keep about two tablespoons of whole chickpeas for garnish, then tip the rest in a food processor with a little of their liquid, do not discard all the liquid yet.
  3. Add the rest of the ingredients with a little salt. Using a low speed, turn the food processor on, let it run for about 2 minutes then taste, adjust if necessary. Keep repeating the same process, adding the yoghurt if you choose, until you reach the consistency and the taste you think is right. The ideal consistency is one which is not too thick, nor too runny: mayonnaise-like. If it is too thick, you can thin it down with some of the reserved liquid, extra virgin olive oil and yoghurt are also other agents to make the dip smoother. If it is too thin, a little more tahini usually does the trick. 
  4. Place the hommous in two small bowls. Arrange some of the reserved whole chickpeas in a mound in the middle, dotting the rest around with a little parsley. Finish off with a sprinkle of paprika and a drizzle of extra virgin olive oil.
  5. Serve with warm Lebanese bread. If you don’t want bread, dip in with fresh red pepper segments, or any other greens such as spring onions, celery, lettuce and so forth. Hommous bi Tahineh keeps well in the fridge for a couple of days but it is best eaten fresh.  


Tip.

Keeping the cooking juice of the chickpeas is necessary, not only to use later as a thinner agent, but also for other purposes. For instance, if you find the mixture is too lemony or has too much garlic, you can soften it by adding some of the juice, or combined with extra virgin olive oil.

Baba Ghannouj or Batinjaan Mutabbal are the names used interchangeably for the same dish. However, the term Batinjaan Mutabbal summarises what it is about. Batinjaan is the Arabic name for aubergine, Mutabbal means flavoured or seasoned with, the aubergine in this instance is grilled giving it that wonderful characteristic flavour which is then enhanced by adding garlic, lemon and tahini paste.

Batinjaan Mutabbal or simply Mutabbal, as we Lebanese often call it, is an integral part of the Lebanese Mezza, but also makes a delicious accompaniment to barbecued meat or fish. Suitable for vegans and vegetarians, most importantly, it is easy to make.

One tip worth mentioning is that when buying aubergines, look for the large, beefy and seedless ones, also, please do not attempt to liquidise the cooked flesh, mash it with a fork to preserve the texture.

Serves 4

Ingredients.

  • 2 large or 3 medium aubergines weighing 800-900g / 2lb approx, it is not a lot, aubergines shrivel during grilling
  • 3-4 fat cloves of garlic peeled
  • 3 tbsp lemon juice
  • 3 tbsp tahini paste

To decorate

  • 3 tbsp pomegranate seeds (the sour ones) or the same amount of chopped flat leaf parsley.
  • Extra virgin olive oil to drizzle

You also need a shallow baking tray lined with aluminium foil.

Method.

  1. Pre-heat the grill medium to high heat.
  2. Wash the aubergines as they are (skin on without cutting any stems), then pat dry with a kitchen paper. Take a small sharp knife and make 4 incisions lengthways along the aubergines at 90º to each other, to prevent them from bursting. Place them on the foil covered baking tray and grill them for about 25-30 minutes, turning them every 8 minutes to ensure they are evenly cooked. At the end, we are looking for a blackened charred skin while the inside is soft, you will also notice the excess juices running out (see picture).
  3. Wait a few minutes for the aubergines to cool down, then cut in half lengthways and pushing aside the skin with the fork (see picture), scoop out the soft inside with a spoon and put it into a colander to drain out excess juice, leave it for about 5 minutes. Meanwhile, in a large mixing bowl, sprinkle salt onto the garlic and crush into a paste, then add the aubergine flesh, mix and using a fork mash gently to obtain a soft but not pureed texture (see picture). Next, stir in the lemon juice, tahini paste and mix thoroughly. Taste and adjust if necessary.
  4. Transfer into 2 shallow serving bowls, fill evenly then make a depression in the middle (see picture). Decorate with the pomegranate seeds or parsley then drizzle extra virgin olive oil. Serve at room temperature with Lebanese or Pitta bread. This is best eaten on the same day but will keep for a couple of days in the fridge.

The grilled aubergines

The grilled aubergines

The inside of the grilled aubergine

The inside of the grilled aubergine

The mashed aubergines

The mashed aubergines

Ready to serve

Ready to serve

Traditionally, when the Christians in Lebanon celebrate Epiphany, they eat and serve different varieties of fritters. Last year, I talked about O’wwamat /Lebanese Doughnuts (see recipe). This time, my recipe is about Ma’croon /Lebanese Fritters with Aniseed.

Ma’croon can be made with flour or semolina or both combined. The main flavouring ingredient is aniseed that gives it a festive aroma. It is very simple to make and is suitable for all eating habits. These are usually deep-fried then dipped straight into the sugar syrup, however, if you don’t like them too sweet, dip and then remove quickly. Ma’croon need the sugar syrup but you can alter the amount by reducing or prolonging the soaking time. I make my Ma’croon with both: flour and semolina because I like that bit of crunchiness created by the semolina. Ma’croon are best eaten when freshly made, like other fritters, they don’t keep for long.

Makes about 25 (roughly 6-7cm / 2½ inches long)

Ingredients

  • 1 quantity of sugar syrup/ Ater (see recipe)
  • 150 g / 5oz fine semolina
  • 75 g/ 3oz flour
  • ¼ tsp easy blend yeast
  • 1 tbsp ground aniseed
  • ¼ tsp Mahlab (optional, see glossary)
  • About 120 ml/ 4fl oz warmish water
  • 3 tbsp vegetable oil to make the dough and enough vegetable oil to deep fry

Method

  1. Sift the flour into a large bowl then add the remaining dry ingredients and mix well. Rub the oil into the mixture, then, gradually add the water mixing and kneading with your hands or dough mixer until you have a firm dough that you can roll. Cover with an oiled clingfilm and leave it at room temperature for an hour. Meanwhile, you could prepare the sugar syrup/ Ater.
  2. Shape the dough into a long roll (roughly ½ cm diameter) then cut it into pieces, (depending how small or big you want the fritters), the ones in this recipe are about 6 cm / 2½ inches long, therefore, I divided the roll into 25 pieces. Now, take one piece at a time and roll it on a marble or between your hands and give it the shape of a sausage or a plump date. Next, press this down onto a perforated surface like the cheese grater, or a colander with a large mesh (see picture) or any equivalent, to give a dimpled effect. Roll the piece with your fingers towards you so could achieve a dimpled pattern (see picture), place it on the plate and cover with a tea towel to prevent the Ma’croon from drying out, continue likewise with the rest until you finish all the pieces.
    Colander with a suitable mesh

    Colander with a suitable mesh

    Pressing the piece to get the dimpled effect.

    Pressing the piece to get the dimpled effect.

    The dimpled effect.

    The dimpled effect.

  3. Heat up the oil in a deep frying pan and when it is hot enough (enough for a small cube of bread to crisp in 1 minute), drop in as many pieces as the frying pan can safely take, allowing them to float around without being squashed, you may need to do that in batches. Fry, turning the fritters until they are golden, this should take about three or four minutes. Remove with a slotted spoon and drain excess oil by placing them briefly onto kitchen paper, then transfer them while still hot into the pan containing the warm sugar syrup/ Ater. The Ma’croon need the sugar syrup but you can alter the sweetness by reducing or prolonging the soaking time.
  4. Remove from the sugar syrup with a slotted spoon onto a serving plate and eat at once.

    Ma'croon ready to eat.

    Ma'croon

The Lebanese way of cooking cauliflower is varied and my two recipes reflect that. The first one Arnabeet Me’ li (Fried Cauliflower) is the most popular, very simple, it consists of frying the cauliflower florets and serve it with taratoor/ tahini sauce (see Sauces section).


The second one Arnabeet Matboukh ma’ Kuzbara (Cauliflower with Coriander) is also easy, the florets are cooked in a very light sauce, finishing off with chopped coriander that complements the flavour of the cauliflower.

If you like to read more on cauliflower, here is a suggested website:

http://www.whfoods.com/genpage.php?tname=foodspice&dbid=13

« Older entries